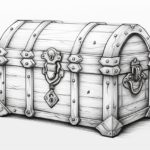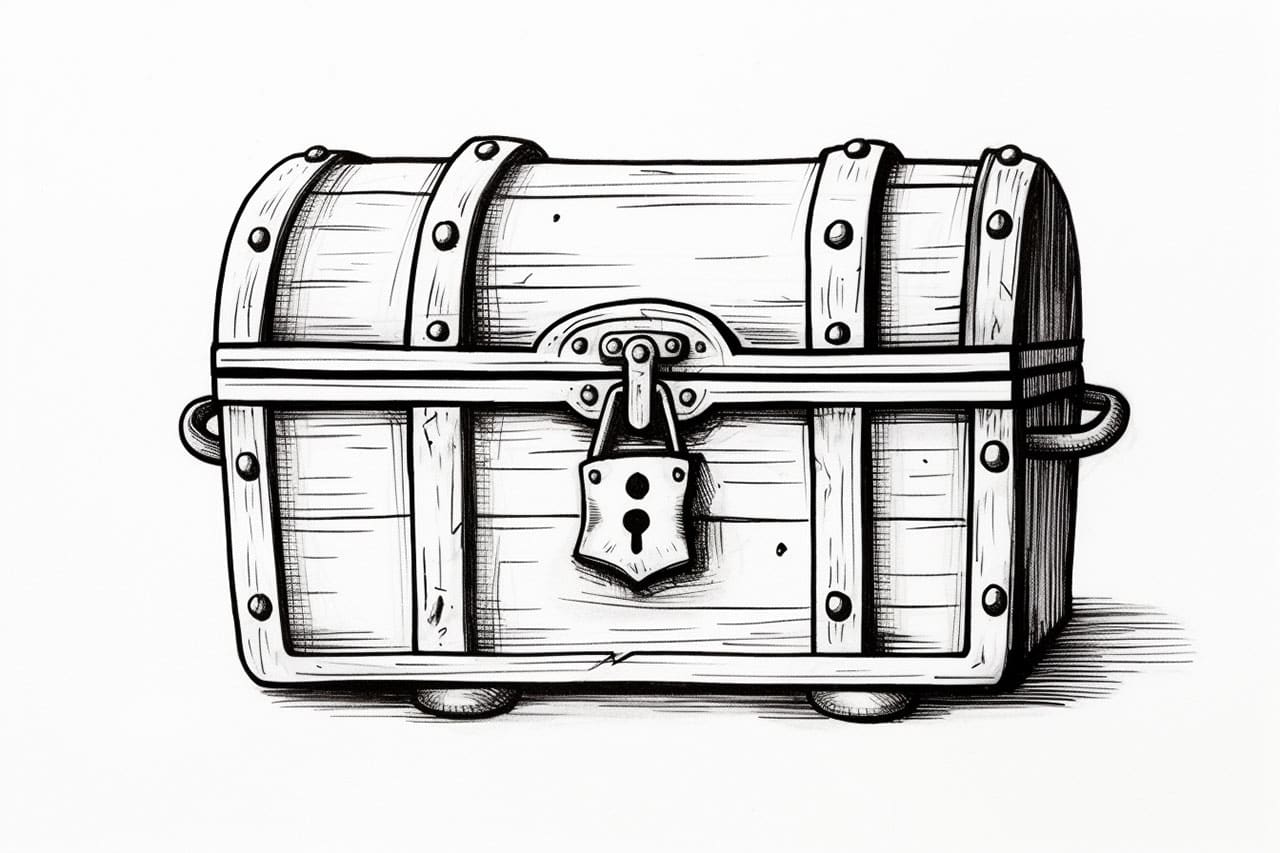
Are you ready to embark on a creative journey and learn how to draw a treasure chest? Whether you’re an aspiring artist or just looking for a fun drawing project, this step-by-step guide will help you bring this classic symbol of hidden treasures to life on paper. So grab your drawing materials and let’s get started!
Materials Required
Before we dive into the drawing process, let’s gather the materials you’ll need:
- Paper: Start with a blank sheet of paper. You can use any type, but a heavier weight or sketch paper would work best.
- Pencil: A regular graphite pencil will be your best friend during this drawing. Make sure it’s sharp and ready to go.
- Eraser: Have a good eraser on hand to correct any mistakes or guidelines you might want to remove later on.
- Ruler: Although not absolutely necessary, a ruler can come in handy for drawing straight lines and ensuring symmetry.
Now that we have all our materials ready, let’s begin with the step-by-step process of drawing a treasure chest.
Step 1: Draw the Outline
Start by drawing a rectangle with slightly curved corners in the center of your paper. This will be the main body of the treasure chest. Take your time to make sure the sides are straight and the corners are smooth.
Step 2: Add the Lid
Extend two parallel lines horizontally from the top of the rectangle. These lines will form the lid of the treasure chest. Connect the ends of the lines with a curved line, creating a slightly arched shape.
Step 3: Draw the Lock
Positioned in the center of the chest, draw a small rectangle for the lock. Add a curved line on each side to give it a three-dimensional effect. You can also add a keyhole by drawing a small circle near the top of the lock.
Step 4: Add Details
To give the treasure chest a more realistic look, it’s time to add some details. Draw two vertical lines near the front of the chest to represent the hinges. You can also add small curved lines along the sides and bottom of the chest to show its construction.
Step 5: Enhance the Lid
Draw two small rectangles on the lid, near its edges, to represent metal handles. Add some decorative elements such as circular patterns or small studs on the lid and corners of the chest. These details will give your treasure chest an authentic look.
Step 6: Shade and Add Depth
Now that you have the basic outline and details, it’s time to add shading and depth to your drawing. Start by determining the direction of your light source. Shade the areas that would be in shadow, such as the sides of the chest, the inside of the lid, and the crevices around the decorative elements. Use light strokes to gradually build up the shading and create a sense of volume.
Step 7: Finalize the Details
Take a step back and review your drawing. Are there any areas that need refinement? Make sure all the lines are clean and precise. Erase any unnecessary guidelines or rough sketches that might still be visible. Pay attention to the texture and patterns on the chest and lid, adding any additional details you feel are necessary to complete the overall look.
Conclusion
Congratulations! You’ve successfully learned how to draw a treasure chest from scratch. By following these step-by-step instructions and using your creativity, you’ve brought this iconic object to life on paper. Remember, practice makes perfect, so don’t hesitate to draw more treasure chests or experiment with different styles and designs. Enjoy the journey of artistic exploration and uncover the hidden gems within your imagination.