Welcome to this step-by-step tutorial on how to draw a present! Whether you’re creating a personalized gift card, designing your own wrapping paper, or simply want to add some festive flair to your artwork, learning how to draw a present is a fun and versatile skill to have.
In this tutorial, I will guide you through each step of the drawing process, providing clear and concise instructions along the way. So grab your drawing materials and let’s get started!
Materials Required:
Before we begin, make sure you have the following materials ready:
Paper: Choose a smooth and sturdy paper suitable for drawing. A sketchbook or drawing pad would be ideal.
- Pencils: Have a selection of pencils with different lead hardness, such as 2B, HB, and 2H, to achieve varying levels of darkness and shading.
- Eraser: A soft eraser will help you correct any mistakes or lighten areas of your drawing.
- Ruler: A straight edge ruler will assist you in creating clean and precise lines.
- Coloring Tools (Optional): If you wish to add color to your present drawing, have colored pencils, markers, or crayons on hand.
Now that you have your materials ready, let’s begin drawing a present!
Step 1: Drawing the Box
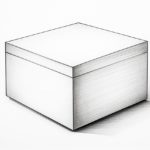
Start by drawing a rectangular shape in the middle of your paper. This will be the main body of the present. Use a light pencil, such as an HB or 2H, so that you can easily erase any initial guidelines later on if needed.
Step 2: Adding the Lid
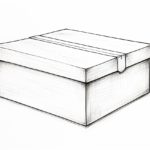
To create the lid of the present, draw another rectangle slightly overlapping the top edge of the box. The size of the lid will depend on how much you want it to cover the box. Make sure the lid is slightly larger than the box to give it a realistic look.
Step 3: Adding Depth
To give the present a three-dimensional appearance, we need to add some depth by drawing the sides of the box. Extend two parallel lines from each side of the box, converging towards the vanishing point on the horizon. This will create the illusion of perspective.
Step 4: Creating the Ribbon
Now it’s time to add a decorative ribbon to our present. Start by drawing two parallel lines from the top edge of the box, extending slightly beyond the sides. Then, connect these lines with two curved lines at each end to form the bow. Add some detail by drawing smaller ribbons or loops within the bow.
Step 5: Adding Details
To make the present look more realistic, we can add some additional details. Draw a small rectangle or square on the lid to represent a gift tag. You can also add patterns or designs to the wrapping paper by drawing shapes, dots, or lines.
Step 6: Erasing Guidelines
Now that the basic structure of the present is complete, use an eraser to gently remove any unnecessary guidelines and overlapping lines. Be careful not to erase any essential parts of your drawing.
Step 7: Shading and Coloring (Optional)
If you want to add depth and dimension to your present, you can apply shading using your pencils. Identify the direction of the light source and darken the areas that would be in shadow, leaving the areas that would receive more light untouched. Remember to blend the shades softly for a realistic effect.
If you prefer to add color to your present, now is the time to bring out your colored pencils, markers, or crayons. Select your desired colors and carefully fill in the shapes, adding shading and highlights as necessary.
Conclusion
Congratulations! You have successfully learned how to draw a present. This skill opens up a world of possibilities, allowing you to create personalized gift cards, design wrapping paper, or add festive elements to your artwork. Remember to practice regularly to improve your drawing skills and experiment with different styles and techniques.
I hope you enjoyed this step-by-step tutorial on how to draw a present. Happy drawing and happy gifting!


