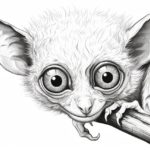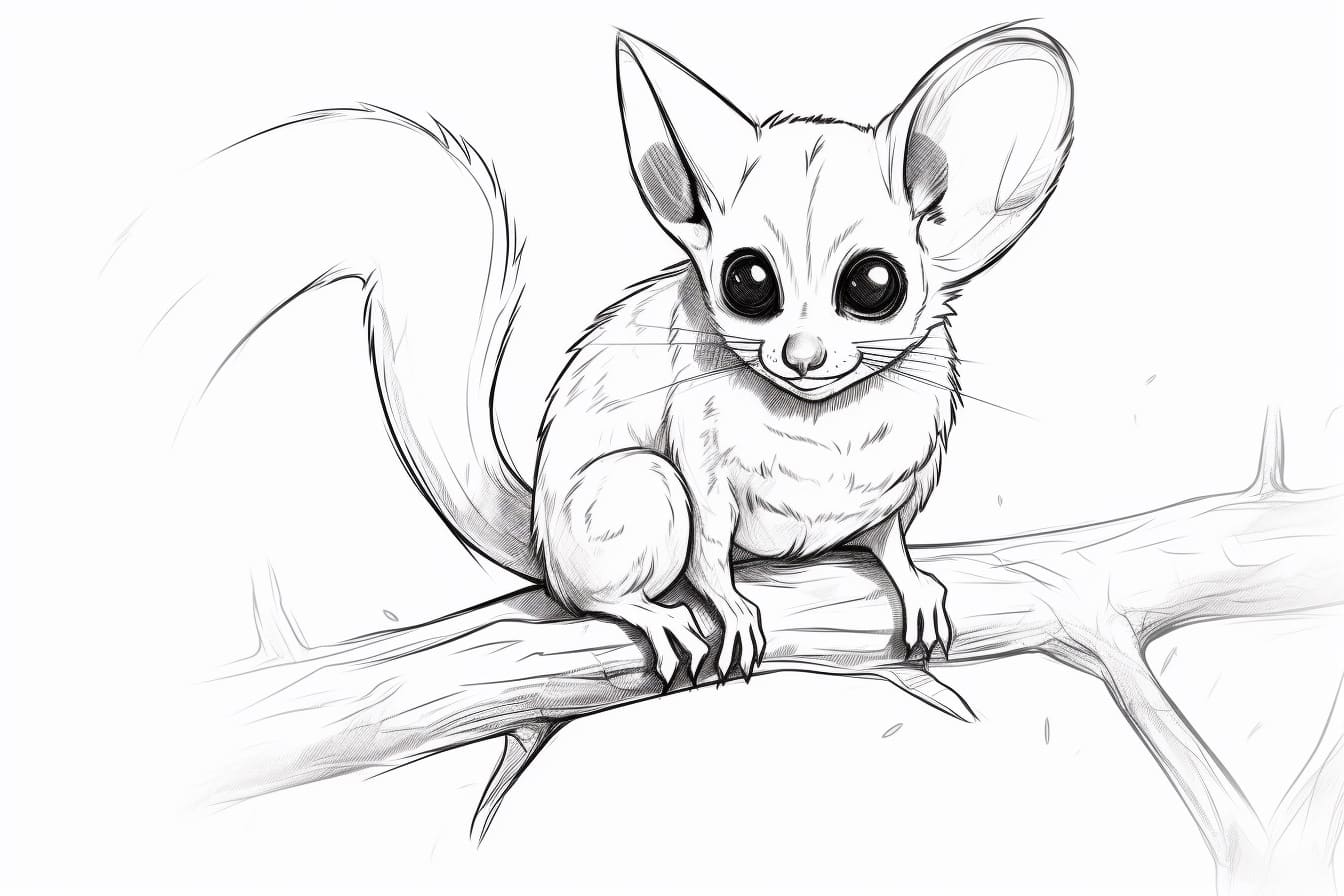
Welcome to this step-by-step tutorial on how to draw a sugar glider. Whether you’re an experienced artist or just starting out, this guide will help you create a lifelike and adorable depiction of this unique creature. Sugar gliders are small, nocturnal marsupials that are native to Australia, Papua New Guinea, and Indonesia. With their large eyes, fluffy tails, and unique membrane that allows them to glide through the air, they make for an interesting subject to draw. So let’s grab our pencils and get started!
Materials Required
Before we begin, let’s gather the materials you’ll need for this drawing tutorial:
- Drawing paper or sketchbook
- Pencils (preferably HB and B or 2B)
- Eraser
- Pencil sharpener
- References or images of sugar gliders (optional)
With these materials in hand, let’s move on to the steps of drawing a sugar glider.
Step 1: Basic Outlines
To begin, lightly sketch an oval shape for the sugar glider’s body. This shape will serve as a guide for the overall structure. Next, add a smaller oval shape above the body to represent the head. Connect the two shapes with gentle curves for the neck and spine. Finally, sketch a long, curved line extending from the back of the body to form the tail.
Step 2: Head and Face
Now, let’s focus on the details of the sugar glider’s head. Using the outline you just drew, add small circular shapes for the ears on top of the head. Draw two almond shapes for the eyes, leaving a small space between them. Inside each eye, draw a smaller circle for the pupils. Add a small, triangular shape for the nose just below the eyes, and then a curving line for the mouth. Finally, draw a few short, curved lines around the eyes and nose to represent fur.
Step 3: Body and Limbs
Next, let’s work on the body and limbs of the sugar glider. Starting from the head, sketch the curve of the back towards the tail. Then, add two curved lines on each side of the body to form the front legs. Remember to keep the shapes soft and rounded to capture the sugar glider’s cute appearance. Now, extend the body downwards to create the hind legs. Add curved lines at the end of each leg to represent the paws. Don’t forget to draw the long, furry tail extending from the body.
Step 4: Face and Ears
Let’s add more details to the sugar glider’s face and ears. Begin by refining the shape of the eyes, making them slightly larger and more expressive. Add a small curved line above each eye to represent the upper eyelid. Then, draw a series of short, curved lines within the ears to give them texture. You can also add a few longer fur lines around the edge of the ears to add depth. Remember to keep your lines light at this stage, as we will darken them later.
Step 5: Fur and Texture
Now it’s time to add some texture and fur to our drawing. Start by adding short, curved lines all over the sugar glider’s body and limbs. These lines will represent the fur, so vary their length and direction to create a realistic effect. Focus on emphasizing the fluffiness of the tail by adding long, curved lines that follow its shape. Take your time with this step and pay attention to the reference images if you have them.
Step 6: Eyes and Facial Features
Let’s bring the sugar glider’s eyes to life. Darken the pupils, leaving a small highlight on each one to give them a shiny appearance. Shade the areas around the eyes lightly to create depth. Use your pencil to add shading to the ears, nose, and mouth as well, focusing on the areas where shadows would naturally fall. This will give your drawing a three-dimensional look.
Step 7: Final Touches
In the final step, take a moment to evaluate your drawing. Look for any areas that need refinement or adjustments. Use your eraser to lighten or fix any lines that are too dark or out of place. You can also darken certain areas to add more contrast or emphasize certain features. Take your time and make any necessary corrections until you’re satisfied with the overall result.
Conclusion
Congratulations, you’ve successfully learned how to draw a sugar glider! By following these step-by-step instructions, you’ve created a charming and accurate portrayal of this unique marsupial. Remember to practice regularly and experiment with different techniques to improve your skills. Now, go ahead and share your adorable sugar glider drawing with friends and family!