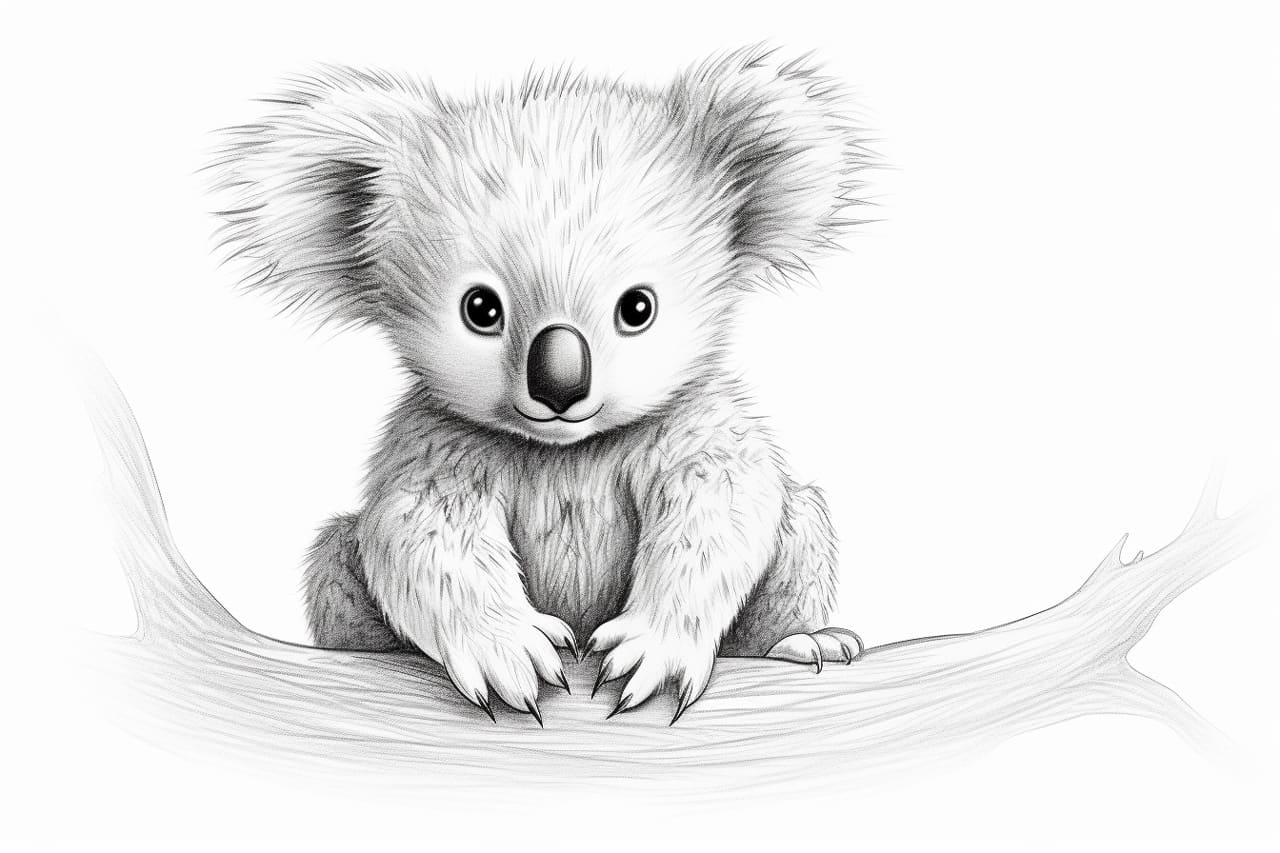
Welcome to this step-by-step guide on how to draw a baby koala! Koalas are incredibly cute and fascinating creatures, and capturing their charm on paper can be a rewarding and enjoyable experience. By following these easy instructions, you’ll be able to create your very own adorable baby koala drawing. So, let’s get started!
Materials Required
Before we begin, gather the following materials:
- Pencil
- Eraser
- Drawing paper
- Fine-tip black marker or pen
- Colored pencils or markers (optional)
Now that you have everything you need, let’s dive into the steps of drawing a baby koala.
Step 1: Basic Shapes
Start by drawing a large oval shape for the koala’s head. Then, draw a smaller oval shape beneath the head for the body. These basic shapes will serve as the foundation for your drawing.
Step 2: Facial Features
Using the head oval as a reference, add two small circles for the koala’s eyes. Inside each eye, add a smaller circle for the pupils. Next, draw a small triangular shape for the nose, slightly below the eyes. Then, draw a curved line for the koala’s smiling mouth.
Step 3: Ears and Details
On top of the head, draw two rounded triangle shapes for the koala’s ears. Make sure to leave some space between the ears and the head. Add some fur details by drawing small, curved lines on the head and ears to give it a realistic texture.
Step 4: Arms and Legs
Extend two slightly curved lines from the sides of the body shape to create the koala’s arms. At the end of each arm, draw rounded shapes for the hands. Then, draw two short, curved lines extending downward from the body shape to create the legs. Add rounded shapes at the bottom as the koala’s feet.
Step 5: Fur Texture
To give your baby koala a furry appearance, use short, curved lines to draw the fur on the head, body, arms, and legs. Slightly overlap some of the lines to create depth and texture.
Step 6: Tail
Draw a curved line extending from the back of the body shape to create the koala’s tail. Make the tail fluffy by adding short, curved lines to represent the fur.
Step 7: Finalize the Outline
Using a fine-tip black marker or pen, carefully trace over the main outlines of your baby koala. Be sure to include the facial features, ears, arms, legs, and tail. Erase any remaining pencil lines once the ink has dried.
Step 8: Coloring (optional)
If you want to add some colors to your drawing, grab your colored pencils or markers. Koalas are known for their gray fur, so consider shading the body, arms, legs, and tail with various shades of gray. You can also add some darker gray patches to create a more realistic appearance. For the nose, eyes, and mouth, use black. Feel free to get creative with your coloring!
Conclusion
Congratulations on completing your baby koala drawing! By following these step-by-step instructions, you’ve successfully captured the cuteness of these adorable creatures on paper. Remember, practice makes perfect, so don’t hesitate to keep drawing and experimenting with different poses and details.
We hope you found this guide helpful and enjoyable. Happy drawing!