How to Draw a Snowy Tree
Learn how to draw a snowy tree in this step-by-step drawing tutorial. Capture the beauty of winter with this easy-to-follow guide.
Materials You'll Need
- Pencil
- Paper
- Eraser
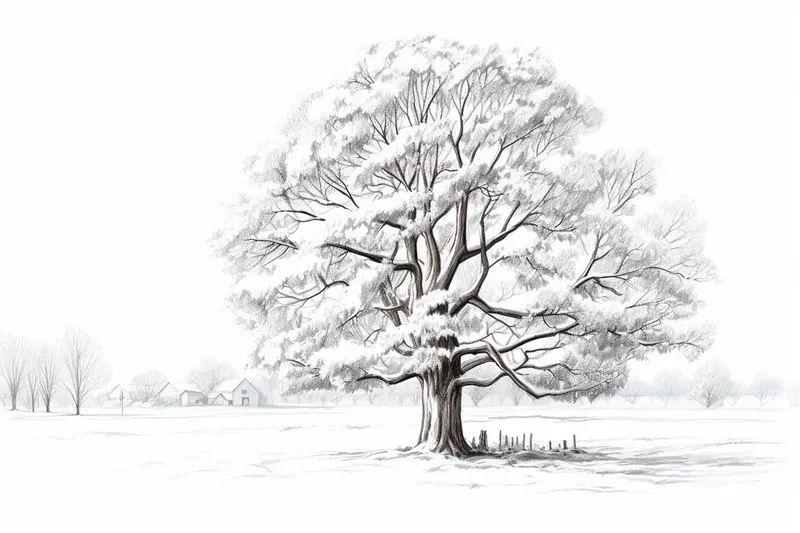
![]() Drawing a snowy tree can be an enchanting way to express the serene beauty of winter. The crisp, white snow blanketing the branches creates a picturesque scene that captures the magic of the season. Whether you're an accomplished artist or just beginning to explore the world of drawing, this guide is designed to help you bring that wintry charm to life on paper.
Drawing a snowy tree can be an enchanting way to express the serene beauty of winter. The crisp, white snow blanketing the branches creates a picturesque scene that captures the magic of the season. Whether you're an accomplished artist or just beginning to explore the world of drawing, this guide is designed to help you bring that wintry charm to life on paper.
In this step-by-step tutorial, you will discover the techniques and materials necessary to learn how to draw a snowy tree. We aim to provide clear, concise instructions to ensure you can follow along effortlessly, regardless of your skill level. From selecting the right drawing tools to mastering shading techniques, each section will build on the last, culminating in a stunning winter landscape.
So, gather your supplies and prepare to dive into the creative process! Let's transform a blank canvas into a beautiful depiction of a snow-covered tree, where every line and shade tells a story of winter's wonder.
Materials Required
Before we begin, let's gather the materials you will need:
- Drawing paper or sketchbook
- Pencils (HB, 2B, and 4B)
- Eraser
- Blending stump or tortillon
- White gel pen or white colored pencil
Now that we have our materials ready, let's dive into the step-by-step process of drawing a snowy tree.
Step 1: Sketch the Tree Trunk
Start by lightly sketching the outline of the tree trunk on your drawing paper. Use an HB pencil for this initial sketch, as it allows for lighter lines that can easily be erased or adjusted later. Remember to keep the shape irregular, as trees in nature have organic and asymmetrical forms.
Step 2: Add Branches
Next, add branches to the tree trunk. Start from the thicker base of the trunk and gradually taper them as they reach the outer edges. Branches should divide into smaller ones as they extend outward, creating a branching structure that mimics the natural growth pattern of trees.
Step 3: Define the Outline of the Tree
Now that you have the basic framework of the tree, use a darker pencil, such as a 2B or 4B, to define the outline of the tree trunk and branches. Add more details to the branches, making them slightly rough and uneven to give them a textured appearance.
Step 4: Add Snow to the Tree
To create the snowy effect on the tree, lightly shade the branches and trunk with your 2B or 4B pencil. Use short, light strokes to mimic the appearance of snowflakes landing on the tree. The shading should be heavier towards the bottom of the branches and gradually become lighter as you move up.
Step 5: Create Highlights
To make the snow on the tree appear more realistic, add highlights using a white gel pen or a white colored pencil. Apply these highlights along the edges of the branches and trunk, as well as on top of the shaded areas. This will give the illusion of light reflecting off the snow.
Step 6: Add Texture
To enhance the texture of the snow, use a blending stump or tortillon to softly blend the shading and highlights. This will create a smoother transition between the two and give the snow a soft, velvety appearance.
Step 7: Complete the Background
To complete your snowy tree drawing, you can add a simple background, such as other trees or a snowy landscape. Use lighter shades of pencil to create depth and add a sense of distance. Remember to keep the background less detailed than the main tree to maintain focus on the focal point of your drawing.
Tip: To create a stunning snowy tree, focus on layering your materials to achieve depth and texture. Start with a light sketch of the tree's outline using a soft pencil (like 2B or 4B) to capture the shape without committing too heavily. Once you're satisfied with your outline, switch to a white gel pen or white colored pencil to add highlights on the branches and snow areas, mimicking the way light reflects off the snow. For the shadows, use a cool gray pencil to softly shade underneath the branches where snow would naturally create depth, blending it gently into the white to maintain a soft, wintry feel. Finally, consider adding a subtle blue or lavender hue in the background to enhance the cool atmosphere of a snowy day!
Conclusion
Drawing a snowy tree allows you to showcase the beauty and tranquility of a winter wonderland. By following these step-by-step instructions, you can create a stunning piece of art that captures the essence of the season. Remember to have fun and experiment with different techniques to add your own personal touch to the drawing.
So, grab your pencils, sketchbook, and get ready to bring a snowy tree to life on paper!