Drawing Aspen Trees can be a truly captivating and rewarding experience for any artist. These elegant and slender trees, with their distinctive white bark and shimmering leaves, offer a unique subject matter that is rich in textures, colors, and patterns. In this guide, we will explore the beauty of Aspen Trees and provide step-by-step instructions on how to capture their essence on paper. Whether you are a beginner looking to improve your drawing skills or an experienced artist seeking inspiration, drawing Aspen Trees is sure to ignite your creativity and transport you to the serene and enchanting world of nature. So grab your sketchbook and pencils, and let’s dive into the wonderful world of Aspen Tree drawing!
Materials Required
To draw an Aspen tree, you will need the following materials:
- Drawing paper or sketchbook
- Pencils of various grades (HB, 2B, 4B, etc.)
- Eraser (kneaded eraser is recommended for shading)
- Sharpener
- Drawing pen or fine liner (optional for adding details)
- Reference photo of an Aspen tree (optional but recommended for accuracy)
- Drawing board or table to work on
- Optional: colored pencils or markers for adding color to your drawing.
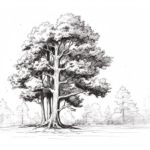
How to Draw an Aspen Tree: a Step-by-step Guide
Step 1: Gather Your Materials
- Make sure you have all the necessary materials ready, including paper, pencils (preferably a range of graphite pencils for shading), eraser, and a reference image of an Aspen tree for guidance.
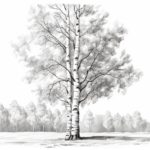
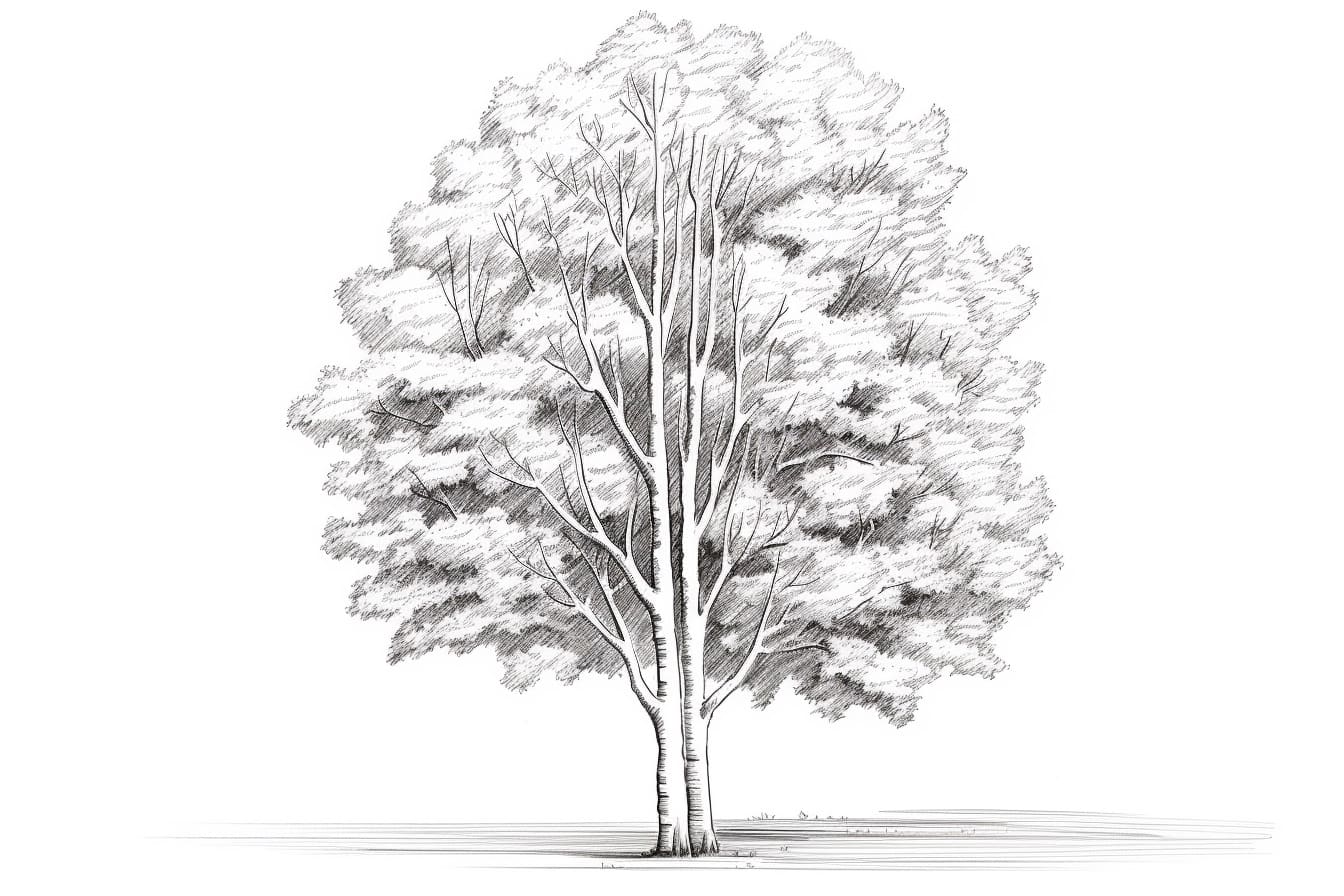
Step 2: Start with the Trunk
- Begin by lightly sketching the main trunk of the Aspen tree using a sharp pencil. Pay attention to the overall shape and thickness of the trunk. Aspen trees typically have a straight and smooth trunk with occasional knots.
Step 3: Add Branches
- Extend from the main trunk, sketch out the branches of the Aspen tree. Keep in mind that Aspen trees have a unique branching pattern with branches that often grow in a horizontal direction.
Step 4: Create the Bark Texture
- Use your pencil to add texture to the trunk and branches. Aspen trees have smooth bark with distinct horizontal lines, so lightly shade in these lines to give the appearance of bark texture.
Step 5: Draw the Leaves
- Aspens have round or oval-shaped leaves with serrated edges. Start by lightly sketching the basic shape of the leaves clustered on the branches. Pay attention to the spacing and arrangement of the leaves.
Step 6: Add Detail to the Leaves
- Once the basic leaf shapes are in place, add more detail by shading in the individual leaves. Aspen leaves have a slightly waxy texture and are typically a bright, vibrant green color.
Step 7: Fine-Tune and Erase Guidelines
- Take a step back and assess your drawing. Make any necessary adjustments to the shape of the trunk, branches, and leaves. Use an eraser to gently remove any guidelines or mistakes.
Step 8: Final Touches
- Add any final details to enhance the realism of your Aspen tree drawing. Consider adding shadows to the trunk and branches to give the illusion of depth and dimension. You can also add a background or additional elements to complete the composition.
Step 9: Sign and Date
- Once you are satisfied with your drawing, consider signing and dating it in a discreet corner. This will not only add a personal touch but also serve as a record of when the artwork was created.
Step 10: Practice and Experiment
- Drawing trees, like Aspen trees, can be challenging but with practice, you will improve your skills. Experiment with different techniques, such as using different pencil grades or incorporating color, to further enhance your drawings.
Conclusion
In conclusion, drawing an Aspen tree can be a rewarding and enjoyable artistic endeavor. By following the step-by-step guide provided in this article, you can capture the unique beauty and delicate details of this iconic tree. Remember to pay attention to the distinctive features of Aspen trees, such as their smooth white bark and fluttering leaves, and use shading and texture techniques to bring your drawing to life. With practice and patience, you can create stunning Aspen tree illustrations that showcase your artistic talents. Enjoy the process of capturing the essence of these majestic trees on paper and let your creativity flourish!
Fun Facts About Aspen Trees
- Aspen trees are often referred to as “quaking aspen” due to the way their leaves flutter and shake in the wind, creating a distinctive rustling sound.
- Aspen trees are the most widely distributed tree species in North America, covering vast areas from Alaska to Mexico.
- Each individual aspen tree is actually part of a larger organism known as a “clone” or “colony,” as they are connected underground by a single root system. This means that a stand of aspen trees may be genetically identical and considered one single organism.
- Aspens are known for their striking white bark, which is smooth when young and becomes more textured and furrowed with age.
- Aspen trees are among the first trees to recolonize areas after disturbances like forest fires, making them important pioneers in forest regeneration.
- The wood of aspen trees is relatively soft and lightweight, making it popular for use in making products like matchsticks, furniture, and paper.
- Aspen trees have a high level of photosynthetic efficiency, meaning they are able to convert sunlight into energy very effectively.
- In Native American folklore, aspen trees are often associated with transformation, rebirth, and renewal due to their ability to regenerate new growth from their root systems.
- Aspen leaves turn a brilliant golden-yellow color in the fall, creating stunning displays of color in the forest.
- The root system of aspen trees can extend over a wide area, making them important for stabilizing soil and preventing erosion in mountainous regions.
Suggestions for Scenes and Settings for Aspen Tree Drawings
- Aspen Tree Grove in Autumn: Capture the vibrant colors of the aspen leaves turning golden yellow against a backdrop of evergreen trees and a clear blue sky.
- Aspen Tree Forest in Winter: Depict a serene winter scene with snow-covered aspen trees standing tall amidst a blanket of white snow, with hints of sunlight filtering through the branches.
- Aspen Tree Sunset: Create a dramatic scene of aspen trees silhouetted against a fiery orange and pink sunset sky, with long shadows stretching across a peaceful landscape.
- Aspen Tree Reflections: Show the beauty of aspen trees mirrored in a calm lake or pond, with their shimmering leaves and white trunks reflected in the water.
- Aspen Tree Path: Illustrate a winding path through a dense grove of aspen trees, with dappled sunlight filtering through the leaves and creating interesting patterns on the forest floor.
- Aspen Tree Close-Up: Zoom in on the intricate details of an aspen tree bark, showcasing the unique patterns and textures of the bark up close.
- Aspen Tree Seasons Collage: Create a collage of four panels, each depicting the same aspen tree in different seasons – spring blossoms, summer greenery, autumn colors, and winter snow.
- Aspen Tree Wildlife: Include some wildlife in your aspen tree drawing, such as birds perched on branches, squirrels scampering up the trunks, or deer grazing at the base of the trees.
- Aspen Tree Mountain Landscape: Draw a panoramic view of a mountain range with a prominent stand of aspen trees in the foreground, capturing the grandeur of nature.
- Aspen Tree Abstract: Experiment with abstract shapes and colors to create a unique interpretation of aspen trees, focusing on their essence rather than realistic representation.