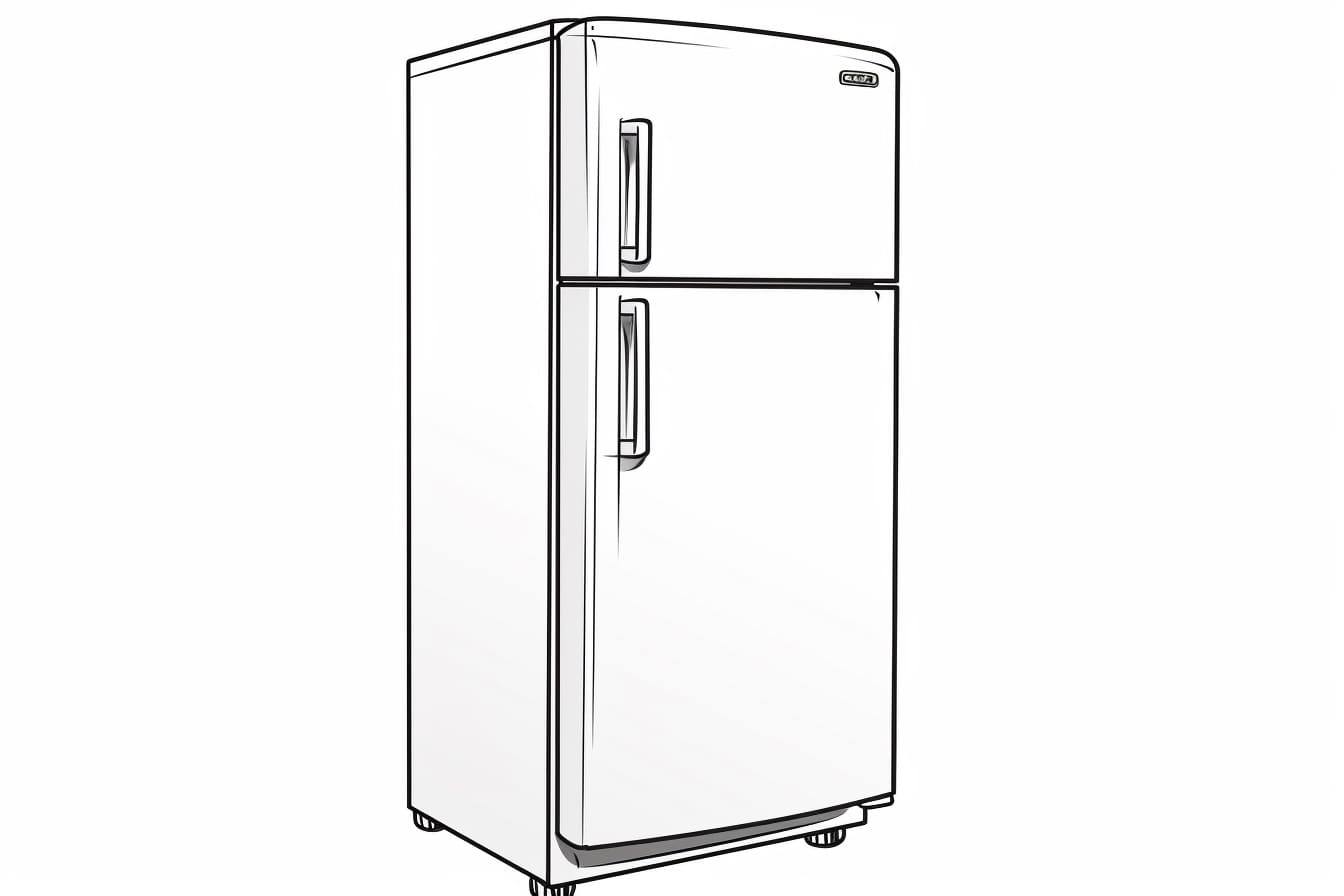
Have you ever wanted to learn how to draw a refrigerator? Whether you want to add a touch of realism to your kitchen sketches or simply enjoy the art of drawing, this step-by-step guide will teach you how to create a lifelike refrigerator. With a few basic drawing tools and some patience, you’ll be amazed at the final result. So grab your pencils and let’s get started!
Materials Required
To draw a refrigerator, you’ll need the following materials:
- Drawing paper or sketchbook
- Pencils (preferably a range of graphite pencils, such as H, HB, and B)
- Eraser
- Ruler
- Compass (optional)
- Colored pencils or markers (optional, for adding color to your drawing)
Now that you have your materials ready, let’s dive into the step-by-step process of drawing a refrigerator.
Step 1: Outline the Basic Shape
Start by lightly sketching a rectangle shape on your drawing paper. This will serve as the basic outline of the refrigerator. Use a ruler to ensure that the lines are straight and accurate. Pay attention to the proportions and make adjustments as needed.
Step 2: Add Depth to the Outline
Next, add depth to the outline by drawing two additional lines parallel to the top and bottom edges of the rectangle. These lines will create the illusion of thickness for the refrigerator. Again, use a ruler to maintain straight lines.
Step 3: Draw the Door Handles
On the front side of the refrigerator, draw the door handles. These handles can vary in size and shape depending on the specific model you want to depict. Use your creativity and observational skills to capture the details accurately. You can use a compass to create circular handles or simply draw them freehand.
Step 4: Sketch the Control Panel
Now, focus on the control panel located on the front of the refrigerator. Start by drawing a rectangular shape above the door handles. Add buttons, knobs, and a display panel within the rectangle. Take your time to capture the intricate details of the control panel while keeping the overall proportions in mind.
Step 5: Draw the Shelves and Drawers
Moving on to the interior of the refrigerator, sketch the shelves and drawers. Draw horizontal lines inside the refrigerator to represent the shelves, keeping them evenly spaced. Then, add vertical lines to create the drawers. Pay attention to the depth and size of the shelves and drawers, as they may vary depending on the model you are drawing.
Step 6: Add Details to the Door
To make the refrigerator appear realistic, add details to the door. This can include textured patterns, a water dispenser, or any other features commonly found on refrigerator doors. Reference images can be helpful in capturing these details accurately.
Step 7: Shade and Add Texture
Once you have completed the basic outline and details, it’s time to add shading and texture to your drawing. Use different grades of pencils to create a range of values, from light to dark. Shade the areas that would appear darker, such as the inside of the refrigerator and the spaces between shelves and drawers. Pay attention to light sources and shadows to enhance the three-dimensional effect.
Step 8: Optional – Add Color
If you prefer to add color to your drawing, now is the time to do so. Use colored pencils or markers to bring your refrigerator to life. Refer to reference images or your imagination to choose the colors that best represent the refrigerator you have in mind.
Conclusion
Congratulations, you have successfully learned how to draw a refrigerator! By following these step-by-step instructions and using your creativity, you can create a realistic and detailed drawing of this essential kitchen appliance. Remember to start with the basic shapes and gradually add details and shading to achieve a lifelike effect. Practice regularly, and soon you’ll be able to draw refrigerators with ease. Happy drawing!