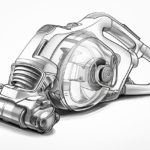
Whether you’re an aspiring artist or just looking to improve your drawing skills, learning how to draw everyday objects can be a great way to practice. In this tutorial, we will explore the step-by-step process of drawing a blender. By following these instructions, you’ll be able to create a detailed and realistic representation of this common kitchen appliance. So, grab your pencils and let’s get started!
Materials Required
Before we start, make sure you have the following materials at hand:
- A sheet of paper
- Pencils of different hardness (HB, 2B, 4B)
- An eraser
- A ruler
- Optional: Colored pencils or markers for shading
Now that we have everything we need, let’s dive into the drawing process.
Step 1: Outline the Basic Shape
To begin, lightly sketch a rectangle shape in the center of your paper. This will serve as the base of the blender. Make sure the proportions are accurate and adjust the size if necessary. Remember, it’s always better to start with a light sketch and refine the details later.
Step 2: Draw the Blender Jug
Within the rectangle shape, draw the main body of the blender jug. Start by drawing a curved line at the top of the rectangle, mimicking the shape of a cylindrical jug. Then, add two parallel lines extending down from the top curve, creating the sides of the jug. Finally, connect the lines at the bottom with a curved line to complete the jug shape.
Step 3: Add the Blender Lid
At the top of the jug, draw a rectangular shape for the blender lid. It should be slightly smaller than the top of the jug and positioned slightly off-center. Add a small circular handle on one side of the lid to make it appear more realistic.
Step 4: Sketch the Blender Base
Below the jug, draw the base of the blender. Start by drawing a rectangular shape that is wider than the jug. Then, add two vertical lines at the front corners of the base to create a three-dimensional appearance. Connect these lines with a curved line at the bottom to form the base.
Step 5: Define the Control Panel
On the front of the blender base, draw the control panel. Begin by drawing a rectangular shape in the center of the base. Add smaller rectangles and circles within this shape to represent the buttons and knobs. Take your time to ensure that the proportions are accurate.
Step 6: Refine the Blender Jug
Now that we have the basic shapes in place, it’s time to add more details to the blender jug. Start by drawing curved lines across the jug’s body to indicate the presence of blending blades. Make sure these lines are evenly spaced and parallel to each other. Then, add a small spout at the front of the jug by drawing a curved shape extending from the top.
Step 7: Add Textures and Shading
To give the blender a more realistic appearance, we need to add textures and shading. Start by lightly shading the areas that would appear darker, such as the front of the base or the lid’s handle. Use your pencils of different hardness to achieve various shades. Remember to blend the shading using a blending tool or your fingers to create a smooth transition between light and dark areas.
Step 8: Refine the Details
At this stage, take a step back and assess your drawing. Look for any areas that need refinement and make necessary adjustments. Pay attention to the overall proportions and symmetry of the blender. If needed, use a ruler to straighten any lines that may appear uneven.
Step 9: Finalize the Drawing
To complete the drawing, go over your outline with a darker pencil or pen. This will make the drawing more prominent and emphasize the details. Once you’re satisfied with the final result, erase any remaining pencil marks from the initial sketch.
Conclusion
Drawing everyday objects can be a rewarding way to develop your artistic skills. In this tutorial, we explored how to draw a blender step by step. By following these instructions and using the right materials, you can create a detailed and realistic representation of this kitchen appliance. Remember, practice makes perfect, so keep honing your drawing skills by exploring various objects in your everyday life.