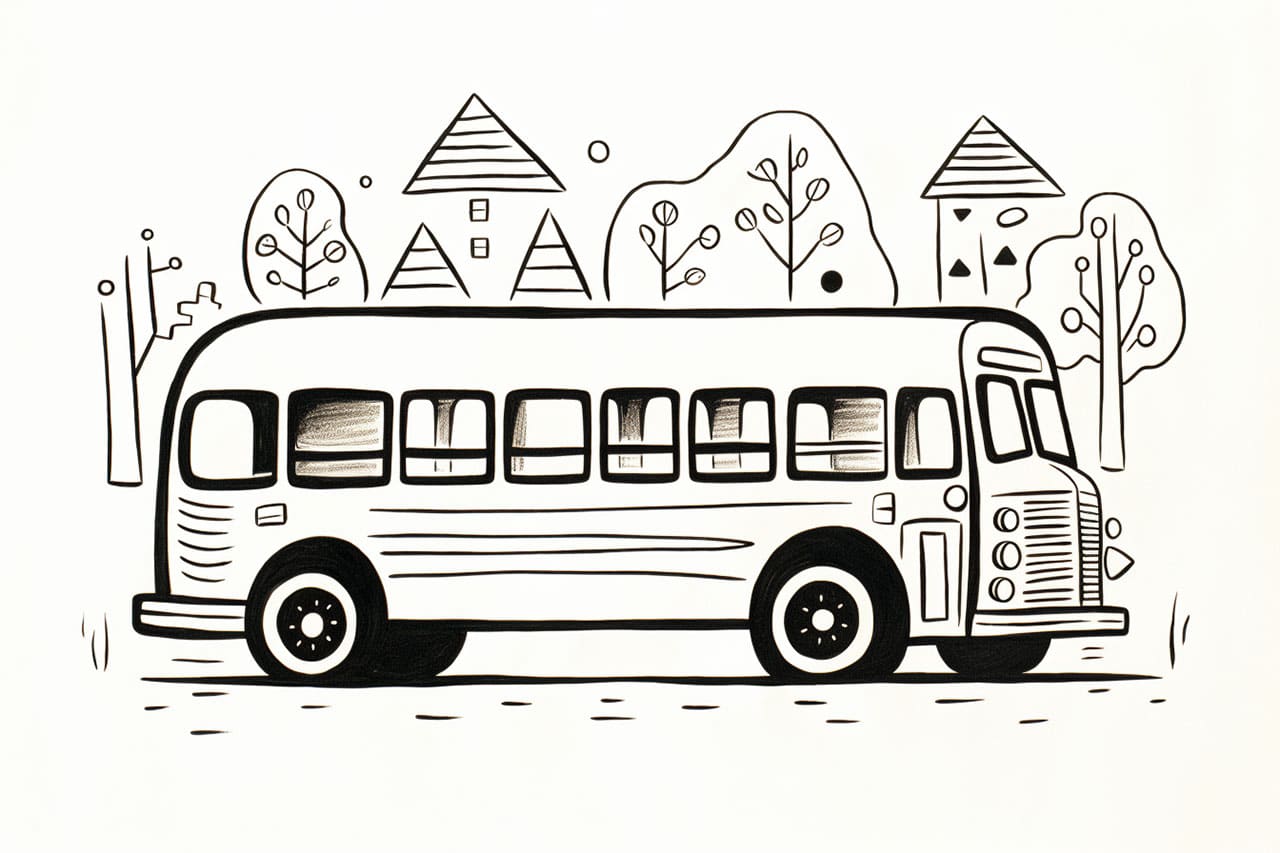
Drawing a school bus may seem like a daunting task, especially if you are a beginner in the world of art. However, with a little guidance and practice, anyone can learn to create a realistic and detailed school bus drawing. In this step-by-step tutorial, I will guide you through the process of how to draw a school bus, providing clear and concise instructions. So grab your pencils, erasers, and paper, and let’s get started!
Materials Required
Before we begin, make sure you have the following materials:
- Drawing paper
- Pencils (HB, 2B, and 4B)
- Eraser (preferably a kneaded eraser)
- Ruler
- Compass (optional, for drawing circles)
- Colored pencils or markers (optional, for coloring your drawing)
Now that we have our materials ready, let’s dive into the step-by-step process of drawing a school bus.
Step 1: Basic Shape
Start by drawing a large rectangular shape in the center of your paper. This will be the main body of the school bus. Use a light pencil, like an HB, so you can easily erase any mistakes or make adjustments later.
Step 2: Windows and Doors
Next, using your ruler, divide the rectangular shape into sections to create the windows and doors of the bus. School buses typically have three rectangular windows on each side. Make sure to leave enough space for the wheels at the bottom.
Step 3: Wheels
Now, let’s draw the wheels of the school bus. Start by drawing two circles at the bottom corners of the bus. Use your compass or a round object as a guide to create evenly sized circles. Then, draw a smaller circle in the center of each wheel to represent the hubcap.
Step 4: Details
Add details to your school bus drawing to make it more realistic. Draw the grille at the front of the bus by adding horizontal and vertical lines. Then, draw the headlights and the windshield above the grille. Add the door handles and any other small details you would like to include.
Step 5: Shading and Textures
To give your drawing dimension, we will add shading and textures. Use your 2B and 4B pencils to create darker areas, such as the shadows under the bus and around the wheels. For lighter areas, gently shade with your HB pencil. Pay attention to the direction of the pencil strokes to create realistic textures, such as the metal body of the bus or the rubber tires.
Step 6: Color (Optional)
If you want to add some color to your school bus drawing, now is the time to do so. Use colored pencils or markers to bring your drawing to life. School buses are usually yellow, but feel free to get creative with your color choices. Remember to apply light layers of color and build up gradually to avoid smudging or over-saturating your drawing.
Conclusion
Congratulations! You have successfully learned how to draw a school bus. With the help of this step-by-step tutorial and a little practice, you can now create your own realistic and detailed school bus drawings. Remember to be patient with yourself and enjoy the process of exploring your artistic abilities.
So grab your art supplies and start creating! Don’t be afraid to experiment and add your own personal touches to your school bus drawing. Happy drawing!