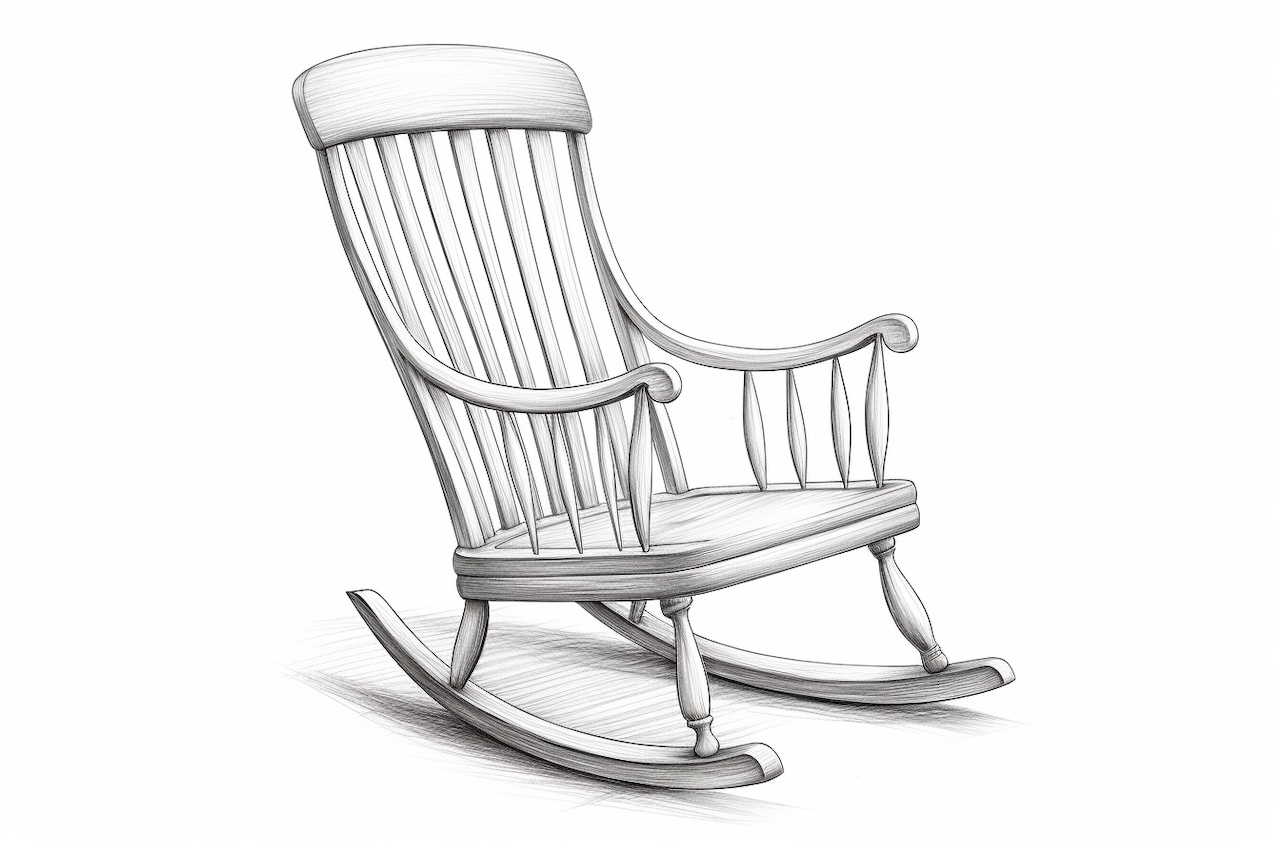
Are you a fan of furniture design? Have you ever wanted to create your own custom rocking chair? Drawing a rocking chair might seem challenging, but with the right guidance and a step-by-step approach, you can become a master at it. In this article, I will guide you through the process of how to draw a rocking chair, starting from the basic shapes to the intricate details. So grab your pencils and let’s get started!
Materials Required
Before we begin, let’s gather all the materials you’ll need for this drawing:
- A sketchpad or drawing paper
- Pencils (HB, 2B, and 4B)
- Eraser
- Ruler
- Compass
- Protractor
- Reference images of rocking chairs (optional)
Now that we have everything we need, let’s dive into the step-by-step process of drawing a rocking chair.
Step 1: Create the Outline
Start by drawing a horizontal line near the middle of your paper. This line will serve as the base of the rocking chair. Use your ruler to ensure it’s straight and properly aligned.
Step 2: Sketch the Seat
Below the horizontal line, draw a rectangle as the seat of the chair. Keep in mind that the seat should be wider at the front and slightly narrower towards the back. Use light lines to create the initial shape, as we will be refining it later.
Step 3: Add the Backrest
Above the seat, draw a curved line that represents the backrest of the chair. The curvature can vary depending on your desired design style. It can be a gentle curve or more pronounced, depending on the overall look you want to achieve.
Step 4: Create the Rockers
Extend two lines downward from the front and back of the seat. These lines should be slightly curved to form the rockers of the chair. Make sure to leave enough space between the rockers and the floor line, so there’s room for the chair to rock back and forth.
Step 5: Refine the Shape
Now that we have the basic outline of the rocking chair, it’s time to refine the shape. Go over the initial lines with darker pencils (2B or 4B) to make them more prominent. Use a combination of straight and curved lines to create the desired contours of the chair.
Step 6: Add Armrests
Draw two lines on each side of the backrest to represent the armrests of the rocking chair. The length and shape of the armrests can vary, so feel free to experiment with different styles.
Step 7: Detail the Seat
To make the seat look more realistic, add some details such as stitching lines or cushioning. You can also create a wood texture by drawing parallel lines across the seat. Take your time with this step, as the details can greatly enhance the overall look of the rocking chair.
Step 8: Enhance the Backrest
To give the backrest more dimension, add some curved lines to imply the presence of wooden slats or support beams. These lines should follow the curve of the backrest and create a sense of depth.
Step 9: Refine the Rockers
Take a closer look at the rockers and make any necessary adjustments to their shape and curvature. Ensure that they are symmetrical and properly aligned with the rest of the chair.
Step 10: Finishing Touches
Lastly, go over the entire drawing and make any final adjustments or additions. Add shading to create depth and contrast, paying attention to areas where shadows would naturally fall. Use your eraser to lighten or clean up any lines that need refining.
Conclusion
Drawing a rocking chair may seem daunting at first, but with a methodical approach and attention to detail, you can create a stunning piece of furniture on paper. By following the step-by-step instructions in this article, you’ll be able to draw a realistic and visually appealing rocking chair. So grab your sketchpad and unleash your creativity!
I hope this article has inspired you to try your hand at drawing a rocking chair. With patience and practice, you can become proficient in drawing various furniture designs. So go ahead, explore your artistic skills, and bring those rocking chairs to life on paper!