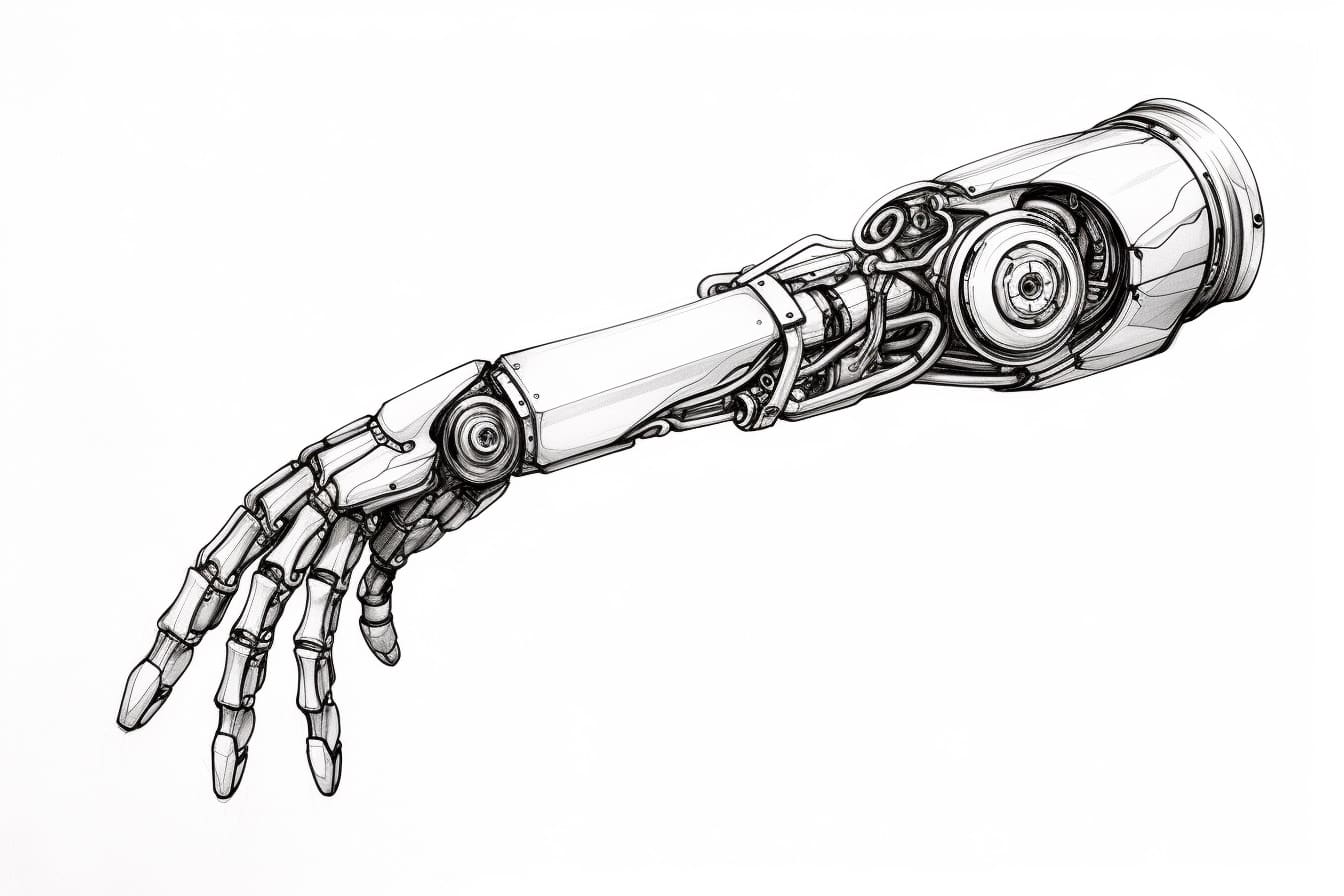
Are you fascinated by robots and their complex mechanisms? Do you want to learn how to draw a robot arm? Drawing a robot arm may seem challenging, but with the right guidance and step-by-step instructions, you can create an impressive illustration that showcases the intricate details of this mechanical marvel. In this article, we will explore the process of drawing a robot arm, breaking it down into easy-to-follow steps. So grab your drawing tools and let’s get started!
Materials Required
Before we begin, make sure you have the following materials at hand:
- Pencil
- Eraser
- Drawing paper
- Ruler
- Compass
- Protractor
Now that you have your materials ready, let’s dive into the step-by-step process of drawing a robot arm.
Step 1: Sketch the Basic Structure
Start by sketching a rectangle to represent the base of the robot arm. This will serve as a foundation for the entire structure. Use your ruler to draw straight lines and ensure the rectangle is proportionate and balanced. Next, draw a smaller rectangle on top of the base to depict the arm’s main body. Keep the lines light at this stage, as we will refine the details later.
Step 2: Add Joints and Segments
In this step, we will add joints and segments to the robot arm. Begin by drawing circles at the points where the joints will be located. These circles will allow the arm to move and rotate. Connect the circles with lines to create the segments of the arm. Remember to maintain consistency in the size and positioning of the segments.
Step 3: Define the Arm’s Features
Now it’s time to add details and define the arm’s features. Start by drawing circles and rectangles to represent various components such as motors, sensors, or hydraulic systems. These elements give the robot arm its functionality and character. Pay attention to the proportions and positioning to ensure a realistic representation.
Step 4: Refine the Shape and Clean Up
In this step, refine the shape of the robot arm by adding more definition and smoothing out any rough edges. Use your eraser to remove unnecessary lines and clean up the drawing. Pay close attention to the details and make any necessary adjustments to achieve a polished look.
Step 5: Apply Shading and Textures
To make your robot arm drawing more realistic, add shading and textures. Identify the primary light source and imagine how it would cast shadows on different parts of the arm. Use your pencil to add shading accordingly, creating depth and dimension. You can also experiment with different textures to enhance the appearance of the mechanical components.
Step 6: Finalize the Drawing
In the final step, go over your drawing one last time, checking for any areas that need refinement or adjustment. Make sure all the lines are clean and defined. If you’re satisfied with the result, you can darken the lines to create a more finished look. Congratulations, you have successfully drawn a robot arm!
Conclusion
Drawing a robot arm may seem daunting, but with patience and practice, you can create an impressive illustration that captures the intricacies of this mechanical wonder. By following the step-by-step instructions outlined in this article, you can develop your drawing skills and bring your robot arm to life on paper. So grab your drawing tools, unleash your creativity, and let the world of robotics inspire your artistic journey!