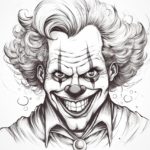
Welcome to this step-by-step guide on how to draw a laughing face! Drawing faces can be a fun and rewarding experience, and capturing the expression of laughter adds a lively and joyful touch to your artwork. In this tutorial, we will break down the process into simple and easy-to-follow steps, allowing you to create your very own laughing face with confidence. So, grab your drawing materials and let’s get started!
Materials Required
Before we begin, gather the following materials:
- Sketch paper or drawing pad
- Pencil (preferably an HB or 2B)
- Eraser (preferably a kneaded eraser for easy shaping and blending)
- Fine-tip black pen or marker (optional, for inking)
- Colored pencils or markers (optional, for adding color)
Once you have your materials ready, find a comfortable and well-lit workspace. Now, let’s dive into the steps for drawing a laughing face!
Step 1: Draw the Guiding Shapes
Start by drawing a circle in the center of your paper. This circle will serve as the foundation for the head. It doesn’t need to be perfect, so feel free to use light, loose strokes.
Step 2: Add the Facial Features
Divide the circle into four equal sections using two intersecting lines—one vertical and one horizontal that cross at the center of the circle. These lines will act as guides to help you properly position the facial features.
Step 3: Outline the Eyes
Within the upper half of the circle, draw two oval shapes along the horizontal guideline, slightly tilted downward in a gentle curve. These ovals will represent the eyes. Make sure to leave some space between them, as this will be where the nose and mouth are located.
Step 4: Draw the Eyebrows
Just above each eye, draw a slightly curved line to represent the eyebrows. You can make them raised for a more exaggerated laughing expression.
Step 5: Add the Nose
Positioned between the eyes, draw a tiny triangle pointing downward to represent the nose. Keep it simple and compact.
Step 6: Sketch the Mouth
Draw a curved line starting from the left end of the nose and extending towards the right. This line will serve as a guide for the mouth. Remember, we’re drawing a laughing face, so make the curve large and exaggerated!
Step 7: Shape the Lips
Starting from the endpoints of the curved line, draw two U-shaped curves facing upward to form the upper and lower lips. These curves should be wide and open, reflecting the expression of laughter. Connect the two curves smoothly at the corners.
Step 8: Define the Laugh Lines
Extend short, curved lines downward from the outer corners of the eyes to meet the upper lip. These lines will give your laughing face some depth and help emphasize the expression.
Step 9: Add the Teeth
Between the lips, sketch a series of small, evenly spaced, rectangular shapes to represent the teeth. Make sure to keep the shapes roughly the same size and aligned.
Step 10: Enhance the Eyes
Within each eye shape, draw a smaller oval to represent the iris. Shade the rest of the eye area lightly, leaving a small area unshaded to represent the reflection of light.
Step 11: Detail the Eyebrows
Refine the shape of the eyebrows by adding short, curved lines along their length. These lines will give them a more realistic texture and add depth to the face.
Step 12: Finalize the Face
Erase any unnecessary guidelines and smoothen out any rough edges or lines. Your drawing should now resemble a laughing face!
Conclusion
Congratulations on completing your drawing of a laughing face! By following these simple steps, you have captured the joy and liveliness of a laughing expression on paper. Remember, practice makes perfect, so don’t hesitate to try this tutorial multiple times to improve your skills and add your personal touch. Enjoy the process and have fun embellishing your artwork with colors or additional details. Keep exploring and discovering the wonderful world of drawing!

