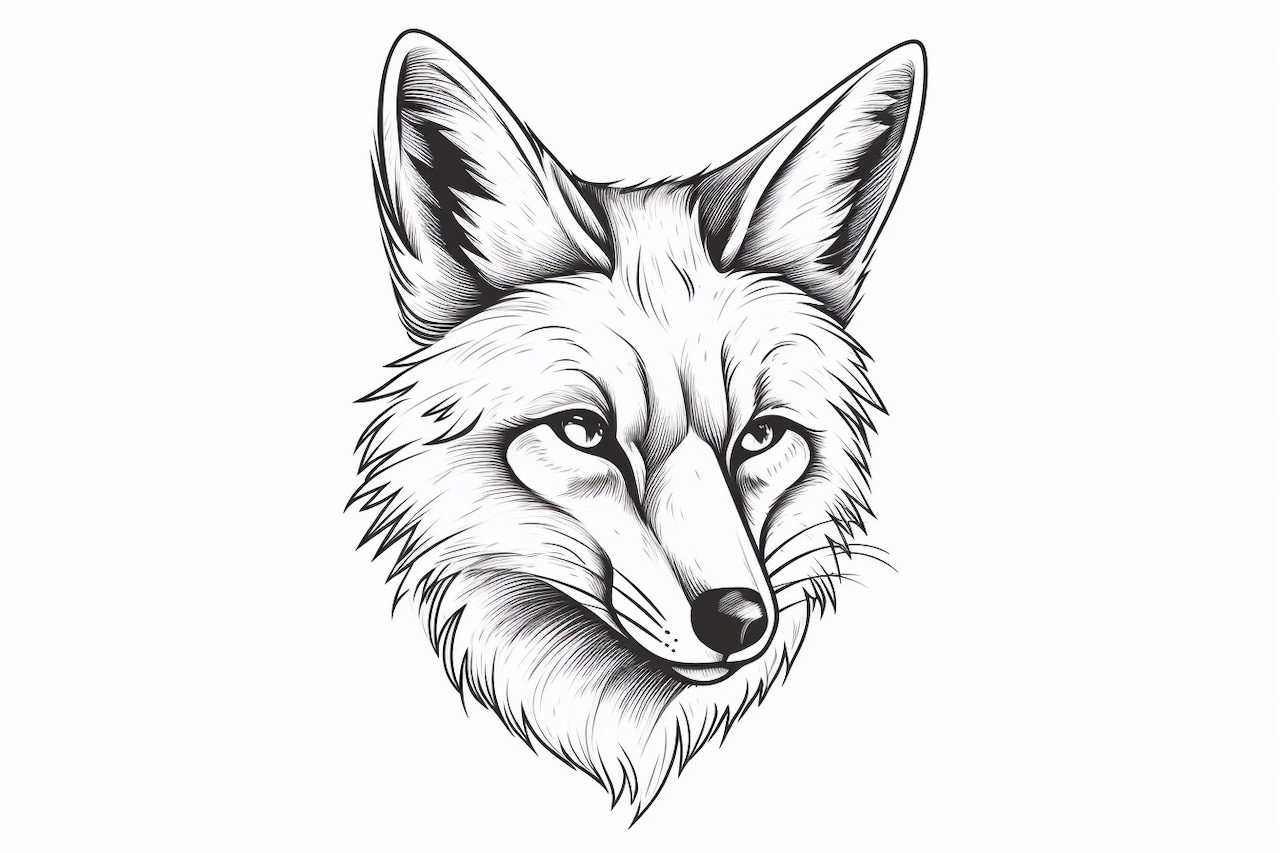
Welcome to this step-by-step guide on how to draw a fox face! Whether you’re a beginner or an experienced artist, this tutorial will help you create a detailed and realistic representation of a fox face on paper. So let’s grab our drawing materials and get started!
Materials Required:
- Pencil
- Eraser
- Drawing paper
- Colored pencils or markers (optional)
Step 1: Basic Shapes
To begin, let’s start by drawing the basic shapes that will form the foundation of our fox face. Start with a circle in the center of your paper. This circle will represent the head of the fox. Next, draw a smaller circle just below the first one, slightly to the right. This smaller circle will be the snout of the fox.
Step 2: Outline the Face
Using the basic shapes as a guideline, start outlining the fox face. Connect the two circles by drawing a curved line on the right side of the snout circle. This line will form the side of the face. Next, draw another curved line starting from the top of the snout circle and curving upwards to create the forehead of the fox. Finally, connect the forehead to the head circle by drawing a slightly curved line.
Step 3: Add the Ears
Now, let’s draw the ears of the fox. The fox has pointy ears that are set high on its head. Draw a triangle-like shape on the top left side of the head circle, pointing slightly upwards. Repeat this step on the right side of the head circle, making sure the ears look symmetrical.
Step 4: Draw the Eyes
The eyes are an important feature of the fox face. Starting from the top of the snout circle, draw a curved line upwards on both sides to create the shape of the eyes. Make sure the eyes are almond-shaped and slightly slanted towards the ears. Inside each eye, draw another curved line to represent the eyelids. Add a small circle or oval shape inside each eye to represent the pupils.
Step 5: Define the Facial Features
To give our fox face more detail and character, let’s now define the facial features. Using small, curved lines, draw the eyebrows just above the eyes. Then, draw a small triangle-like shape below the snout to represent the fox’s nose. Add a curved line below the nose to form the mouth. Next, draw a few small, curved lines on either side of the mouth to create the whiskers of the fox.
Step 6: Refine the Details
It’s time to refine the details of our fox face. Start by erasing any unnecessary lines to clean up the drawing. Next, add fur details around the head and ears by drawing small, short lines in a outward pattern. This will give the fox face a more realistic and textured look. Add more fur details around the eyes and snout, using small lines to create a sense of fur texture.
Step 7: Add Color (Optional)
If you want to add color to your drawing, now is the time to do so. Use colored pencils or markers to bring your fox face to life. The fox is typically known for its reddish-orange fur, so you can use shades of orange, red, and brown to color the head and ears. Don’t forget to add some white patches of fur on the face and around the eyes.
Conclusion
Congratulations! You have successfully learned how to draw a fox face. By following this step-by-step tutorial, you have created a realistic and detailed representation of a fox face. Remember to experiment with different techniques and styles to develop your own unique drawing skills. Happy drawing!