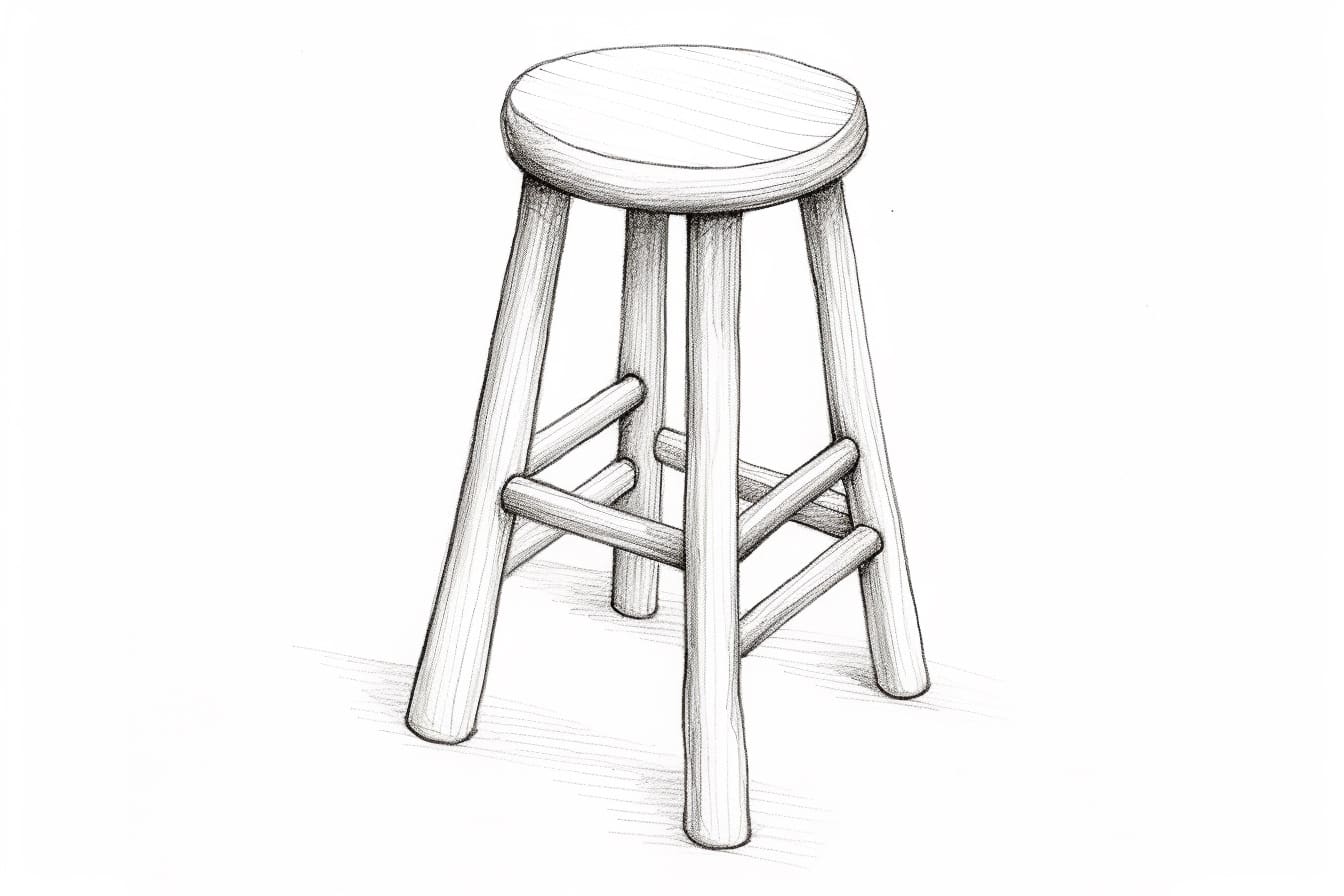
Drawing is a wonderful way to express creativity and bring life to your imagination. In this step-by-step guide, we will explore how to draw a stool. Whether you are a beginner or an experienced artist, this tutorial will provide you with clear instructions to create a realistic stool drawing. So let’s get started!
Materials Required:
To begin drawing a stool, you will need the following materials:
- Drawing paper
- Pencil
- Eraser
- Ruler
- Compass (optional)
- Fine tip markers or colored pencils (optional)
Having these materials ready will ensure a smooth and enjoyable drawing experience. Now, let’s dive into the steps!
Step 1: Setting the Perspective
To create an accurate drawing of a stool, start by establishing the perspective. Draw a vertical line in the center of your paper; this will act as the centerline of the stool. Next, draw a horizontal line near the bottom to represent the ground or floor. This will give you a sense of the stool’s position and angle.
Step 2: Drawing the Seat
Now, let’s focus on drawing the seat of the stool. Start by drawing a rectangle shape above the centerline. Make sure the lines are straight and parallel to the ground line. The size of the rectangle will depend on the height and width you envision for your stool.
Step 3: Adding the Legs
To create the legs of the stool, draw four vertical lines extending down from the corners of the seat. Ensure that the lines are parallel and evenly spaced. You can use a ruler to help you maintain consistency. Make the length of the legs proportional to the height of the seat.
Step 4: Detailing the Legs
Now it’s time to add some depth and dimension to the legs. Begin by drawing two horizontal lines at the bottom of each leg. These lines will represent the top and bottom edges of the stool’s footrest, also known as the stretcher. Ensure that the lines are parallel to the ground and extend across all four legs.
Step 5: Adding Curves
To make your stool look more realistic, add some curves to the seat and legs. Start by rounding the corners of the rectangle seat. Then, curve the vertical lines of the legs slightly inward, towards the centerline. This will give your stool a more organic and aesthetically pleasing appearance.
Step 6: Refining the Details
Now that the basic structure of the stool is in place, it’s time to refine the details. Use your pencil to carefully smoothen out any rough edges or lines. Pay attention to the proportions and make any necessary adjustments to ensure the stool looks balanced and symmetrical.
Step 7: Finalizing with Ink or Color
If you prefer a more finished look, you can use fine tip markers or colored pencils to add depth and color to your stool drawing. Start by outlining the entire drawing with a pen or marker, emphasizing the important lines. Then, carefully color in the different parts of your stool, adding shading and texture as desired. This step is optional but can add a vibrant touch to your artwork.
Conclusion
Drawing a stool may seem like a simple task, but it requires attention to detail and a good understanding of perspective. By following the step-by-step instructions in this tutorial, you can create a realistic and visually pleasing stool drawing. Remember, practice makes perfect, so don’t be discouraged if your first attempt is not exactly as you imagined. Keep exploring and experimenting with your artistic skills, and soon you’ll be creating stunning drawings of various objects, just like a professional artist!


