Welcome to this step-by-step guide on how to draw a recycling sign. Whether you’re an aspiring artist or just looking to add an eco-friendly touch to your artwork, this tutorial will walk you through the process. The recycling sign is a universal symbol of environmental consciousness, so by learning how to draw it, you’ll be able to incorporate it into various art projects. So, let’s get started!
Materials Required
Before we dive into the drawing process, let’s gather the materials you’ll need:
- Paper: Choose a type that suits your preferred drawing medium, such as sketch paper, drawing paper, or even a simple printer paper.
- Pencil: Opt for a regular graphite pencil with a medium to soft lead. You can also use a mechanical pencil if that’s what you’re comfortable with.
- Eraser: Select a soft eraser that won’t leave smudges on your drawings.
- Ruler: A straight ruler or a T-square will help you create precise lines.
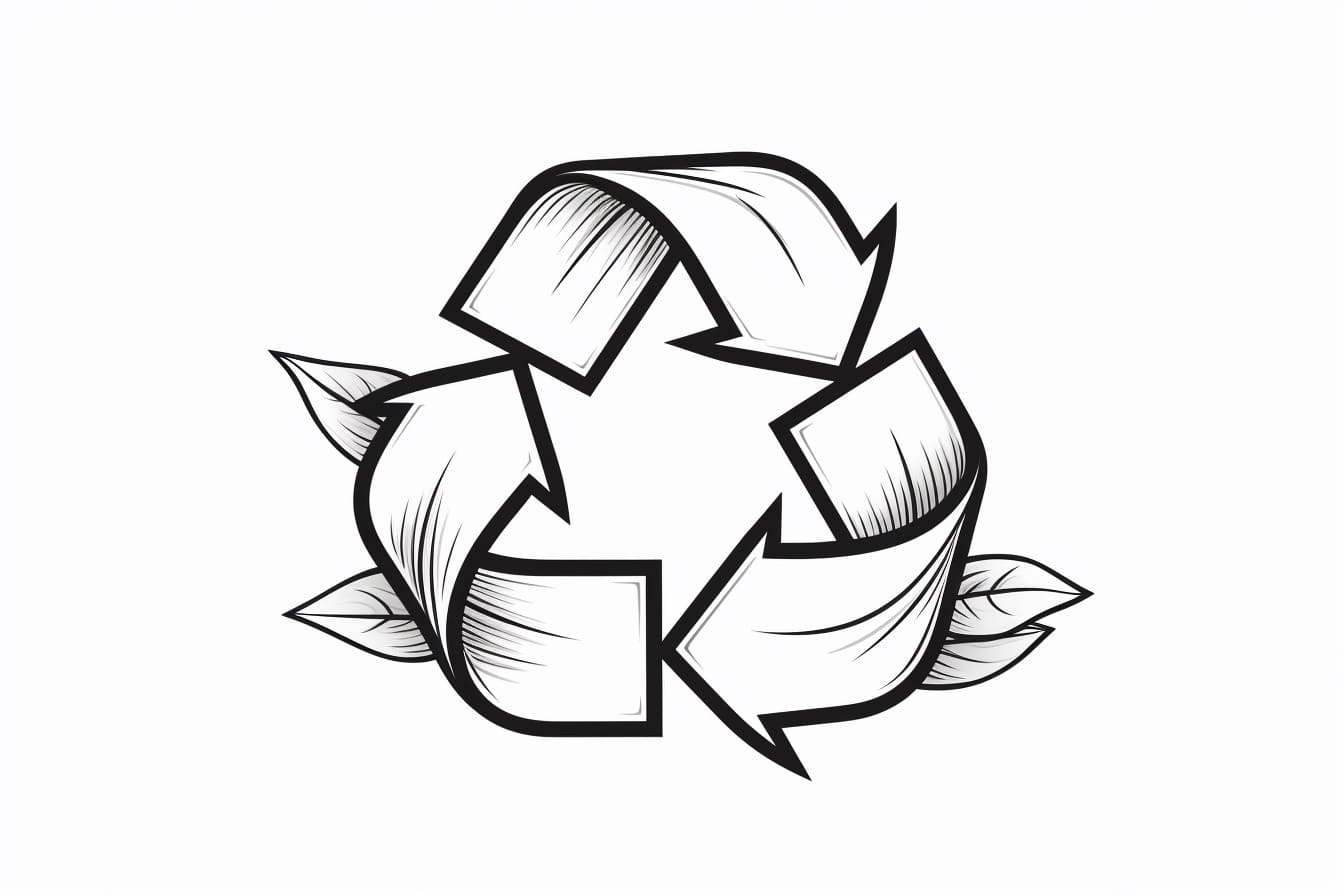
Step 1: Draw a Circle
Begin by drawing a perfect circle on your paper. You can achieve this by using a compass or by tracing around a circular object such as a lid or a bottle cap. Start by lightly sketching the circle, as you’ll be refining it later.
Step 2: Create the Arrows
Next, draw two straight lines originating from the top and bottom of the circle, extending outward at an angle. These lines should be similar in length and angle, forming a V shape. Make sure the lines are evenly spaced and symmetrical.
Step 3: Add the Recycle Symbol
In this step, we’ll draw the triangular recycle symbol inside the circle. Begin by drawing a horizontal line across the middle of the circle, dividing it into two equal parts. Then, draw two curved lines extending from the horizontal line, forming the top and bottom arcs of the triangle. Finally, connect the ends of the arcs with a straight line, completing the triangular shape.
Step 4: Refine the Drawing
Now, it’s time to refine the recycling sign. Take your pencil and carefully go over the outline of the circle, making it more defined and smooth. Similarly, clean up the lines of the arrows and the recycle symbol, ensuring they are crisp and well-formed.
Step 5: Add Details
To make the recycling sign more visually appealing, let’s add some details. Begin by drawing small diagonal lines across the arrows, indicating motion and direction. These lines should be evenly spaced and slanting in the same direction as the arrows. Next, draw a series of smaller circles inside the larger circle, simulating the appearance of recycling materials.
Step 6: Shade and Color
To give your recycling sign depth and dimension, we can add shading and color. Start by determining a light source for your drawing, which will determine where shadows fall. Shade the areas of the sign that would be cast in shadow, using light hatching or cross-hatching. You can also add gradients or different shades of color to the sign, making it visually dynamic.
Conclusion
Congratulations! You’ve successfully learned how to draw a recycling sign. With just a few simple steps, you can now incorporate this symbol into your artwork to promote environmental awareness. From posters and illustrations to personal projects, the recycling sign can add a meaningful touch to your creative endeavors. So grab your materials and start drawing today!