How to Draw a Pterodactyl in 8 Easy Steps
Learn how to draw with this step-by-step tutorial.
Materials You'll Need
- Drawing paper
- Pencil (HB or 2B)
- Eraser
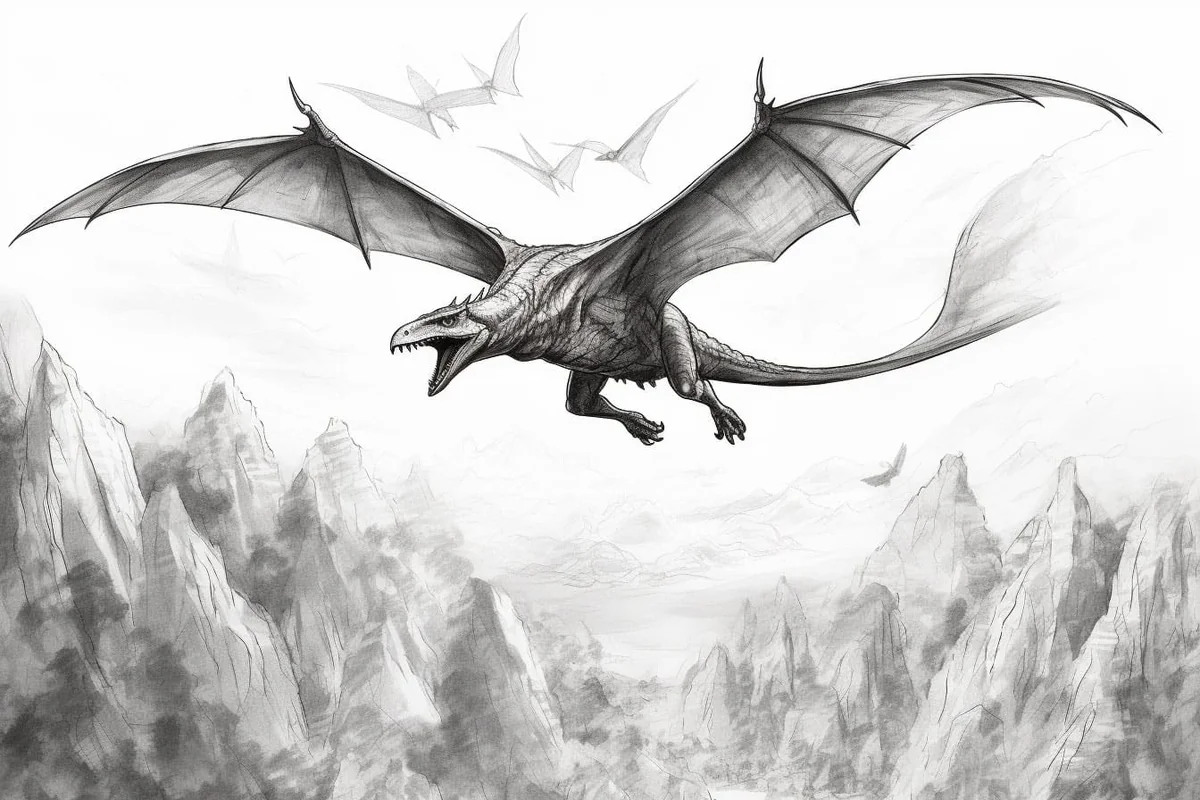
Welcome to an exciting journey into the world of prehistoric art with this step-by-step guide on how to draw a pterodactyl! This magnificent flying reptile, known for its impressive wingspan and unique features, has captivated the imagination of many. Whether you're aiming to enhance your artistic skills or simply looking for a fun project, this tutorial will provide you with comprehensive instructions to create an incredible representation of a pterodactyl.
In this article, we will break down the drawing process into easy-to-follow steps, making it accessible for both beginners and experienced artists alike. You'll learn how to capture the intricate details and distinctive characteristics of this remarkable creature. By the end of this tutorial, you will have a striking drawing that embodies the essence of the pterodactyl.
So, grab your pencils and paper, and let's embark on this artistic adventure together! With each step, you'll discover new techniques that will help you bring this ancient creature to life on your page. Let's get started!
Materials Required
Before we begin, let's gather the necessary materials to complete this drawing:
-
Pencil: You will need a medium-soft graphite pencil, preferably HB or 2B, for sketching and shading.
-
Eraser: A soft eraser is essential for correcting mistakes and refining your drawing.
-
Paper: Choose a good quality drawing paper that is suitable for pencil work. A smooth surface will help achieve better details.
Now that we have our materials ready, let's start creating our pterodactyl masterpiece!
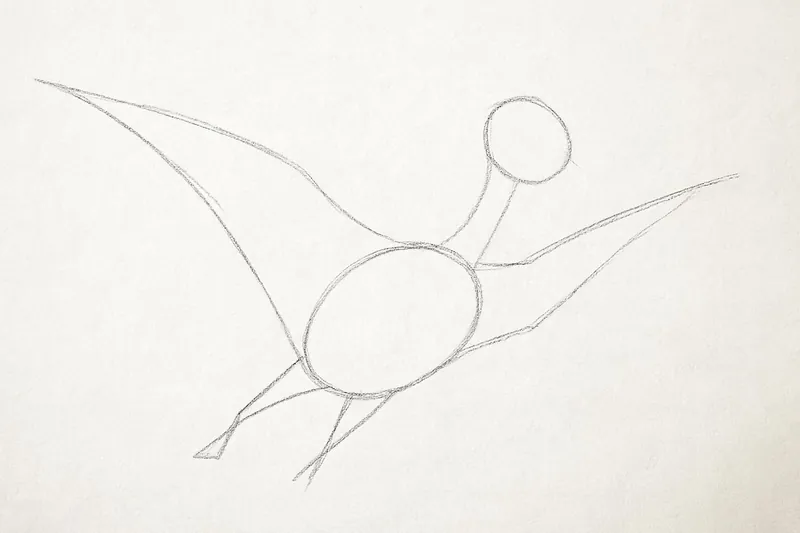
Step 1: Basic Guidelines
To begin, lightly sketch the basic outline of the pterodactyl using simple geometric shapes. Start with a large oval for the body, followed by a smaller oval for the head. Add two long, curved lines for the wings and a small triangle for the tail. Position the head at the top and slightly to the right of the body.
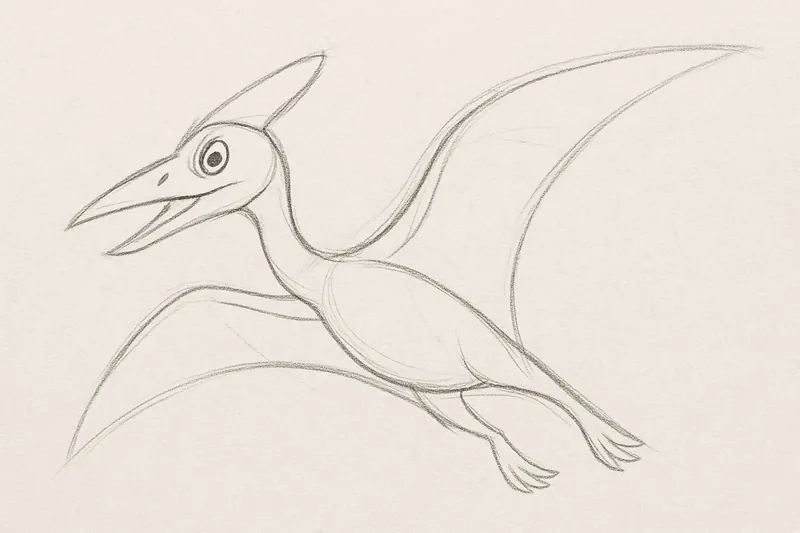
Step 2: Head and Beak
Refine the shape of the head by adding more details. Pterodactyls had a distinct head crest, so make sure to include a curved line that starts at the top of the head and extends backward. Next, draw a long, curved line from the head to create the upper part of the beak. The beak should be pointed and slightly open.

Step 3: Eyes and Nostrils
Draw two small circles within the head to represent the eyes. Leave a small white space in each eye to indicate a highlight. Then, add two small ovals near the tip of the beak to illustrate the nostrils.
Step 4: Neck and Body
Connect the head to the body with a long, curved line to form the neck. Make the neck wider toward the body and gradually taper it near the head. Next, refine the body outline by adding more curves to emphasize the shape and contours. Notice that the body is thicker in the middle and tapers towards the tail.
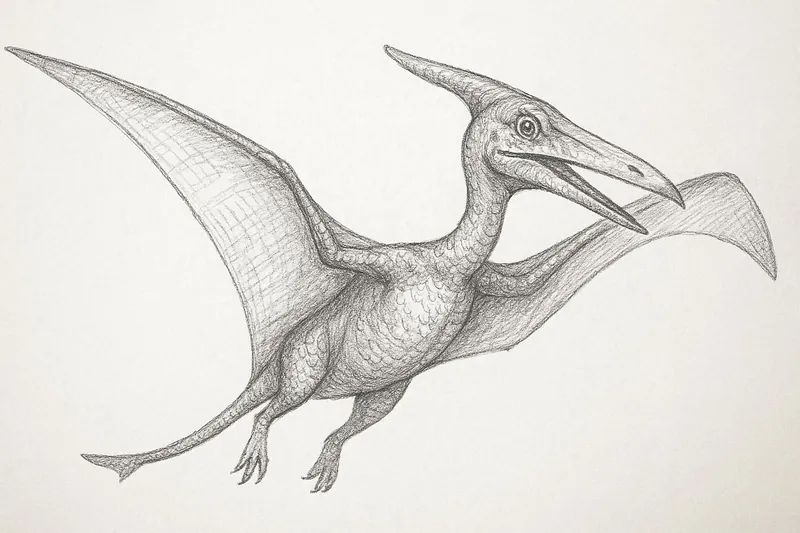
Step 5: Wings
Pterodactyls had large, bat-like wings. Start by drawing the upper portion of the wing using long, curved lines that connect to the body. Then, add another set of curved lines to create the lower part of the wing. Detail the wings by adding lines to represent the bones and webbing of the wings.
Step 6: Legs and Claws
Extend two curved lines downward from the body to create the legs. Pterodactyls had three fingers on each wing, so draw three small, curved lines at the end of each wing to represent the claws. Make the claws sharp and pointed.
Step 7: Tail and Texture
Complete the outline by drawing a long, pointed tail at the end of the body. Add a few curves to indicate the segments of the tail. To make the drawing more realistic, add texture to the body, wings, and tail by sketching small, irregular scales.
Step 8: Shading and Detailing
Now that we have our basic outline, it's time to add depth and detail to our drawing. Begin by shading the darker areas, such as the shadows under the wings and body. Use gentle strokes and gradually build up the shading to create a smooth transition between light and dark areas. Add more texture to the scales and feathers by using small, directional strokes.
Taking Flight with Your Art: Final Thoughts on Drawing a Pterodactyl ✏️
Congratulations—you've just brought a prehistoric creature back to life on paper! By following this step-by-step guide, you've sketched and shaped a pterodactyl, one of the most fascinating flying reptiles from the age of dinosaurs. From its powerful wings to its sharp beak and distinct silhouette, you've learned to capture the essence of this ancient animal in your own artistic style.
Remember, drawing is a journey, and every line you put down is a step forward. The more you practice, the more confident and creative you'll become. Don't hesitate to experiment with different poses, add backgrounds like cliffs or skies, or even design your own prehistoric scenes. Art is about expression, so let your imagination take flight just like your newly drawn pterodactyl.
We hope this tutorial inspired you to keep exploring the world of dinosaur art and beyond. Keep creating, keep learning, and most importantly—have fun with it!
Gallery of Pterodactyl Drawings


Fun Facts About Pterodactyls
-
Pterodactyls are not actually dinosaurs but are a type of flying reptile known as pterosaurs.
-
The name "Pterodactyl" comes from the Greek "pteron" meaning "wing" and "daktylos" meaning "finger," referring to their wing structure.
-
They lived during the late Jurassic period, about 150 million years ago.
-
Pterodactyls' wingspans varied greatly, with some reaching lengths of over 10 meters (33 feet).
-
Despite their size, they were lightweight due to their hollow bones.
-
Pterodactyls likely had excellent eyesight, beneficial for spotting prey while flying.
-
Some species had elaborate crests on their heads, which may have been used for display or balance during flight.
-
Paleontologists have found fossils of pterodactyls on every continent, indicating they were widespread.
-
Unlike birds, pterodactyls had a membrane of skin and muscle stretching from their elongated fourth finger to their hind limbs.
-
Pterodactyls were carnivorous, with a diet that likely included fish and small animals.
Tip: When drawing your pterodactyl, focus on the structure of its wings and body by using light, loose pencil strokes initially. This approach allows you to capture the dynamic shape without committing to details too early. Consider breaking down the wings into simple shapes—triangles for the wing tips and curves for the wing span—so you can visualize their proportions and how they attach to the body. Additionally, use reference images to understand how the pterodactyl's anatomy works, paying close attention to the angles of the wings and the curvature of the beak. Finally, don't hesitate to make adjustments as you go; the beauty of drawing lies in the ability to refine your work!
Suggestions for Scenes and Settings for Pterodactyl Drawings
-
Jurassic Skies: Draw a majestic scene of pterodactyls soaring over a prehistoric landscape with tall ferns and volcanic mountains in the distance.
-
Ocean Hunt: Illustrate a dynamic underwater view with pterodactyls swooping down to snatch fish from the sea.
-
Nest on the Cliff: Create a peaceful image of pterodactyl parents tending to their nest on a rocky cliff, watching the sunset.
-
Fossil Discovery: Depict a scene where paleontologists excitedly excavate a large pterodactyl fossil from ancient sedimentary rocks.
-
Prehistoric Jungle: Imagine a dense jungle with pterodactyls perched among the treetops and colorful prehistoric birds flying alongside them.
-
Evening Flight: Design a serene dusk setting with silhouetted pterodactyls against a vibrant orange and purple sky.
-
Pterodactyls and Dinosaurs: Show a scene where pterodactyls glide above a herd of wandering herbivorous dinosaurs.
-
Time Travel Adventure: Picture a modern-day twist with pterodactyls flying over a cityscape, perhaps part of an alternate history or time-travel narrative.
-
Canyon Ride: Visualize a thrilling glide through narrow canyons, with pterodactyls deftly navigating between towering rock faces.
-
Storm Escape: Draw an intense scene of pterodactyls battling strong winds and rain during a fierce prehistoric storm.