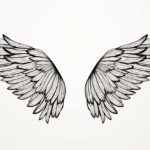
Have you ever been fascinated by the beauty and elegance of angel wings? Drawing angel wings can be a rewarding and creative experience. Whether you want to create an angelic character for a story or simply enjoy the process of drawing, this step-by-step guide will teach you how to draw angel wings like a professional artist.
Materials Required
Before we start, let’s gather the materials you will need:
- Paper: Choose a high-quality drawing paper that can handle different drawing techniques.
- Pencil: Use a range of pencils such as HB, 2B, and 4B for shading and detailing.
- Eraser: A kneaded eraser is ideal for smudging and correcting mistakes.
- Blending Stump: A blending stump or tortillon will help you achieve smooth shading.
- Fine Liner or Pen: You can use a fine liner or pen for outlining and adding details.
Now that you have your materials ready, let’s begin working on your angel wings masterpiece!
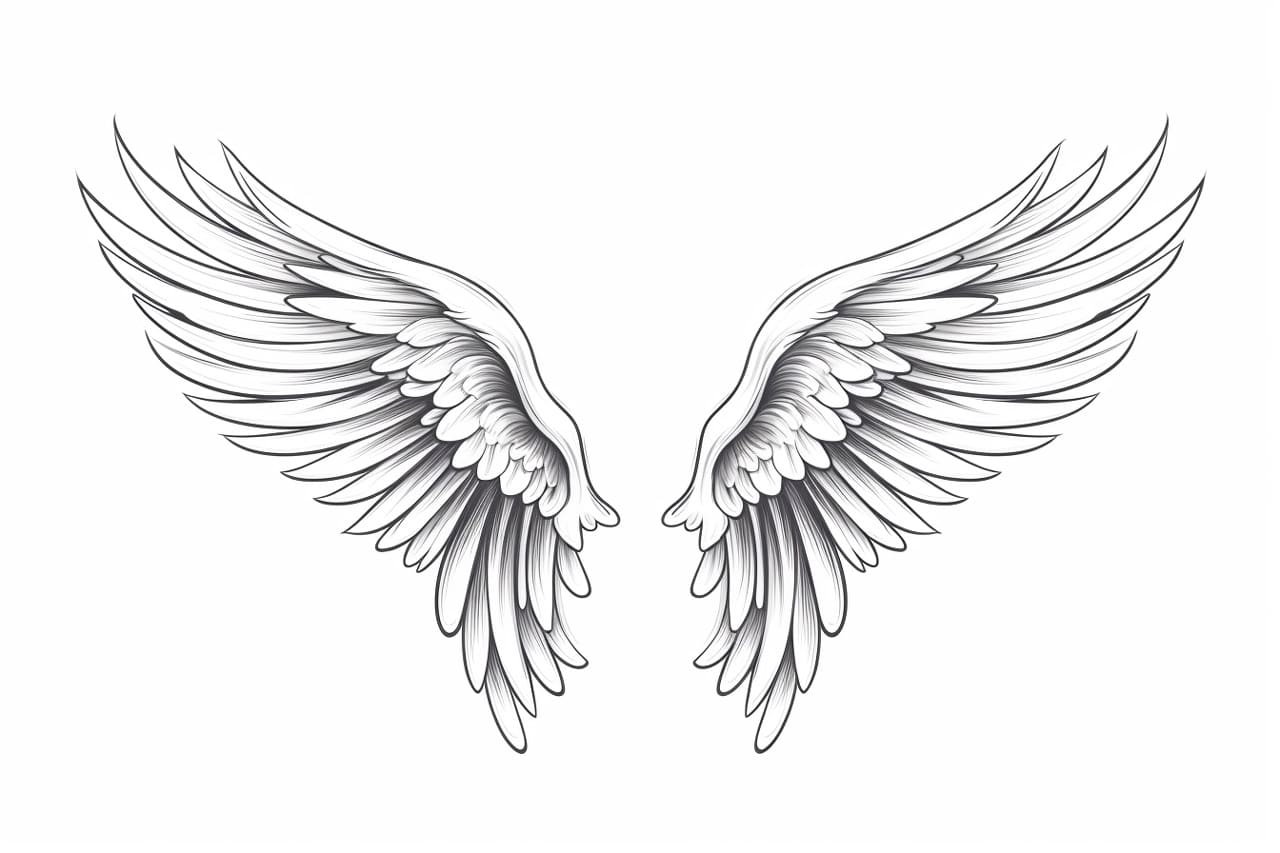
Step 1: Basic Structure
Start by lightly sketching a curved line in the shape of a gentle arc. This will serve as the backbone of your angel wing. Next, draw a smaller curved line parallel to the first one, creating a thinner wing shape. Repeat this step to create the second wing.
Step 2: Primary Feathers
To add detail to your angel wing, draw a series of curved lines from the outer edge of the wing to the bottom of the arc. These lines will represent the primary feathers. Make sure to vary the length and angle of the feathers for a more natural look.
Step 3: Secondary Feathers
Now it’s time to add the secondary feathers. Draw smaller curved lines between the primary feathers, extending from the base of the wing to about halfway up the primary feathers. These secondary feathers should be shorter and narrower than the primary feathers.
Step 4: Tertiary Feathers
To further enhance the depth and realism of your angel wing, draw even smaller curved lines between the secondary feathers. These tertiary feathers should be shorter and narrower than the secondary feathers.
Step 5: Texture and Details
Add texture and details to your angel wing by sketching soft lines and curves on the feathers. These lines will create a sense of flow and dimension. Pay attention to the direction of the lines and follow the natural shape of the feathers.
Step 6: Shading
To make your angel wings appear more three-dimensional, it’s crucial to add shading. Start by identifying the light source in your drawing. Shade the areas that would be in shadow, using a darker pencil. Gradually build up the shadows, blending them with a blending stump or tortillon for a smooth transition.
Step 7: Highlights
To complete the realistic look of your angel wings, add highlights using an eraser. Lightly erase small areas on the feathers that would catch the light, creating a luminous effect. Be careful not to overdo it – subtlety is key.
Conclusion
Congratulations! You have successfully learned how to draw angel wings. With practice and patience, you can continue to refine your technique and develop your own unique style. Remember to experiment with different shapes, sizes, and details to create a variety of angel wings. Now, grab your materials and let your creativity soar!