Have you ever wanted to learn how to draw a popsicle? Whether you’re a beginner or an experienced artist, drawing a popsicle can be a fun and refreshing project. In this step-by-step guide, I will walk you through the process of creating a delicious-looking popsicle drawing. So grab your drawing materials and let’s get started!
Materials Required:
- Drawing paper
- Pencil
- Eraser
- Colored pencils or markers (optional)
Step 1: Sketch the Outline
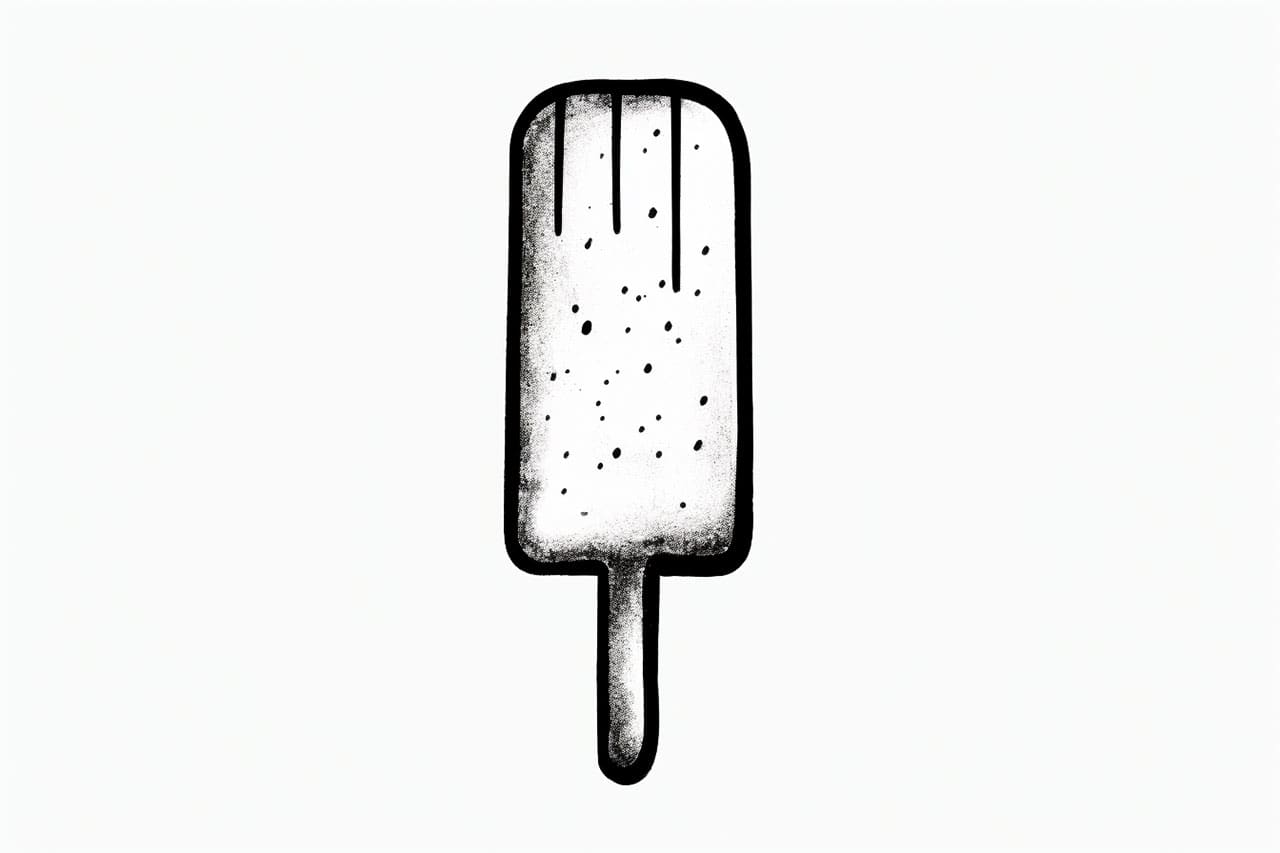
To begin, let’s first sketch the outline of the popsicle. Start by drawing a long, vertical rectangle shape on your paper. This will serve as the main body of the popsicle. Make sure to leave enough space at the top for the popsicle stick.
Step 2: Add the Stick
Now, it’s time to add the popsicle stick. Draw a small rectangle shape coming out from the top of the popsicle body. Make sure the stick is centered and slightly tilted to give it a more realistic appearance.
Step 3: Draw the Details
Next, we’ll add some details to make our popsicle drawing more exciting. Start by adding a curved line in the middle of the popsicle body to give it a three-dimensional look. Then, draw a few diagonal lines across the body to represent the drips of melting ice cream.
Step 4: Add Color (Optional)
At this point, your basic popsicle drawing is complete. However, if you want to make it more vibrant and realistic, you can add color using colored pencils or markers. Choose your desired colors for the popsicle body and the stick. You can also experiment with different shades and patterns to make your popsicle truly unique.
Step 5: Shade and Highlight
To give your popsicle drawing more depth, let’s add some shading and highlighting. Identify which direction the light source is coming from, and then darken the side of the popsicle that is opposite to the light source. Use your pencil or colored pencils to carefully shade this side, gradually getting lighter towards the center. Add a bit of white or a lighter shade to the side that is directly facing the light source to create a highlight.
Step 6: Final Touches
Now that your popsicle drawing is nearly complete, take a step back and assess the overall composition. Are there any areas that need to be refined or adjusted? If so, make any necessary changes using your eraser or pencil. Pay attention to the proportions and details to ensure your popsicle looks as realistic as possible.
Conclusion
Congratulations! You’ve successfully learned how to draw a popsicle from start to finish. Drawing a popsicle can be a great way to practice your sketching skills and create a beautiful piece of art. Remember to be patient and take your time with each step. So the next time you’re feeling inspired, grab your drawing materials and start creating your own mouth-watering popsicle masterpiece!