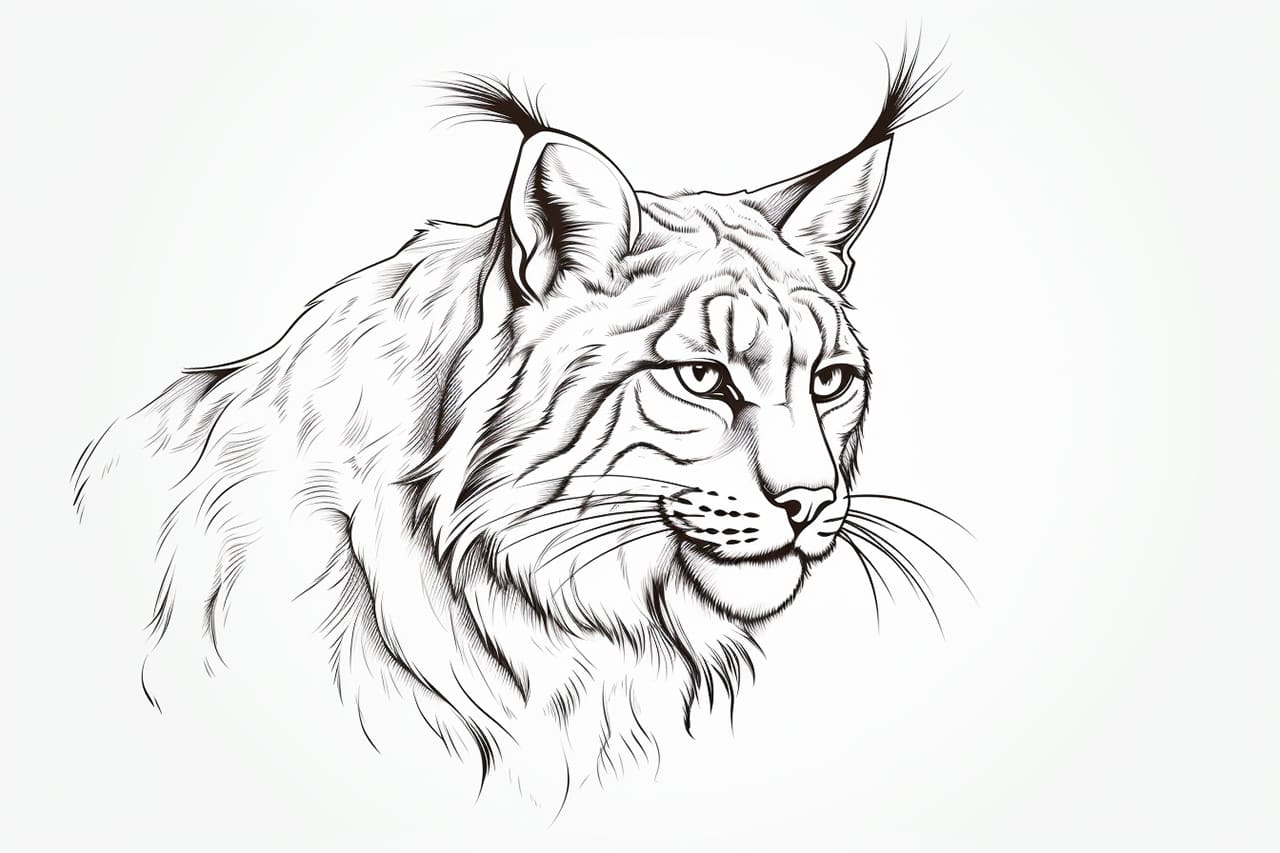
Welcome to this step-by-step guide on how to draw a Lynx! In this tutorial, I will walk you through the process of creating a realistic and detailed drawing of this magnificent wild cat. Whether you are a beginner or an experienced artist, this guide will help you capture the beauty and essence of the Lynx in your artwork.
Before we begin, let’s gather the materials you will need:
- Pencil (preferably a set of drawing pencils with different degrees of hardness)
- Eraser
- Drawing paper (smooth and sturdy paper works best)
- Reference image of a Lynx (this can be a photograph or a printout)
Now that we have everything we need, let’s dive into the steps of drawing a Lynx!
Step 1: Start with Basic Shapes
Begin by lightly sketching the basic shapes that form the Lynx’s body. Start with an oval for the head and a larger oval for the body. These shapes will serve as the framework for your drawing.
Step 2: Add the Facial Features
Using the guidelines from the previous step, start adding the Lynx’s facial features. Sketch the eyes, nose, and mouth, paying close attention to their placement and proportions. Lynxes have distinctively tufted ears, so make sure to include those as well.
Step 3: Refine the Outline
Once you are satisfied with the placement of the facial features, refine the outline of the Lynx’s body. Use light, confident strokes to create the shape of the body, emphasizing the muscular structure and proportions.
Step 4: Add Fur Details
Lynxes have beautiful fur patterns, so let’s start adding those details. Use short, curved strokes to depict the texture of the fur. Pay attention to the direction of the strokes, as it will add a sense of depth and realism to your drawing.
Step 5: Work on the Eyes and Nose
The eyes and nose are key elements in capturing the expression of the Lynx. Add more detail to these features, focusing on the shape and shading. Darken the areas around the eyes to create depth and add a highlight to make them appear lively.
Step 6: Define the Ears and Whiskers
Lynxes have distinctive tufted ears and long whiskers. Use short, precise strokes to give the ears their furry texture. Add the individual strands of the whiskers, keeping them thin and delicate.
Step 7: Shade and Add Depth
Now it’s time to add shading and depth to your drawing. Observe the reference image carefully and identify the areas that are in shadow. Use a darker pencil or increase the pressure on your pencil to create shading in those areas. Gradually build up the layers of shading to achieve a more realistic effect.
Step 8: Finalize the Details
Take a step back and evaluate your drawing. Look for any areas that need refinement or additional detail. Pay attention to the Lynx’s fur patterns, facial features, and any other distinctive markings. Make any necessary adjustments to bring your drawing to life.
Step 9: Erase Guidelines and Final Touches
Once you are satisfied with your drawing, gently erase any visible guidelines or construction lines. Be careful not to smudge or damage your artwork. Take this opportunity to make any final adjustments or additions to enhance the overall look and feel of your drawing.
And there you have it! You have successfully drawn a Lynx. Take a moment to admire your artwork and appreciate the progress you have made. Remember, practice is key, so don’t be discouraged if your first attempt doesn’t turn out exactly as expected. With time and dedication, your skills will continue to improve.
I hope you found this tutorial helpful in capturing the beauty of the Lynx in your artwork. Remember to have fun and enjoy the process of drawing. Happy sketching!
Conclusion
In this step-by-step guide, we have explored the process of drawing a Lynx, focusing on capturing its unique features and characteristics. By following these steps and practicing regularly, you can refine your artistic skills and create stunning artwork. So grab your pencils, reference image, and let your creativity flow as you bring this majestic wild cat to life on paper.