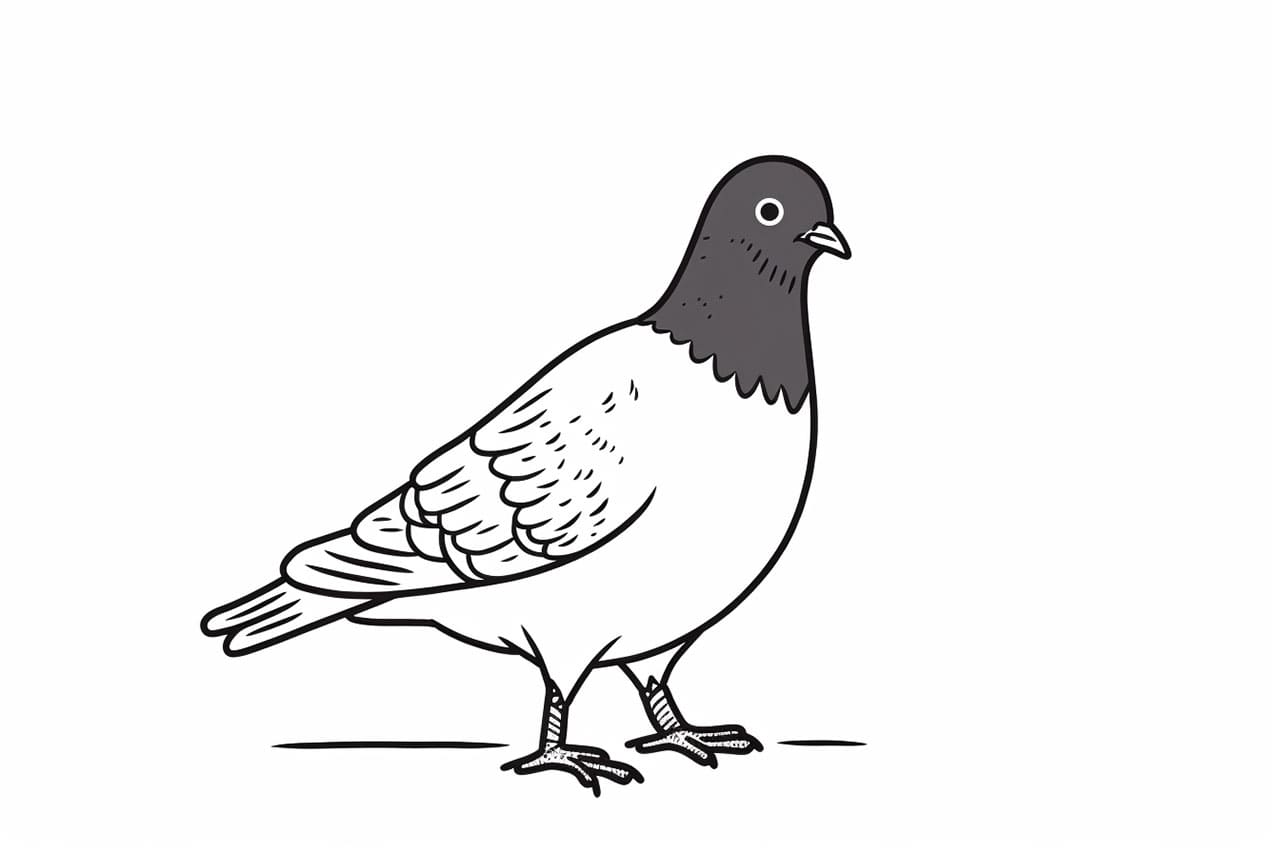
Welcome to this step-by-step guide on how to draw a pigeon. Whether you are a beginner or an experienced artist, this tutorial will help you capture the beauty of these fascinating birds on paper. Pigeons are known for their unique shapes and patterns, making them an interesting subject to draw. So, let’s get started and create our very own pigeon masterpiece!
Materials Required
Before we begin, let’s gather the materials you’ll need to complete this drawing:
- Drawing paper: Choose a smooth, heavyweight paper that is suitable for your preferred drawing medium.
- Pencils: Have a range of graphite pencils with different levels of hardness (2H, HB, 2B, 4B, and 6B) to achieve various tones and textures.
- Eraser: A kneaded eraser is recommended for its ability to lift graphite without smudging.
- Blending stump or tortillon: This tool will help you blend and soften the pencil marks to create a smooth and realistic texture.
With all your materials ready, let’s dive into the step-by-step process of drawing a pigeon.
Step 1: Basic Shapes and Proportions
Start by sketching the basic shapes that make up the pigeon’s body. Draw a circle for the head, an oval for the body, and a smaller oval for the abdomen. Pay attention to the proportions, ensuring that the body is slightly larger than the head. You can lightly sketch these shapes using your HB pencil.
Step 2: Outlining the Body
Using the basic shapes as a guide, begin outlining the body of the pigeon. Define the structure of the head, neck, and body with smooth and curved lines. Keep your lines light and loose at this stage, as you may need to make adjustments later. Take your time to capture the natural flow and posture of the pigeon.
Step 3: Adding Details to the Head
Focus on the pigeon’s head next. Sketch the beak by drawing a triangular shape extending from the front of the head. Then, add the eyes on either side of the head, paying attention to the size and placement. Pigeons have round, expressive eyes, so try to capture their lively nature. Use gentle curves to outline the beak and eyes, giving them a sense of depth.
Step 4: Feather Details and Texture
Now, it’s time to add texture and feather details to the pigeon’s body. Start by lightly sketching the wing shape, paying attention to the overlapping feathers. Draw short, curved lines to indicate the feathers’ direction. Gradually add more feathers to the body, focusing on the chest and abdomen areas. Observe the reference image or a real pigeon for guidance and try to replicate the pattern and texture of the feathers.
Step 5: Shading and Tonal Values
To add depth and dimension to your drawing, it’s important to incorporate shading and tonal values. Begin by identifying the light source in your reference image or imagine one from a specific direction. Use your knowledge of light and shadow to determine the areas of the pigeon that would be in light and those that would be in shadow.
Start by shading the areas that are in shadow using your 2B pencil. Apply light strokes in the direction of the feathers, gradually building up the value. Use a blending stump or tortillon to blend the shading and create a smoother transition between light and shadow areas. Add layers of shading and gradually darken the areas that require more depth and contrast.
Continue to refine the shading and contrast by using different grades of pencils. Use the harder pencils (2H, HB) for lighter areas and the softer ones (4B, 6B) for darker ones. Pay attention to the intricate details in the feathers and mimic their texture through careful shading and blending.
Step 6: Final Touches and Refinements
Once you’re satisfied with the overall shading and tonal values, take a step back and assess your drawing. Look for any areas that require adjustments or refinements. Add more details to the feathers if needed, and clean up any stray marks or smudges with a kneaded eraser. Continuously compare your drawing to the reference image to ensure accuracy and capture the essence of a pigeon.
Conclusion
Congratulations on completing your pigeon drawing! By following these step-by-step instructions and paying attention to the details, you have created a beautiful representation of a pigeon on paper. Remember, drawing is a skill that improves with practice, so keep exploring various subjects and techniques to enhance your artistic abilities. Now, go out and share your masterpiece with others!