Welcome to this drawing tutorial on how to draw a moon! Whether you’re an aspiring artist or just looking to explore your creative side, drawing a moon can be a fun and rewarding project. In this step-by-step guide, I will walk you through the process of drawing a realistic moon using simple techniques. So, grab your drawing supplies and let’s get started!
Materials Required
To draw a moon, you will need the following materials:
- Drawing paper: Use a smooth-surfaced paper that is suitable for your chosen drawing medium.
- Pencil: A graphite pencil with a soft lead (e.g., HB or B) will work well for sketching and shading.
- Eraser: Make sure to have a good quality eraser for correcting any mistakes.
- Blending tools: You can use a blending stump, tortillon, or even a cotton swab for blending and smudging.
- Soft pastels or charcoal: These drawing mediums work great for creating the dark shadows and details of the moon.
- Fixative (optional): If you want to preserve your finished drawing and prevent smudging, you can use a fixative spray.
Now that you have all the necessary materials, let’s begin drawing the moon!
Step 1: Draw the Moon’s Outline
Start by lightly sketching a circle on your drawing paper using a pencil. This will serve as the base for the moon. Don’t worry about making it too perfect at this stage; we will refine the shape later.
Step 2: Add Surface Divisions
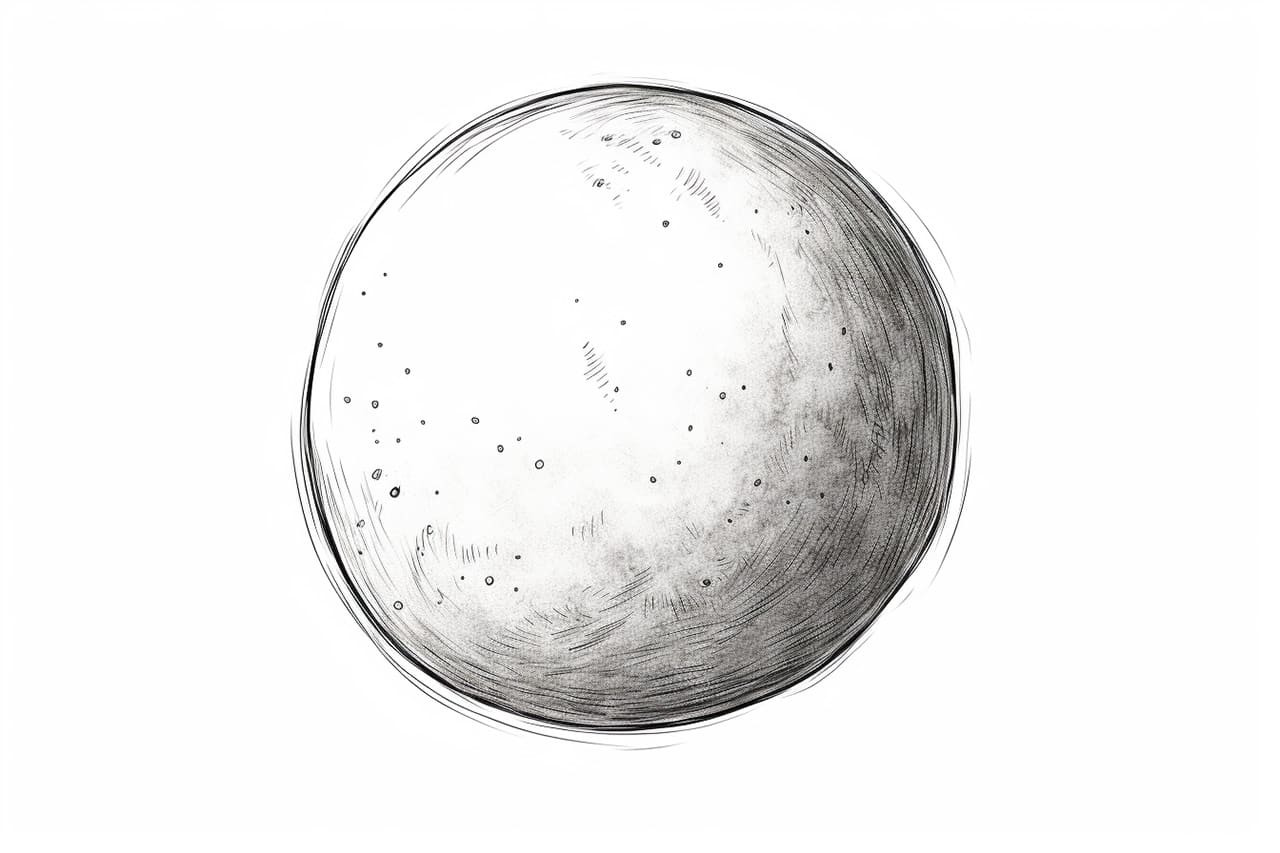
To give the moon a realistic appearance, add divisions on its surface. These divisions are called craters and they are formed from asteroid impacts. Begin by lightly drawing some circular shapes of different sizes and irregularities within the moon’s outline. Remember to vary their placement and sizes to create a more natural effect.
Step 3: Shade the Moon
Next, it’s time to add some shading to the moon. Start by identifying the light source. Since the moon is usually illuminated from the upper left side, imagine a light coming from that direction. Use your pencil to shade the right side of the moon darker, gradually getting lighter towards the left side. This will create a three-dimensional effect.
Step 4: Blending and Smudging
To achieve a smoother transition of shades, use a blending tool such as a blending stump or tortillon. Gently blend the shaded areas, but be careful not to smudge the highlights too much. You can also use a cotton swab to achieve a similar effect if you don’t have a blending tool.
Step 5: Add Highlights
Now, it’s time to add some highlights to make the moon appear more luminous. Leave some areas untouched or lightly erase them to create brighter spots. These highlights will indicate the parts of the moon that are directly illuminated by the sun.
Step 6: Enhance the Craters
To make the craters stand out, darken their edges and add shadow areas around them using a pencil. This will create depth and make them look more realistic. Remember to vary the pressure of your pencil to achieve different levels of darkness and shading.
Step 7: Deepen the Shadows
To further enhance the three-dimensional look of the moon, deepen the shadows on the left side. Use a soft pastel or charcoal to add darker tones to the shaded areas. Gradually build up the layers of shading for a more realistic effect. Take your time and blend the shadows with a blending tool as needed.
Step 8: Refine the Details
Now that you have the basic structure of the moon, take a step back and evaluate your drawing. Look for any areas that need refinement or additional details. Pay attention to the overall shape, the placement of the craters, and the balance of light and shadows.
Step 9: Finalize the Drawing
Once you are satisfied with your drawing, you can finalize it by darkening the outlines and refining any remaining details. Use your eraser to gently remove any unwanted pencil marks or smudges. If you want to preserve your drawing, consider using a fixative spray according to the manufacturer’s instructions.
Congratulations! You have successfully learned how to draw a realistic moon. With practice and experimentation, you can further develop your skills and create stunning lunar landscapes.
Conclusion
In this step-by-step tutorial, we have explored the process of drawing a moon using simple techniques. From sketching the outline to adding shading and details, each step contributes to the final realistic effect. Drawing a moon can be a fun and relaxing activity, allowing you to explore your creativity and create unique artworks.
So, grab your drawing supplies and start creating your own moon drawings today. With patience and practice, you will surely master the art of drawing moons in no time!