Smoothies are a popular and delicious beverage choice for many people. From refreshing fruit blends to nutrient-packed green smoothies, there are endless possibilities when it comes to creating a smoothie masterpiece. But have you ever thought about drawing a smoothie? In this step-by-step tutorial, we will guide you through how to draw a smoothie. So, grab your pencils, and let’s get started!
Materials Required
To draw a smoothie, you will need the following materials:
- Paper: Start with a clean sheet of paper that is suitable for drawing. Opt for a thicker paper if you prefer using markers or wet mediums.
- Pencils: Use a set of drawing pencils with a range of graphite hardness, such as HB, 2B, 4B, and 6B. These will allow you to create different shades and textures in your drawing.
- Eraser: Have a good quality eraser on hand to correct any mistakes or lighten areas of your drawing.
- Blending tools: Consider using blending stumps, tortillions, or even a cotton swab to smooth out graphite and create subtle gradients.
- Colored pencils (optional): If you want to add a pop of color to your drawing, colored pencils can be a great addition.
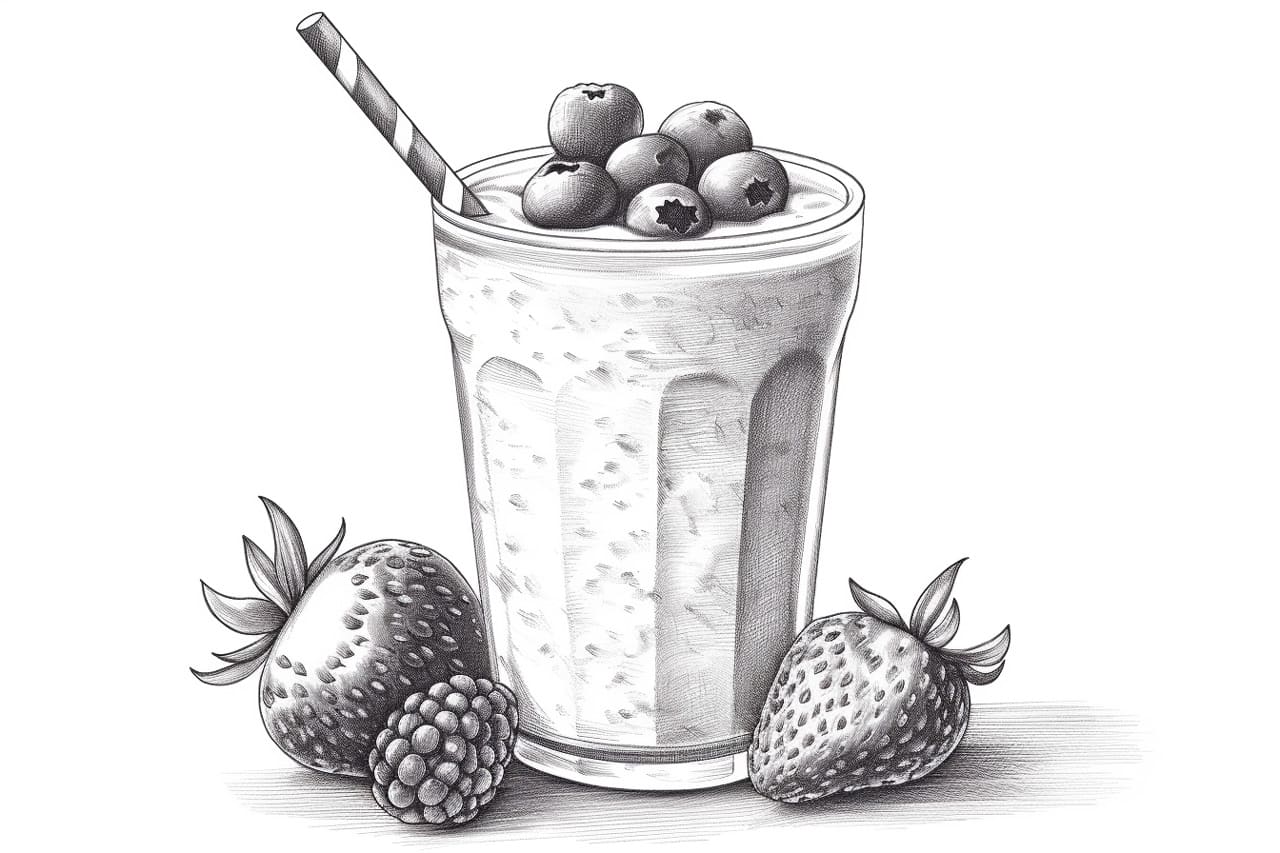
- Reference image: Find a high-resolution photo of a smoothie that you like. This will serve as your reference guide throughout the drawing process.
Now that you have gathered your materials, let’s dive into the step-by-step instructions for drawing a smoothie.
Step 1: Sketch the Outline
Start by lightly sketching the basic outline of your smoothie using an HB pencil. Pay attention to the shape and proportions of the glass or cup in which the smoothie is served. Take your time at this stage to ensure accuracy in your drawing.
Step 2: Add the Details
Once you have the basic outline, start adding more details to your smoothie. Begin by sketching the rim and base of the glass. Then, outline the fruit or toppings that are visible on top of the smoothie. Take note of the angles and shapes of these elements, as they will add a realistic touch to your drawing.
Step 3: Shade the Glass
Next, focus on shading the glass or cup of your smoothie. Use a 2B or 4B pencil to create the gradient effect that glass often has. Start from the top of the glass, where it is usually lighter, and gradually darken as you move towards the bottom. Use long, smooth strokes to achieve a realistic texture.
Step 4: Draw the Straw
If your smoothie is served with a straw, now is the time to add it to your drawing. Use a combination of straight and curved lines to depict the straw’s shape realistically. Pay attention to any bends or folds in the straw and draw them accordingly.
Step 5: Render the Fruit and Toppings
Now, let’s focus on the delicious fruit and toppings that adorn the smoothie. Take your time to carefully observe the reference image and recreate the shapes and textures of the ingredients. Use a combination of light and dark shading to give them dimension and make them look more realistic.
Step 6: Blend and Smooth
To create a smooth and polished look in your drawing, use a blending stump, tortillion, or a cotton swab to blend and smooth out any visible pencil strokes. This will help create a seamless transition between different shades and textures in your smoothie drawing.
Step 7: Add Color (Optional)
If you want to take your smoothie drawing to the next level, consider adding color using colored pencils. Choose colors that match the fruits and toppings in your smoothie. Use light layers at first and gradually build up the intensity as needed. Blend the colors smoothly using a blending tool or by layering different shades.
Conclusion
Congratulations! You have successfully learned how to draw a delicious and realistic smoothie. By following these step-by-step instructions and using the right materials, you can create stunning smoothie artwork that will make anyone’s mouth water. So, grab your drawing supplies and start sketching your favorite fruity concoctions. Happy drawing!