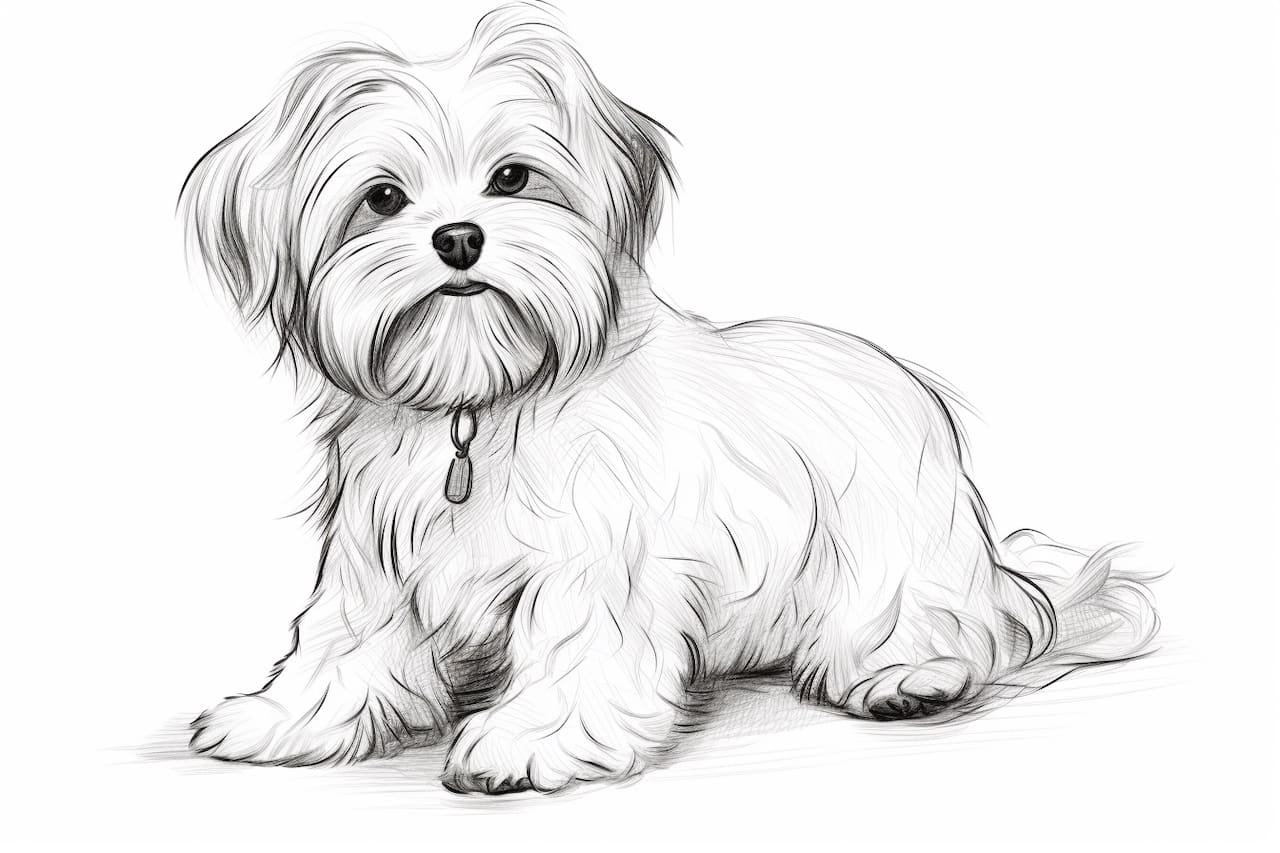
Are you a dog lover and an aspiring artist? If so, you’re in luck! In this step-by-step guide, I will teach you how to draw a Maltese, one of the most beloved and adorable dog breeds. The Maltese is known for its long, silky white coat and expressive eyes, making it a perfect subject for your art. So, grab your drawing supplies and let’s get started!
Materials Required
Before we begin, make sure you have the following materials ready:
- Drawing paper: Choose a high-quality paper that is suitable for your preferred drawing medium.
- Pencils: You’ll need a range of graphite pencils, such as HB, 2B, 4B, and 6B, for shading and adding details.
- Eraser: A kneaded eraser or a soft gum eraser will be handy for correcting any mistakes.
- Blending tools: You can use a blending stump or a piece of tissue paper to achieve smooth shading.
- Reference image: Find a clear and high-resolution photo of a Maltese to help you with proportions and details.
- Optional: Colored pencils or markers, if you wish to add color to your drawing.
Now that you have all your materials ready, let’s start drawing!
Step 1: Outline the Head and Body
Begin by drawing a circle for the head. Then, add a slightly curved line below to represent the body. Remember that Maltese dogs have a compact and elegant body shape, so keep your lines gentle and graceful.
Step 2: Sketch the Facial Features
Draw two intersecting lines across the head circle. These will help you place the eyes, nose, and mouth accurately. Next, sketch two small almond shapes for the eyes, leaving some space between them. Add a curved line below the eyes for the nose.
Step 3: Define the Nose and Mouth
Refine the shape of the nose by adding a small triangular shape to the curved line. Then, draw a smiling mouth just below the nose. Pay attention to the proportions, as Maltese dogs have a small and delicate muzzle.
Step 4: Add the Ears
Maltese dogs have large, droopy ears that hang down on the sides of their head. Sketch two long, curved lines extending from the top of the head to represent the ears. Make sure the tips of the ears are slightly rounded.
Step 5: Draw the Eyes
Using the intersecting lines as a guide, draw the eyes in more detail. Add small circles inside the almond shapes to depict the pupils. Don’t forget to leave a white highlight in each eye to make them look more lively and realistic.
Step 6: Outline the Face and Neck
Now, carefully outline the face and neck of the Maltese, following the initial shape you sketched. Pay attention to the contours and curves, as they contribute to the unique charm of this breed. Add some fur details, but keep the lines light and loose.
Step 7: Sketch the Front Legs and Paws
Draw two slightly curved lines extending down from the body to represent the front legs. Then, add small oval shapes at the end of each leg for the paws. Remember to keep the proportions and angles consistent with the reference image.
Step 8: Complete the Body and Tail
Extend the lines from the body to create the hind legs. Connect them with a curved line at the bottom to form the belly. Finally, draw a long, fluffy tail that curves gracefully upwards.
Step 9: Add Fur Texture
Now that you have the basic structure of the Maltese, it’s time to add some texture to its beautiful coat. Use short, overlapping strokes to create the illusion of soft and fluffy fur. Pay attention to the direction of the strokes, following the contours of the body.
Step 10: Refine and Shade
Take a step back and evaluate your drawing so far. Make any necessary adjustments to the proportions or shapes. Once you’re satisfied with the overall look, start shading to add depth and volume to your artwork. Use darker graphite pencils, like 4B or 6B, to create shadows in areas where the fur has more volume, such as under the chin or between the legs.
Step 11: Optional – Add Color
If you prefer to add some color to your drawing, now is the time to do it! Using colored pencils or markers, carefully layer light tones over the white areas of the Maltese’s coat. Pay attention to the subtle shades and variations in color that give the coat its characteristic appearance.
Conclusion
Congratulations! You’ve successfully learned how to draw a Maltese, capturing its elegance and charm on paper. Remember to practice regularly and experiment with different techniques to continue improving your artistic skills. With time and dedication, you’ll be able to create stunning drawings of other dog breeds as well. Happy drawing!