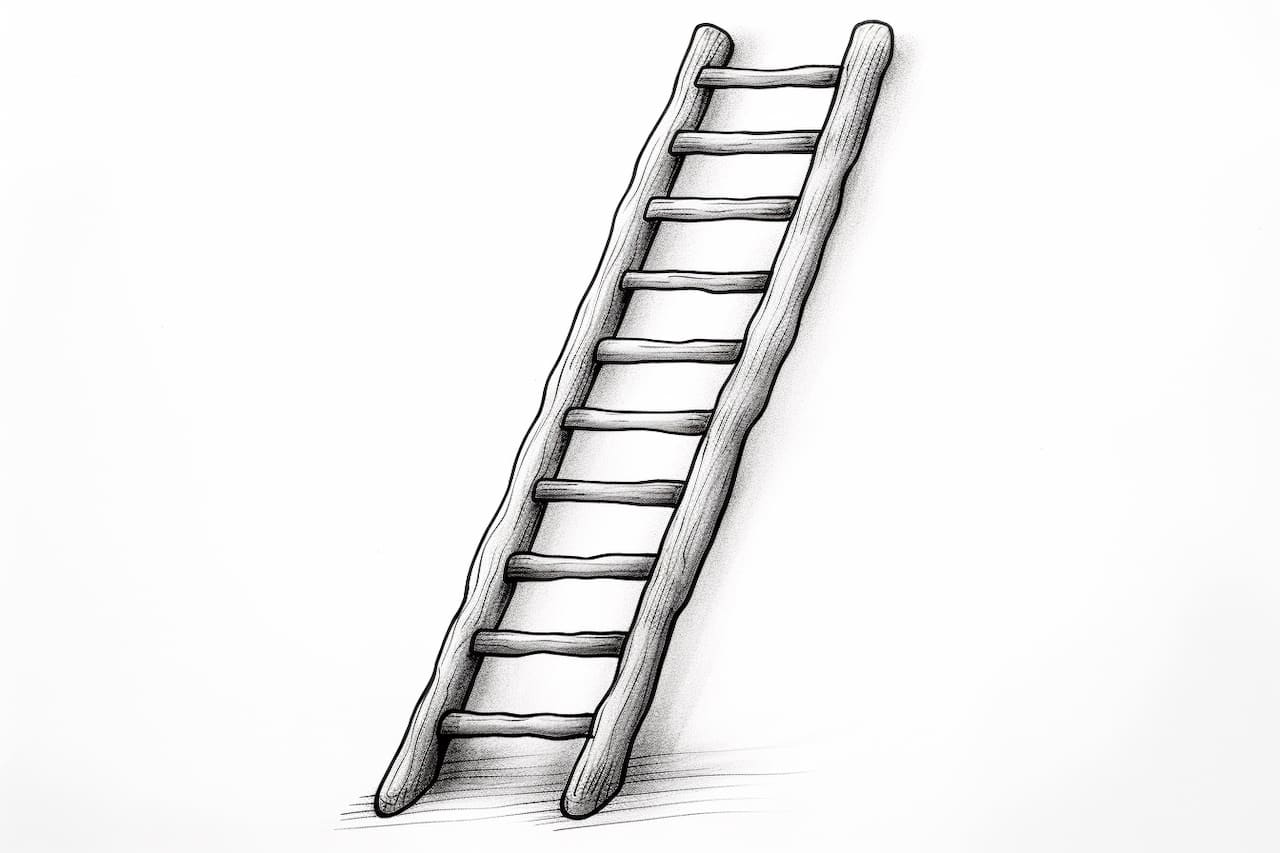
Whether you are an aspiring artist or simply want to add a ladder to your artwork, learning how to draw a ladder can be a valuable skill. This step-by-step guide will teach you how to draw a ladder in a clear and concise way. By following these instructions, you’ll be able to create a realistic ladder in no time.
Materials Required
Before we start, let’s gather the materials you’ll need for this drawing:
- A pencil
- Drawing paper
- An eraser
- A ruler
Now that we have everything we need, let’s dive into the steps!
Step 1: Draw the Uprights
Start by drawing two vertical lines parallel to each other. These lines will serve as the uprights of the ladder. Make sure to leave some space between the lines, as this will be where the rungs of the ladder will go.
Step 2: Add the Rungs
Draw horizontal lines across the uprights to represent the rungs of the ladder. Start from the top of one upright and draw a line to the corresponding height on the other upright. Continue drawing lines across the entire length of the ladder, leaving equal spacing between each rung.
Step 3: Refine the Shape
Once you have drawn the basic shape of the ladder, take a look at it and make any necessary adjustments. Use your ruler to straighten any lines that are not completely vertical or horizontal. This will help give your ladder a more polished and professional appearance.
Step 4: Add Details
To make your ladder look more realistic, you can add some additional details. For example, you can draw small circles or squares at the ends of each rung to represent the connecting joints. You can also draw diagonal lines on each rung to create a more textured appearance.
Step 5: Shade and Shadow
To add depth to your ladder, you can create shading and shadows. Decide on the direction of the light source and use your pencil to darken one side of the ladder, leaving the opposite side lighter. You can also add shading to the individual rungs to create a sense of depth.
Step 6: Erase Unnecessary Lines
Once you are satisfied with the overall shape and details of your ladder, carefully erase any unnecessary guidelines. Be sure to erase the initial lines that you drew for the uprights and rungs, as they are no longer needed.
Step 7: Final Touches
Take a moment to review your drawing. Look for any areas that may need additional shading or refining. Make any necessary adjustments until you are happy with the final result.
Conclusion
Drawing a ladder is a simple yet effective way to enhance your artwork or learn more about perspective and proportions. By following these step-by-step instructions and using the suggested materials, you will be able to create a realistic ladder drawing. Remember to take your time, practice, and have fun with it. Happy drawing!