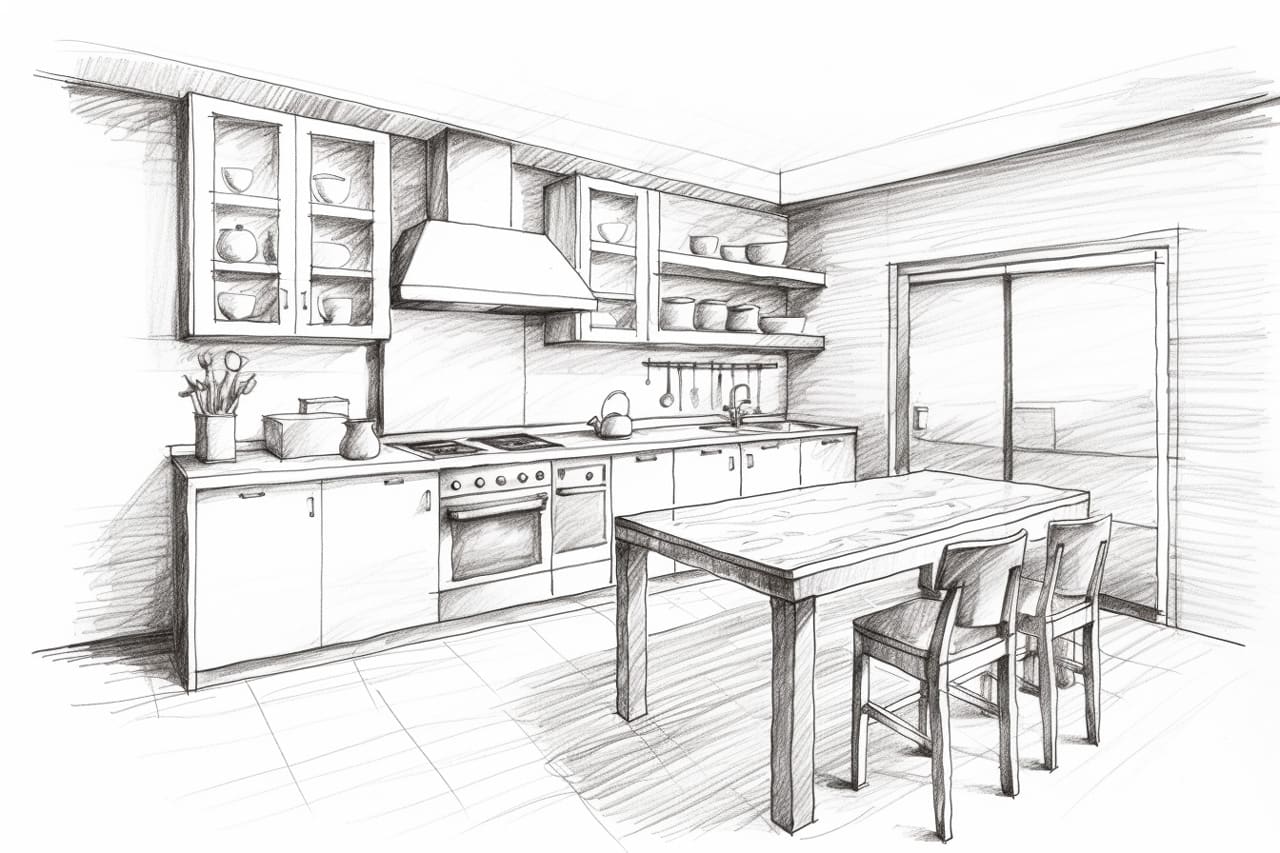
Welcome to this step-by-step guide on how to draw a kitchen. Whether you are an aspiring artist or simply looking to enhance your drawing skills, this tutorial will take you through the process of creating a realistic and detailed kitchen drawing. From the layout to the appliances, we will cover all the essential elements that will bring your kitchen to life on paper.
Materials Required
To get started, gather the following materials:
- Drawing paper
- Pencil (HB or 2B)
- Eraser
- Ruler
- Compass (optional)
- Colored pencils or markers (optional)
Now that you have your materials ready, let’s dive into creating your kitchen drawing!
Step 1: Plan the Layout
Before we begin drawing, it’s important to plan the layout of your kitchen. This will help you visualize how the elements will fit together on paper. Consider factors such as the shape and size of the kitchen, the placement of appliances, and any additional features you want to include.
Step 2: Draw the Walls
Using your ruler and pencil, lightly draw the outline of the walls of your kitchen. Make sure to accurately represent the shape and size of your planned layout. If there are any windows or doors, add them at this stage.
Step 3: Add the Flooring
Draw the flooring of the kitchen using horizontal and vertical lines to create a tiled or wooden effect. Pay attention to perspective and ensure that the lines converge towards a vanishing point if you want to create a three-dimensional look.
Step 4: Sketch the Cabinets and Countertops
Next, draw the kitchen cabinets and countertops. Start by drawing the basic shapes and outlines, considering the placement within the layout. Use straight lines and gentle curves to create a realistic representation. Add details such as cabinet handles and countertop edges.
Step 5: Outline the Appliances
Now it’s time to draw the appliances in your kitchen. Begin by outlining the refrigerator, stove, and sink. Pay attention to the proportions and placement of each appliance within the kitchen layout. Use straight lines for the general shape and add specific details such as buttons and knobs.
Step 6: Add Details and Accessories
To make your kitchen drawing more realistic, add details and accessories. This could include items such as a kitchen island, chairs, a table, or decorative elements like plants or artwork on the walls. Take your time to sketch these elements accurately and in proportion to the rest of the kitchen.
Step 7: Shade and Add Texture
To give your kitchen drawing depth and dimension, it’s important to add shading and texture. Use your pencil to create light and dark areas, paying attention to the placement of light sources. Consider the materials of different elements in the kitchen, such as the glossy surface of appliances or the matte finish of wooden cabinets.
Step 8: Optional – Add Color
If you prefer a colored kitchen drawing, this is the step to bring it to life! Use colored pencils or markers to add hues to your drawing. Consider the color scheme you want to use and apply it to each element of the kitchen. Take your time with this step to achieve a vibrant and cohesive look.
Conclusion
Congratulations on completing your kitchen drawing! By following these step-by-step instructions, you have learned how to plan the layout, draw the walls, add the flooring, sketch the cabinets and appliances, add details and accessories, and bring the drawing to life with shading and color. Remember to practice regularly to further improve your drawing skills. Enjoy the process of creating your own unique kitchen designs on paper!