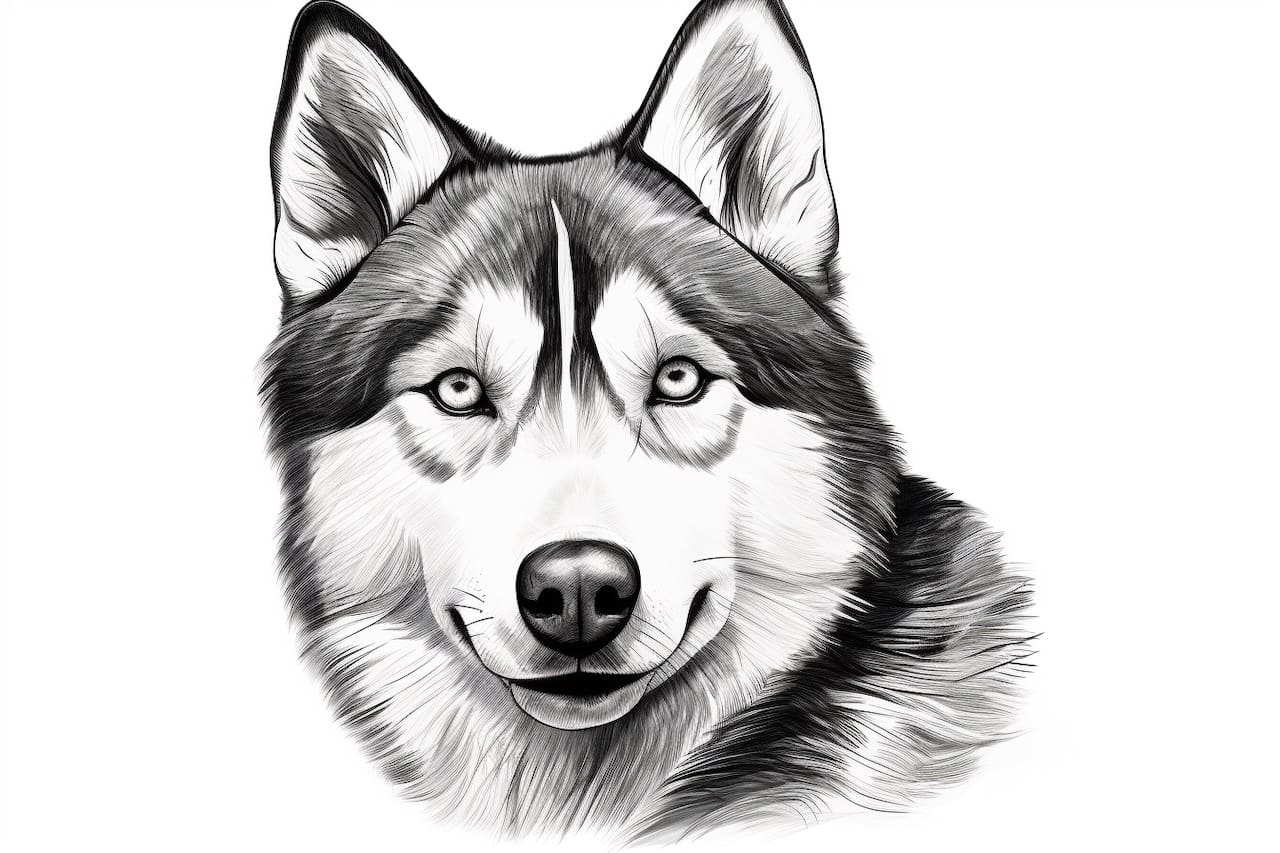
Welcome to this step-by-step guide on how to draw a husky face! Huskies are known for their striking features, including their piercing blue eyes and distinctive facial markings. Whether you’re an aspiring artist or just looking for a fun artistic activity, this tutorial will walk you through the process of capturing the essence of a husky’s face on paper. So, grab your drawing materials and let’s get started!
Materials Required
To begin this drawing tutorial, you will need the following materials:
- Drawing paper
- Pencils (preferably a range of graphite pencils – 2B, 4B, and 6B)
- Eraser
- Blending stump or cotton swabs (optional)
- Reference image of a husky face (helpful but not essential)
Step 1: Basic Outline
Start by lightly sketching a rough outline of the husky’s head. Use simple shapes, such as circles and ovals, to establish the general proportions. Pay attention to the placement of the ears, eyes, and snout. Remember, this initial outline is just a guide, so don’t worry about getting it perfect.
Step 2: Add Details to the Face
Now that you have a basic framework, it’s time to add some details to the husky’s face. Start by sketching the eyes, which are one of the most distinctive features of a husky. Draw two almond-shaped eyes, leaving some space between them. Inside the eyes, add smaller circles for the pupils. Pay close attention to the direction the husky is looking in your reference image, as this will affect the placement and angle of the eyes.
Next, sketch the outline of the snout beneath the eyes. Huskies have a long, slender snout, so make sure to capture that in your drawing. Add a small triangular shape at the tip of the snout to indicate the nose. Overlapping the snout, sketch a curved line to represent the mouth.
Step 3: Focus on the Eyes
Now that the basic facial features are in place, it’s time to give the eyes more depth and character. Start by darkening the pupils, leaving a small highlight to give the eyes a lively appearance. Then, carefully shade the area around the eyes to add shadows and create a three-dimensional effect. Use lighter shading around the highlight and gradually darken it as you move outward.
To further enhance the realism, add some whisker holes on either side of the snout. These are small, circular indentations that can be lightly suggested with a few subtle dots. Be careful not to overdo it – simplicity often yields better results.
Step 4: Define the Facial Markings
Huskies are known for their beautiful facial markings, which often include distinctive patterns around the eyes and on the forehead. Take a closer look at your reference image and carefully sketch these markings. Use gentle strokes to indicate the fur texture, paying attention to the direction in which the fur grows.
For a more polished look, you can use a blending stump or a cotton swab to gently blend and soften the shading. This will create a smoother transition between light and dark areas, giving your drawing a more realistic appearance.
Step 5: Refine the Snout and Mouth
Now that the eyes and facial markings are complete, it’s time to refine the snout and mouth. Begin by darkening the nose and adding some texture to it. Husky noses are usually black, but they can vary in color, so adjust accordingly. Use short, light strokes to imply the texture of the fur on the snout.
Next, work on the mouth by adding more definition to the lips and tongue if visible in your reference image. Pay attention to subtle details such as wrinkles or creases around the mouth, as these add character to your drawing.
Step 6: Add Fur Texture
To create a realistic husky drawing, it’s important to add texture to the fur. Start by lightly sketching the direction of the fur using short, outward strokes. Huskies have a dense, double-layered coat, so keep that in mind as you draw. Gradually build up the layers, using a range of graphite pencils to achieve varying levels of darkness.
Take your time as you add the fur texture, paying attention to the contours of the husky’s face. Remember, fur doesn’t always follow a straight pattern, so allow for some organic variation in your strokes. Experiment with different pencil pressures to add depth and dimension to your drawing.
Step 7: Final Touches
Now that you’ve captured the main features and fur texture, take a step back and assess your drawing. Look for any areas that need refinement or additional shading. Use your eraser to lighten or correct any mistakes, paying particular attention to highlights on the fur or in the eyes.
Feel free to add any finishing touches or details that will enhance your drawing. For example, you can add a hint of color to the eyes by using colored pencils or watercolor pencils. This can bring an extra level of depth and realism to your husky drawing.
Conclusion
Congratulations! You have successfully learned how to draw a husky face. By following the step-by-step instructions, you were able to capture the unique features and character of this beautiful breed. Remember, practice is key to improving your drawing skills, so don’t be discouraged if your first attempt isn’t perfect. Keep practicing, and soon you’ll be able to create stunning husky drawings.
So, grab your drawing materials and give it a try. Unleash your creativity and have fun bringing huskies to life on paper!