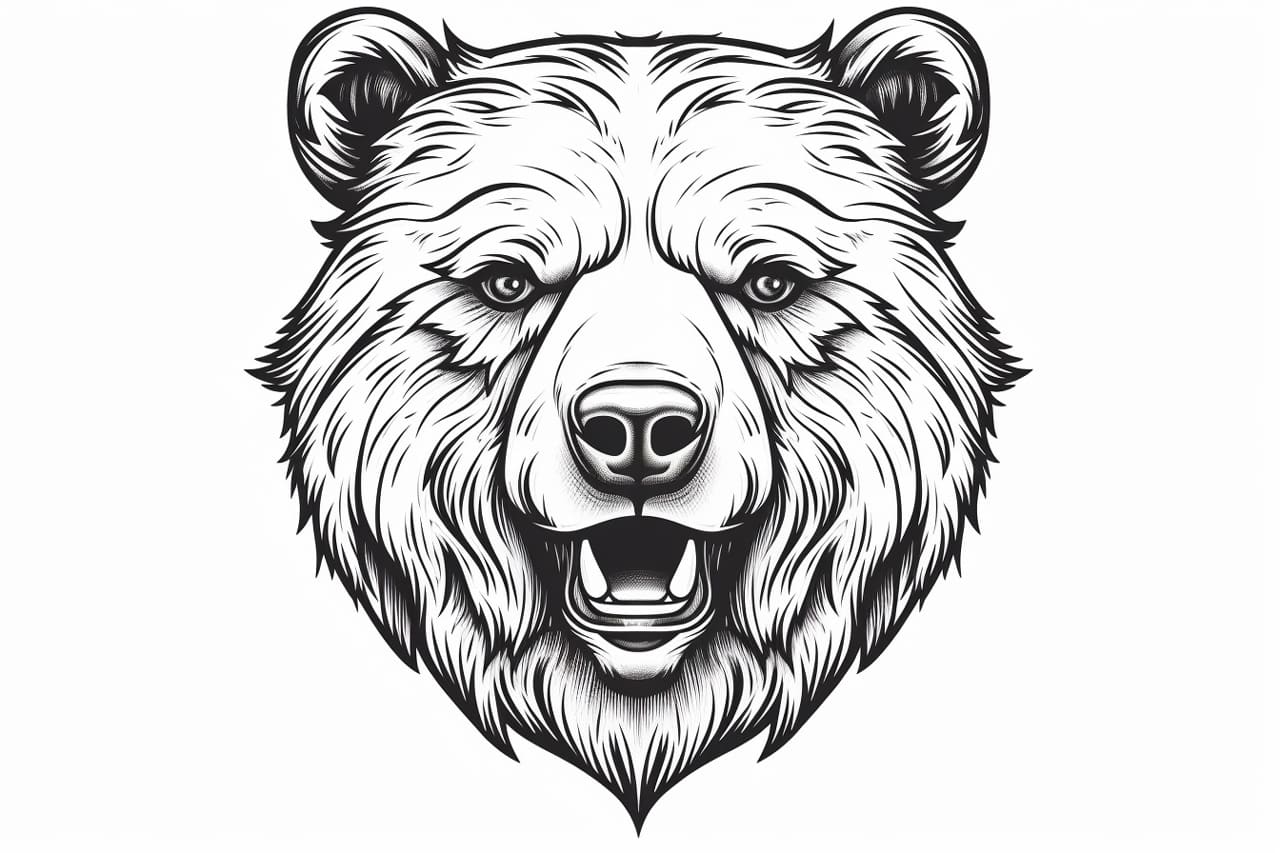
In this tutorial, we will learn how to draw a bear’s face step by step. Whether you’re an experienced artist or a beginner, this guide will help you create a realistic and detailed portrayal of a bear’s face. Grab your drawing tools and let’s get started!
Materials Required
Before we begin, make sure you have the following materials ready:
- Pencil – Get a selection of pencils with different lead hardness (e.g., 2B, 4B, 6B).
- Paper – Use a sheet of drawing paper or sketchbook.
- Eraser – Have a kneaded or vinyl eraser for corrections.
- Blending Tools – Keep some blending stumps or tortillions handy for shading and blending.
Step 1: Basic Outline
Start by drawing a circle in the center of your paper. This will be the bear’s head. Next, add two smaller circles for the ears on top of the head. Make sure the sizes are proportionate to the head. Place two dots below the head for the bear’s nose and mark a horizontal line slightly below the nose for the mouth.
Step 2: Eyes and Muzzle
Draw two almond-shaped eyes inside the head, slightly above the horizontal line. Add a small dot inside each eye to indicate the pupils. Below the eyes, sketch a rounded triangle shape for the muzzle. Connect it to the head by drawing a curved line on each side.
Step 3: Nose and Mouth
Refine the shape of the bear’s nose by adding more details. Draw two small curved lines on each side of the nose to create nostrils. Then, give the bear a smiling mouth by curving the line below the nose upwards on each side, finishing it with a slight curve downwards towards the end.
Step 4: Fur Details
To add texture to the bear’s face, start by drawing small, curved lines around the head. These lines will represent the fur. Pay close attention to the direction of the lines, as they should follow the contours of the bear’s face. Add more fur details around the ears and muzzle as well.
Step 5: Ears and Facial Features
Refine the shape of the bear’s ears by adding more details and fur texture. You can make the edges of the ears slightly jagged for a more realistic look. Add some fur lines within the ears as well. Then, draw a thin eyebrow line above each eye, curving slightly downwards towards the outer edge of the head.
Step 6: Shading
Now it’s time to add some shading to give our drawing more depth. Start by identifying the light source. Imagine where the light is coming from and shade the opposite side of the face accordingly. Use a soft pencil (e.g., 2B) for shading. Gradually build up the darkness by layering the pencil strokes, especially in the areas that have more shadow.
Step 7: Highlighting and Blending
To create a more realistic look, add highlights by erasing small areas where the light would hit the face. This will make the drawing appear more three-dimensional. Use a kneaded eraser for this, as it can be shaped to create different highlight sizes and shapes. Next, use a blending stump or tortillon to blend the shading and highlights smoothly, giving the drawing a soft and realistic appearance.
Step 8: Final Details
Take a step back and evaluate your drawing. Identify any areas that need refinement or adjustment. Add more fur details or refine the existing ones to make the drawing more intricate. Pay attention to all the small details, such as the texture of the fur, the shape of the eyes, and the contours of the nose and mouth. Make any necessary corrections to achieve the desired result.
Conclusion
Congratulations! You’ve successfully learned how to draw a bear’s face. By following these step-by-step instructions, you were able to create a realistic and detailed depiction of a bear’s face. Remember, practice makes perfect, so don’t be afraid to experiment and try different techniques. Keep refining your skills, and soon you’ll be able to draw bears and other animals with confidence. Happy drawing!