Drawing the human body can be both challenging and rewarding. One important aspect of anatomical drawing is understanding how to accurately depict the rib cage. The rib cage not only provides protection for our internal organs, but it also plays a crucial role in our posture and overall body structure. In this step-by-step tutorial, we will explore the process of how to draw a rib cage in a clear and concise manner. So grab your drawing materials and let’s get started!
Materials Required
Before we begin, make sure you have the following materials on hand:
- A sketchbook or drawing paper
- Pencils of various hardness (B, HB, and 2B)
- An eraser
- A ruler
- Optional: Colored pencils or markers for shading
Step 1: Understanding the Structure
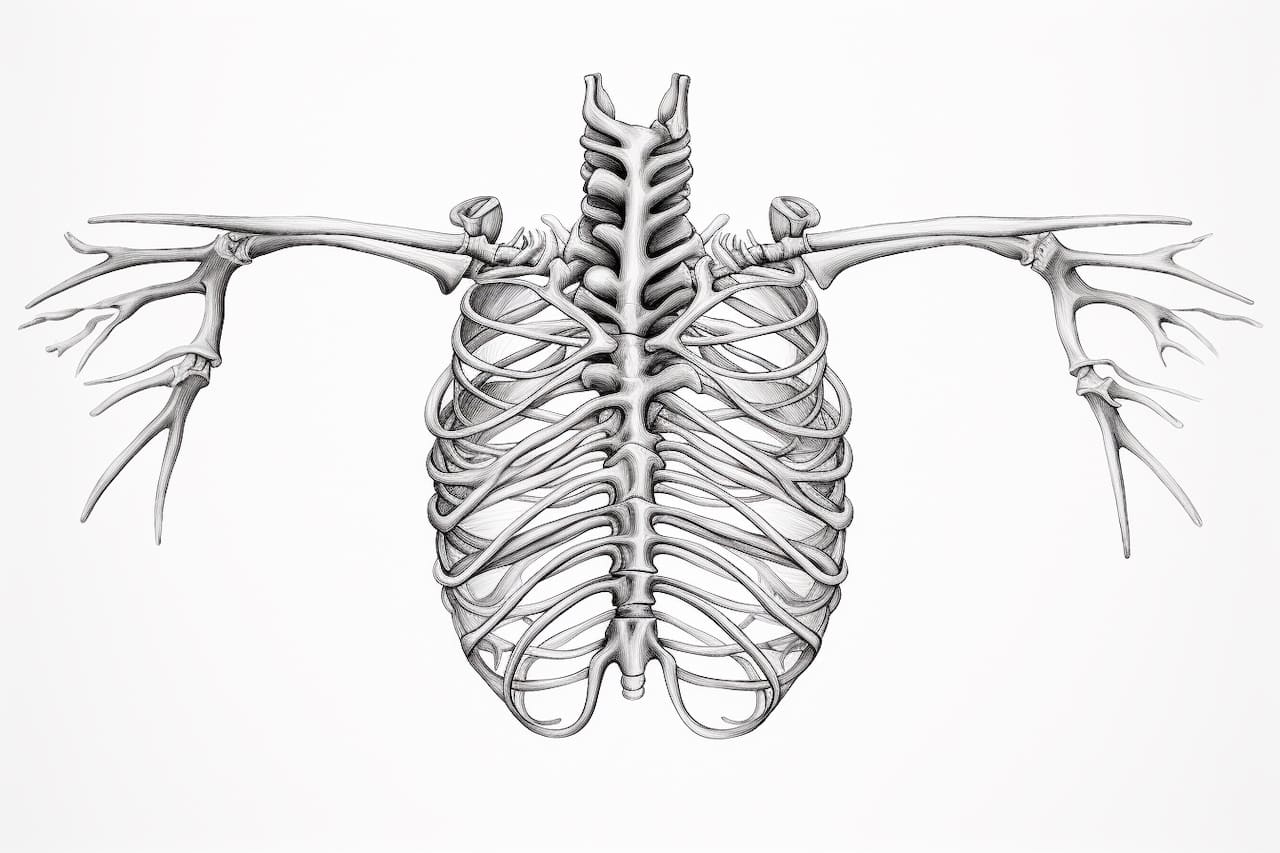
To successfully draw a rib cage, it’s essential to have a basic understanding of its structure. The rib cage is composed of twelve pairs of ribs that connect to the spine at the back and to the sternum (breastbone) at the front. The top seven pairs of ribs are attached directly to the sternum, while the remaining pairs are connected indirectly or float freely.
Step 2: Start with the Spine
Begin by drawing a vertical line to represent the spine. This line will serve as the central axis for your rib cage. Use a ruler to ensure the line is straight and extends from the top to the bottom of your paper.
Step 3: Outline the Sternum
Next, draw a horizontal line slightly below the top of the spine. This line will serve as the top boundary of the sternum. Then, extend two angled lines from the ends of the horizontal line, forming an inverted “V” shape. Connect the ends of these lines with a slightly curved horizontal line, completing the outline of the sternum.
Step 4: Sketch the Ribs
To draw the ribs, start by extending pairs of curved lines from the spine, gradually getting longer as you move outward. These lines should be slightly angled downward and slightly curved to mimic the shape of the ribs. Remember to leave enough space between each pair of ribs to maintain accuracy.
Step 5: Add Details
Now it’s time to add more details to your rib cage drawing. Begin by lightly sketching the outline of each individual rib. Pay attention to the slight curvature and tapering of the ribs as they extend from the spine to the sternum.
Step 6: Define the Sternum
Refine the outline of the sternum by adding more definition and detail. The sternum consists of three parts: the manubrium (upper portion), the body (middle portion), and the xiphoid process (lower pointed portion). Use curved lines to represent the contours of these different sections.
Step 7: Refine and Erase
Take a step back and assess your drawing so far. Use an eraser to carefully remove any unnecessary lines or mistakes. This will help create a clean and polished look for your rib cage drawing.
Step 8: Add Shadows and Shading
To add depth and dimension to your rib cage drawing, consider adding shadows and shading. Determine the direction of the light source and use a darker pencil or colored pencils to create shading on the undersides of the ribs and the contours of the sternum. Gradually build up the shadows and blend them with a blending tool or your fingertip for a more realistic effect.
Step 9: Finalize the Drawing
Once you are satisfied with the shadows and shading, go over your drawing with bolder lines to define the rib cage’s structure. Add any additional details or adjustments needed to make your drawing more accurate and refined.
Conclusion
Drawing a rib cage may seem daunting at first, but by breaking down the process into simple steps, you can achieve impressive results. Remember to take your time, observe the structure carefully, and make adjustments as necessary. With practice, you’ll develop the skills needed to draw the human body with confidence. So grab your drawing materials and start honing your artistic skills by drawing a realistic rib cage!