Are you interested in learning how to draw the majestic beauty of a horsehead? Look no further! In this tutorial, I will guide you through the process of how to draw a horsehead step by step, allowing you to create a stunning representation of this remarkable creature. So, grab your pencils and let’s get started!
Materials Required
Before we begin, make sure you have the following materials:
- Paper: It’s best to use a sturdy drawing paper that can hold various pencil strokes without tearing.
- Pencils: Select a range of graphite pencils, such as HB, 2B, 4B, and 6B, to achieve different shades and textures.
- Eraser: Have a kneaded eraser handy for easy corrections and highlights.
- Pencil Sharpener: Keep your pencils sharp for precise lines and details.
- Blending Stump: This tool is optional but can be useful for creating smooth gradients and blending pencil strokes.
Now that you have everything you need, let’s dive into the step-by-step process of drawing a horsehead.
Step 1: Basic Shapes
To establish the overall proportions of your horsehead, begin by sketching a circle for the head and a small oval for the muzzle. These basic shapes will serve as your guide throughout the drawing process. Don’t worry about perfection at this stage; these are just rough guidelines.
Step 2: Outline the Head
Using the basic shapes as a reference, start outlining the contours of the horsehead. Pay attention to the curves and angles, making sure they resemble the unique structure of a horse’s head. Focus on capturing the general shape rather than intricate details.
Step 3: Add Facial Features
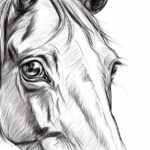
Now it’s time to add the essential facial features of the horse. Start by sketching the eyes, which are typically almond-shaped. Pay attention to the position, size, and angle of the eyes, as they are crucial for capturing the horse’s expression. Next, draw the nostrils and the mouth, keeping in mind the proportions of the muzzle.
Step 4: Define the Mane and Ears
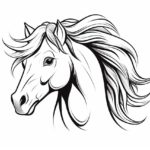
The mane is one of the most distinctive features of a horse. Begin by drawing the outline of the mane, keeping it flowing and natural-looking. Add individual strands to give it texture and volume. Then, draw the ears, which can be positioned erect or relaxed depending on the horse’s mood.
Step 5: Refine the Details
Now that you have the basic structure in place, start refining the details of the horsehead. Pay particular attention to the shape and proportion of the eyes, adding depth and shading to create a sense of realism. Add the eyelashes and eyebrows delicately for a more lifelike appearance. Refine the nostrils and mouth by adding shadows and highlights.
Step 6: Add Shadows and Highlights
To give your drawing depth and dimension, it’s essential to add shading. Observe the light source and imagine how it falls on the horse’s head. Use your pencils to create varying shades, from dark to light, to mimic the play of light and shadows. Pay attention to the contours of the horse’s head and add highlights to create a realistic and three-dimensional effect.
Step 7: Final Touches
Take a step back and assess your drawing. Are there any areas that need adjustment or refinement? Use your eraser to make any necessary corrections or highlight certain areas. Take your time to ensure every detail is captured to your satisfaction.
Conclusion
Congratulations on completing your horsehead drawing! By following these step-by-step instructions, you have learned how to capture the grace and beauty of this magnificent creature on paper. Remember, practice makes perfect, so keep honing your skills by drawing horses from different angles and in various poses. With time and dedication, you will master the art of horsehead drawing.
I hope you found this tutorial helpful and enjoyable. Now go grab your pencils and start your own horsehead masterpiece!

