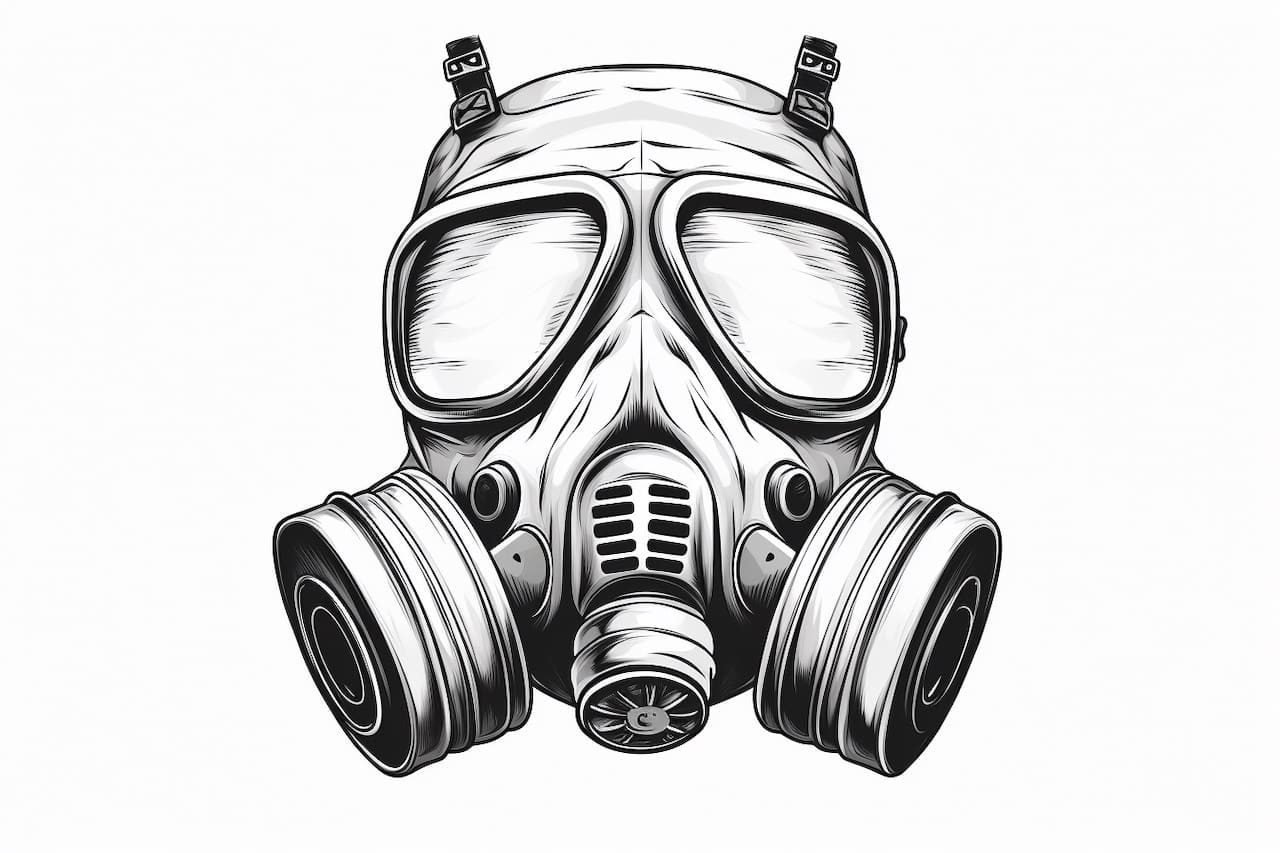
Gas masks are fascinating pieces of protective equipment that have been used in various industries and military operations. Drawing a gas mask can be a great way to explore your artistic skills and create a unique and detailed illustration. In this step-by-step guide, we will walk you through the process of drawing a gas mask, from the initial sketch to the final touches. So grab your pencils, erasers, and paper, and let’s get started!
Materials Required
To draw a gas mask, you will need the following materials:
- Pencil: Use a set of drawing pencils ranging from 2H to 6B for different levels of darkness and shading.
- Eraser: A kneaded eraser is ideal for easily correcting mistakes and lightening pencil marks.
- Paper: Choose a medium-weight drawing paper that can handle graphite shading and erasing.
Now that you have all your materials ready, let’s begin the drawing process!
Step 1: Sketch the Basic Shape
Start by sketching a vertical oval shape for the main body of the gas mask. This shape will act as a guide for placing other features accurately. You can lightly draw the oval using an H pencil, ensuring that it’s proportionate to the size you want for your gas mask.
Step 2: Divide the Oval
Divide the oval shape into two equal horizontal halves using a light pencil stroke. This line will represent the center of the gas mask and will help to maintain symmetry in your drawing.
Step 3: Add the Eye Openings
On the upper half of the oval, draw two elongated, rectangular shapes to represent the eye openings of the gas mask. These openings should be slightly curved at the ends and positioned symmetrically along the center line.
Step 4: Outline the Respirator
Below the eye openings, sketch the respirator part of the gas mask. Start by drawing a rectangular shape that extends from one end of the oval to the other. This shape should be wider at the bottom and narrower at the top.
Step 5: Refine the Respirator Shape
Now, work on shaping the respirator by curving the corners and adding more detail. Use reference images or your imagination to get an idea of the design elements you want to incorporate. You can add straps, filters, or any other distinct features to make your gas mask unique.
Step 6: Draw the Filter Canisters
On each side of the respirator, draw two cylindrical shapes tilted slightly upward. These shapes will represent the filter canisters of the gas mask. Position them symmetrically on either side of the respirator, ensuring they align with the overall shape of the mask.
Step 7: Add the Strap Details
Draw straps that go around the back of the head to secure the gas mask in place. Start by sketching two curves extending from the sides of the respirator and connecting them at the back of the head. Then, add additional straps as necessary, crossing over each other to create a realistic strap system.
Step 8: Refine the Shape and Add Details
With the basic structure in place, refine the overall shape of the gas mask by adjusting the curves and lines. Pay attention to the details such as connectors, valves, or any other components that make up the gas mask. Use an eraser as needed to correct any mistakes or smudges.
Step 9: Shade and Add Depth
Now it’s time to add shading and create depth in your drawing. Start by determining the light source and apply shading accordingly. Use a range of pencils from 2H for lighter shades to 6B for darker areas. Add shadows beneath the eye openings, around the filters, and anywhere else that requires a sense of depth.
Step 10: Finalize Your Drawing
Take a step back and evaluate your drawing. Make any necessary adjustments to ensure that the proportions and details are accurate. Add any additional touches or highlights to further enhance your drawing. Once you are satisfied, carefully erase any remaining pencil marks that are no longer needed.
Congratulations! You have successfully drawn a gas mask, capturing its intricate details and unique design. Now you can experiment with different coloring techniques or create variations of the gas mask to further develop your artistic skills.
Conclusion
Drawing a gas mask allows you to delve into the fascinating world of protective equipment and explore your creativity. By following the step-by-step instructions provided in this guide, you can create a detailed and visually impressive illustration of a gas mask. Remember to practice regularly and experiment with different techniques to further enhance your drawing abilities. Have fun and keep exploring your artistic talents!