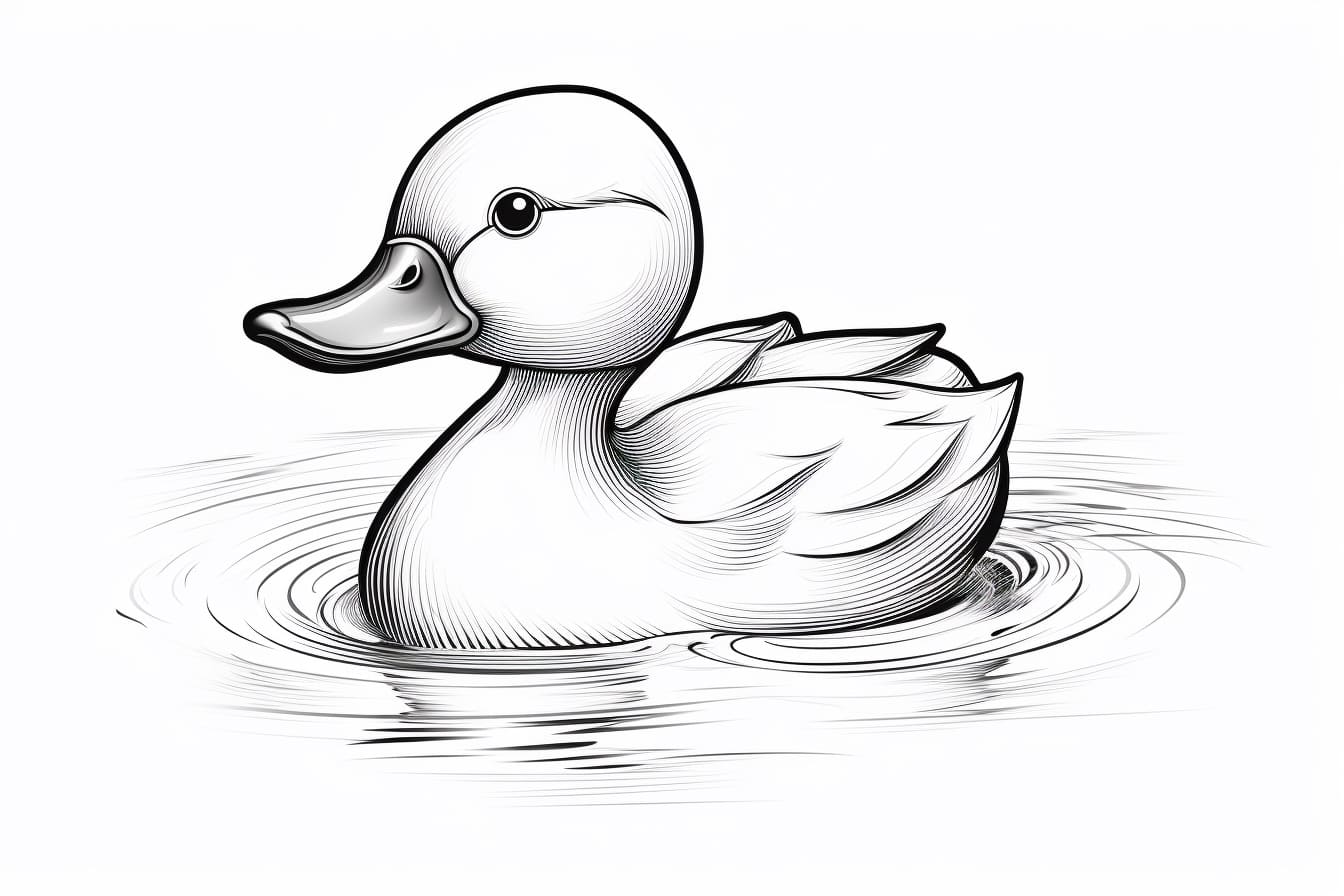
Welcome to the world of art, where creativity knows no bounds! In this step-by-step guide, we will explore the process of how to draw a rubber ducky. Rubber duckies hold a special place in our hearts, evoking feelings of joy and nostalgia. By following these easy instructions, you can create your own whimsical rubber ducky masterpiece. So, grab your pencil and paper, and let’s get started!
Materials Required
To begin your artistic endeavor, gather the following materials:
- A blank sheet of paper
- A pencil
- An eraser
- Colored pencils or markers (optional, for adding some vibrant hues to your finished creation)
Now that we have all our materials ready, let’s dive into the process of drawing a rubber ducky!
Step 1: Draw the Ducky’s Body
To begin, draw an oval shape in the center of your paper. This will serve as the body of our rubber ducky. Make sure the oval is smooth and symmetrical. The size of the oval will determine the size of your ducky, so adjust accordingly.
Step 2: Add the Head and Beak
From the top-left side of the oval, draw a smaller oval shape slanting towards the right. This will be the head of our rubber ducky. Near the bottom of the head, draw a curved line protruding outwards to form the beak. Curve the line upward to create the beak’s tip.
Step 3: Detail the Face
Within the head, draw two large circular eyes. Leave some space between them and make sure they are evenly sized. Inside each eye, draw a smaller circle to represent the iris. Add tiny dots inside the irises to give your rubber ducky a cute expression. Draw a small curved line above the eyes to indicate the eyebrows, giving your ducky some personality.
Step 4: Shape the Body
To add more dimension to the body, draw a curved line extending from the right side of the head to the bottom of the oval. This will create the back of the rubber ducky. Then, draw a slightly curved line from the bottom-back of the oval to the left side, completing the body shape.
Step 5: Outline the Wings
To give your rubber ducky wings, draw two elongated oval shapes on either side of the body. These ovals should partially overlap the body, extending outward. Make sure the wings are symmetrical and similar in size.
Step 6: Create the Feet
At the bottom of the body, draw two small, rounded shapes to form the feet of your rubber ducky. These shapes should be slightly tapered at the ends. You can also add short lines to represent the toes.
Step 7: Refine the Details
Now that the basic structure of your rubber ducky is complete, take a moment to refine the details. Use your pencil to carefully go over your drawing, smoothing out any rough lines or shapes. Erase any unnecessary pencil marks, ensuring that your rubber ducky stands out.
Step 8: Add Some Color (Optional)
Here comes the fun part! If you have colored pencils or markers, feel free to add some vibrant shades to bring your rubber ducky to life. Traditional rubber duckies are typically yellow, but don’t hesitate to get creative with different colors and patterns. Let your artistic flair shine!
Conclusion
Congratulations on successfully creating your very own rubber ducky masterpiece! By following these step-by-step instructions, you have learned how to capture the charm and whimsy of this beloved bath toy. Drawing is a wonderful way to express your creativity, and we hope this guide has sparked your artistic inspiration. Now, go ahead and take pride in your artwork. Remember, the sky’s the limit when it comes to exploring your artistic talents!