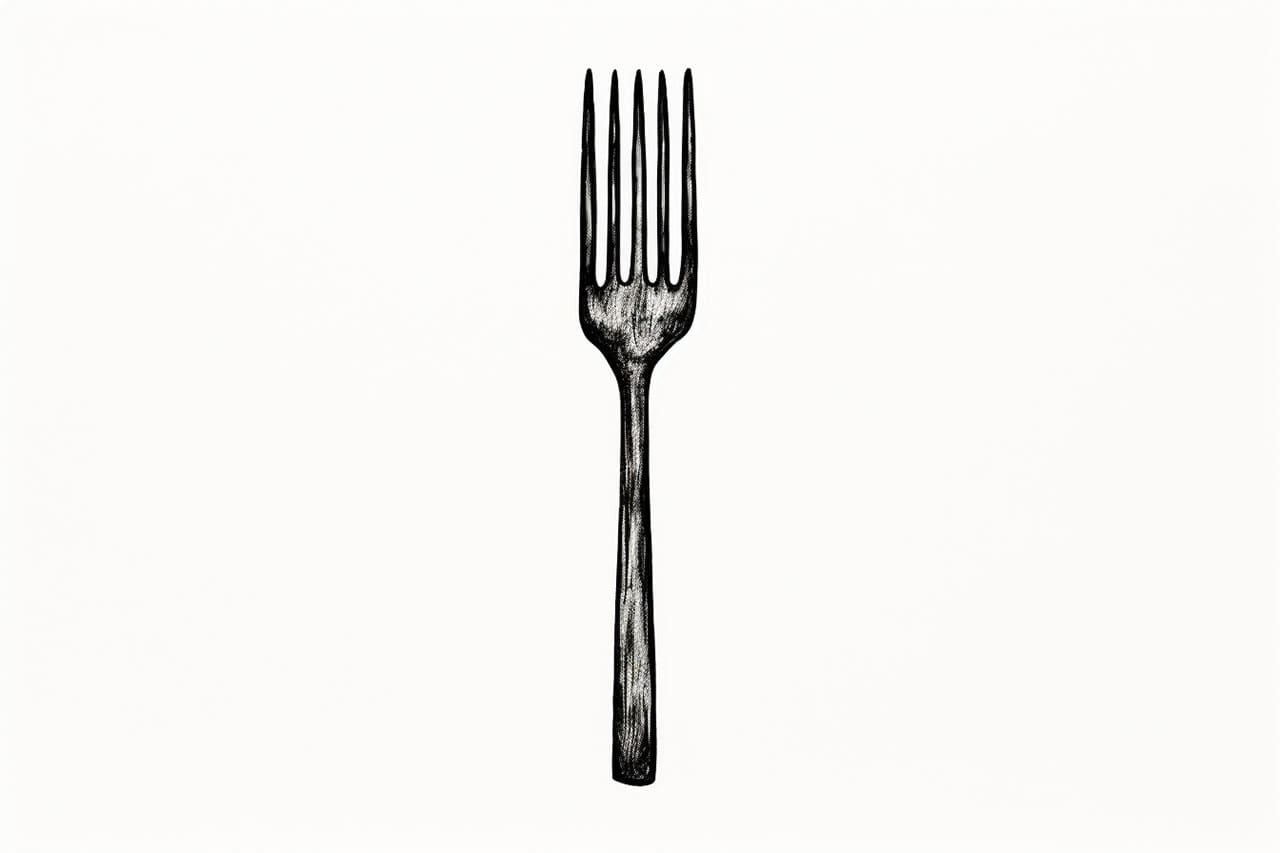
Have you ever wanted to improve your drawing skills or simply learn how to draw everyday objects? In this step-by-step guide, we will walk you through the process of how to draw a fork. As an expert artist and drawing instructor, I will provide clear, clean, and concise instructions to help you create a realistic and detailed fork drawing. So let’s grab our pencils and get started!
Materials Required
Before we begin, let’s make sure we have all the materials we need:
- Drawing paper
- Pencils (preferably HB or 2B)
- Eraser
- Ruler
- Reference image of a fork (optional)
Now that we have all our materials ready, let’s dive into the process of drawing a fork.
Step 1: Outline the Basic Shape
Start by lightly sketching the basic shape of the fork using your pencil. Begin with a vertical line, which will serve as the handle. Then, draw two short horizontal lines extending from the top of the vertical line, creating the fork’s prongs. Make sure to leave some space between the prongs.
Step 2: Refine the Handle
Using your ruler, extend the vertical line of the handle to achieve the desired length for your fork. Then, add some thickness to the handle by drawing two parallel lines on each side of the initial line. These lines should gradually converge as they reach the fork’s prongs.
Step 3: Shape the Prongs
Next, focus on shaping the fork’s prongs. Begin by drawing two diagonal lines that connect the upper part of the prongs to the handle. These lines should start close together and gradually widen as they reach the prongs.
Once the diagonal lines are in place, sketch the outline of the prongs using curved lines. Ensure that the prongs are evenly spaced and have a similar shape. Remember to keep the lines light and smooth in this initial stage.
Step 4: Add Detail to the Prongs
Now, let’s add some detail to the fork’s prongs. Start by drawing a series of short, parallel lines along the inner curve of each prong. These lines represent the tines of the fork. Make sure to space them evenly and maintain a consistent size.
After adding the tines, refine the outline of the prongs by tracing over the initial sketch with more defined and confident lines. Pay attention to the curves and angles of the prongs, ensuring they have a realistic and symmetrical appearance.
Step 5: Define the Handle
It’s time to give the handle more definition. Start by drawing a series of short, horizontal lines along the length of the handle. These lines create the texture of the handle, giving it a more realistic look.
Next, add some depth to the handle by shading one side. Determine the light source for your drawing, and imagine where the shadows would fall. Shade the side opposite the light source using hatching or crosshatching techniques. This will create a sense of volume and make the fork appear more three-dimensional.
Step 6: Refine and Erase
Take a moment to step back and evaluate your drawing. Look for any areas that need refinement or adjustments. Use your eraser to gently remove any unwanted lines or smudges.
Pay attention to the overall shape and proportions of the fork. Ensure that the prongs are evenly sized and spaced. Make any necessary corrections to achieve a realistic representation.
Step 7: Add Shadows and Highlights
To bring your fork drawing to life, let’s add some shadows and highlights. Using a darker pencil or shading tool, lightly shade the areas where shadows would naturally occur. This includes the underside of the prongs and handle, as well as any overlaps or indentations.
Next, use an eraser or a kneaded eraser to create highlights. Lightly lift off some graphite from the areas where light would hit the fork. This will add contrast and enhance the three-dimensional appearance of your drawing.
Step 8: Final Details
In this last step, focus on adding the final details to your fork drawing. Pay attention to the small features that make a fork unique, such as the curvature of the prongs or any decorative patterns on the handle. Take your time and work patiently to capture these details accurately.
Conclusion
Congratulations! You have successfully learned how to draw a fork from start to finish. With the help of the step-by-step instructions provided in this guide, you can now create realistic and detailed drawings of everyday kitchen objects like knives. Remember to practice regularly and experiment with different techniques to further improve your drawing skills. Enjoy the process, and happy drawing!