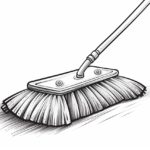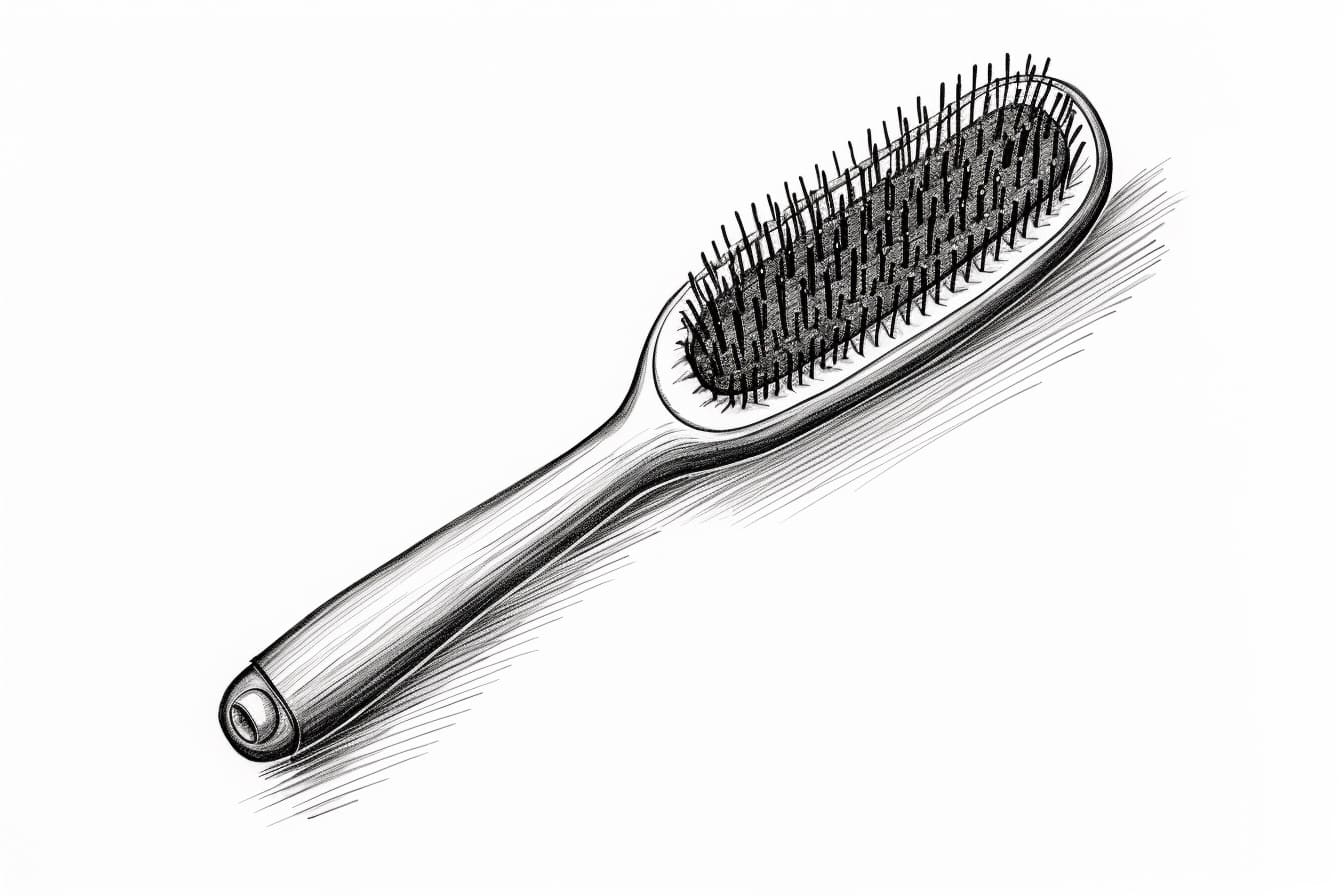
As an artist, being able to draw everyday objects is an essential skill. In this tutorial, we will guide you step-by-step on how to draw a hairbrush. This straightforward process will help you understand the basic shapes and lines needed to accurately recreate a hairbrush on paper.
Materials Required
To begin, make sure you have the following materials ready:
- Pencil
- Eraser
- Paper
Now that we have everything we need, let’s get started!
Step 1: Draw the Outline
Begin by lightly sketching the outline of the hairbrush. Start with a rectangular shape for the handle and extend it downwards, curving slightly at the end. Then, draw a smaller rectangular shape for the brush head at the top of the handle. Make sure to pay attention to the proportions, keeping the handle longer than the brush head.
Step 2: Add Detail to the Handle
Next, add some details to the handle of the hairbrush. Draw a line down the middle of the handle to create a ridge. Then, add two smaller lines on either side of the ridge to add texture and make it look more realistic. You can also draw a small curve at the bottom of the handle to indicate where the brush head connects.
Step 3: Define the Brush Head
Now, let’s focus on the brush head. Start by drawing a line across the top of the brush head to define the bristle area. Then, add a series of short, parallel lines within this area to represent the bristles. Make sure to leave some space between each line to create a realistic texture.
Step 4: Refine the Shape
Take a moment to refine the overall shape of the hairbrush. Look for any areas that may need adjustments or corrections. Pay close attention to the proportions of the handle and brush head, making sure they are in balance with each other.
Step 5: Add Shadows and Highlights
To give the hairbrush more dimension, it’s important to add shadows and highlights. Begin by shading the areas where the brush head and handle meet. This will create a cast shadow. You can also add some shading along the bottom of the brush head to indicate depth.
On the opposite side, add a curved highlight to the handle to make it appear more rounded. This highlight should follow the contour of the handle and be lighter than the surrounding areas.
Step 6: Finalize the Details
Now that the main elements of the hairbrush are in place, it’s time to finalize the smaller details. Add some additional texture to the bristles by drawing a few stray lines here and there. You can also add more texture to the handle by adding small, irregular lines to indicate wear and tear.
Conclusion
Drawing everyday objects like a hairbrush can be a fun and rewarding exercise for any artist. By following the step-by-step instructions in this tutorial, you have learned how to effectively draw a hairbrush. Remember to take your time, pay attention to the details, and practice regularly. With patience and practice, you will become more comfortable drawing a variety of objects.
So grab your pencil, paper, and let’s start drawing a hairbrush!