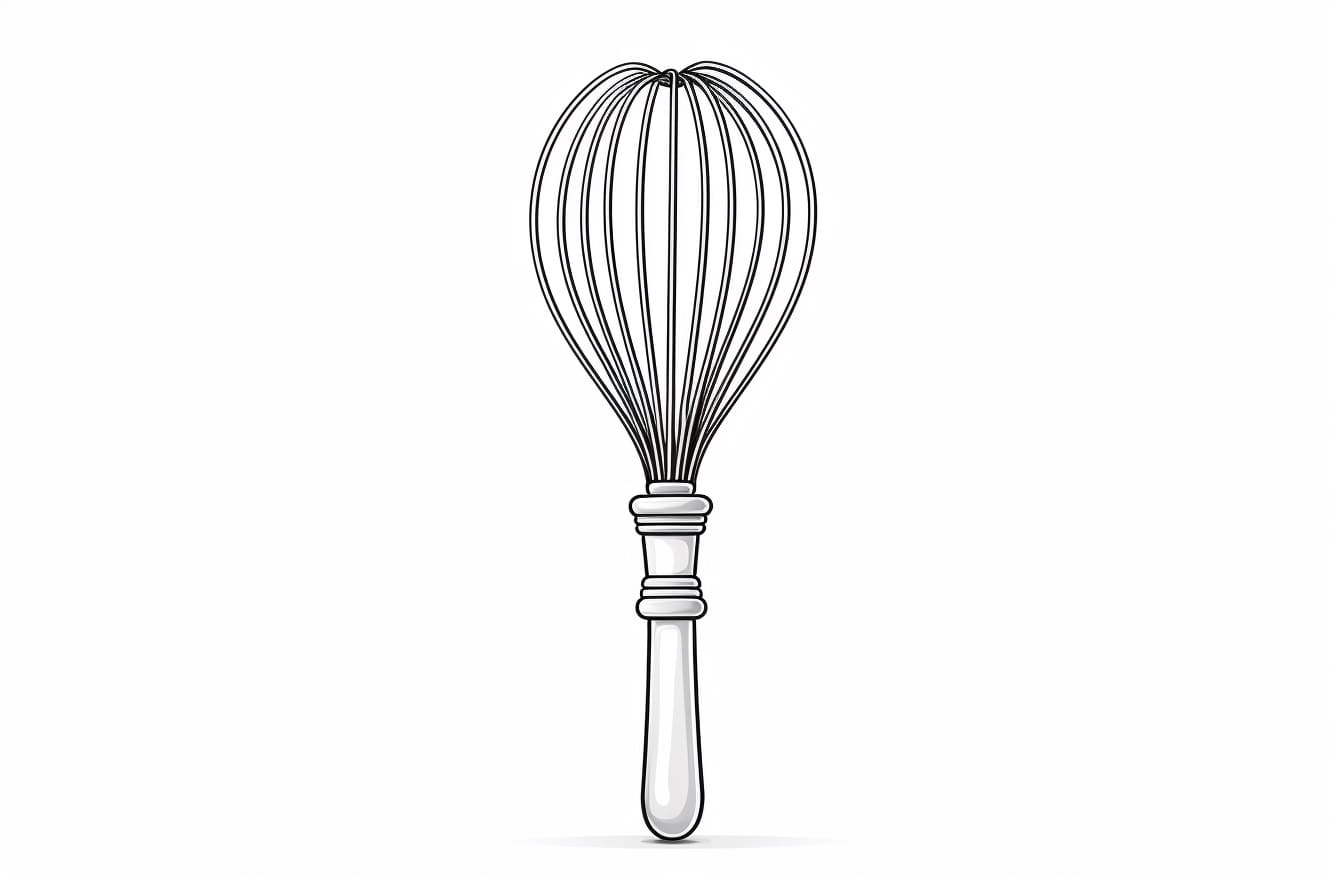
Do you enjoy drawing and want to learn how to draw a whisk? Whisks are commonly used in the kitchen for mixing ingredients, and they can add a fun and realistic touch to your artwork. In this step-by-step guide, we will walk you through the process of how to draw a whisk, from sketching the basic shape to adding details and shading. So grab your pencils, and let’s get started!
Materials Required:
Before we begin, make sure you have the following materials ready:
- Drawing paper or sketchbook
- Pencil (preferably HB or 2B)
- Eraser
- Fine-tipped black pen or marker
- Optional: Colored pencils, markers, or watercolors for adding color
Now that we have everything we need, let’s delve into the process of drawing a whisk!
Step 1: Sketch the Outline
Start by lightly sketching the outline of the whisk using your pencil. Begin with a horizontal line for the handle, and then draw two diagonals extending out at an angle from each end of the handle. These diagonals will represent the wires of the whisk. Make sure the wires are evenly spaced and symmetrical on both sides.
Step 2: Define the Shape
Next, use your pencil to add more definition to the whisk by drawing the contours of the handle and wires. The handle should be slightly thicker towards the base and taper towards the top. The wires can have a slightly curved shape to give them a more realistic look. Take your time with this step and make any necessary adjustments to ensure the proportions are accurate.
Step 3: Add Detail to the Handle
Now, let’s focus on adding some detail to the handle of the whisk. Start by drawing small horizontal lines across the handle to represent the texture. These lines should follow the curve of the handle and be evenly spaced apart. You can also add a few vertical lines towards the base of the handle to indicate the joining of the wires.
Step 4: Refine the Wires
To make the wires look more realistic, add some curvy lines along their length. These lines should follow the shape of the wires and give them a sense of movement. Remember to keep the spacing between the wires consistent. You can also add some small hooks at the ends of the wires to represent the loops where the ingredients are mixed.
Step 5: Erase Unnecessary Lines
Now that the basic structure of the whisk is complete, use your eraser to carefully remove any unnecessary pencil lines. Be gentle while erasing, so you don’t accidentally erase the lines you want to keep. This step will help clean up your drawing and make it ready for the next phase.
Step 6: Ink the Lines
Once you are satisfied with your pencil sketch, go over the final lines with a fine-tipped black pen or marker. This will give your drawing a bold and clean outline. Take your time and follow the pencil lines carefully. If you make any mistakes, don’t worry – you can always use the eraser to correct them before inking.
Step 7: Add Shadows and Shading
To add depth and dimension to your whisk drawing, you can incorporate shading. Start by determining the light source in your drawing. Then, darken the areas that would be in shadow, such as the underside of the wires and the part of the handle opposite the light source. Use your pencil or a darker shade of marker to add these shadows gradually, blending them with a blending tool or your finger for a smooth appearance.
Step 8: Optional – Color Your Drawing
If you want to take your whisk drawing to the next level, you can add colors to make it more vibrant and realistic. Use colored pencils, markers, or even watercolors to bring your whisk to life. Pay attention to the materials and colors you see in a real whisk, and try to replicate those in your drawing. Be creative and have fun with the colors!
Conclusion
Drawing a whisk may seem challenging at first, but by following these step-by-step instructions, you can create a detailed and realistic representation of this kitchen tool. Remember to take your time, practice, and make adjustments as needed. With each attempt, your artistic skills will improve, and you’ll gain confidence in drawing different objects. So grab your pencils and start whisking up some artistic magic on paper!