Welcome to this step-by-step tutorial on how to draw a flying plane! In this guide, I will show you how to create a dynamic and realistic drawing of a plane in flight. Whether you are a beginner or an experienced artist looking to improve your skills, this tutorial will help you create impressive plane drawings. So let’s get started!
Materials Required
Before we begin, make sure you have the following materials ready:
- Drawing paper or sketchbook
- Pencils (HB, 2B, 4B, and 6B)
- Eraser
- Blending stump or cotton swabs
- Ruler
- Reference image of a flying plane (optional, but highly recommended)
Now that you have your materials in place, let’s dive into the step-by-step process of drawing a flying plane.
Step 1: Sketching the Basic Shape
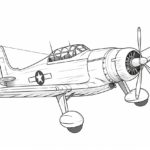
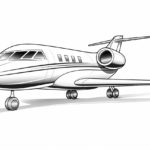
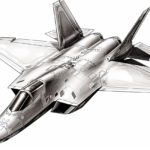
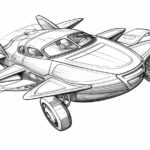
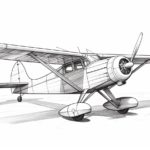
Start by sketching a rough outline of the plane’s basic shape using a light pencil such as HB. Keep the lines loose and simple, as this is just a foundation for the more detailed drawing that will follow. Use reference images to get a sense of the plane’s proportions and angles.
Step 2: Adding the Wings
Using your reference image, draw the wings of the plane. Start with the main wings by drawing two elongated triangular shapes on either side of the plane’s body. Make sure the wings are symmetrical and proportionate to the body. Use a ruler for straight lines if needed.
Step 3: Outlining the Fuselage
Next, outline the fuselage of the plane. Draw a long oval shape to represent the body of the plane, connecting it to the wings. Keep in mind the perspective and angle of the plane. If the plane is in a three-quarter view, make the front part of the fuselage appear larger and taper towards the tail.
Step 4: Adding Detail to the Fuselage
Now, let’s add some details to the fuselage. Observe the reference image and draw the windows, doors, and any other distinguishing features of the plane. Use curved lines to indicate the contours of the body and make it look more three-dimensional. Take your time with this step to ensure accuracy.
Step 5: Drawing the Tail
Move on to drawing the tail of the plane. Depending on the type of plane, the tail may vary in shape and size. Draw a vertical fin at the back of the fuselage and add horizontal stabilizers. Again, refer to your reference image to capture the correct proportions and details.
Step 6: Creating the Engines
Now it’s time to draw the engines. Most planes have engines mounted under the wings, so draw circular or oval shapes beneath each wing to represent the engines. Add details such as the exhaust and intake ports to make them more realistic. Remember to keep the engines symmetrical and aligned with the wings.
Step 7: Adding Landing Gear
To complete the drawing of the flying plane, add the landing gear. Start by drawing the main landing gear, which are usually located towards the front of the plane’s body. Use straight lines and simple shapes to represent the wheels and support structures. Then, add the smaller landing gear towards the back of the fuselage.
Step 8: Refining the Drawing
At this point, you have a rough sketch of a flying plane. Now, it’s time to refine the drawing and add more details to make it come alive. Start by darkening the lines of the plane using a darker pencil (such as 2B). Add shading to create depth and volume, paying attention to the light source and casting shadows. Use a blending stump or cotton swabs to blend the shading and create a smooth transition between light and dark areas.
Step 9: Final Touches
In this final step, take a step back and analyze your drawing. Make any necessary adjustments and add any additional details you feel are missing. Don’t be afraid to experiment and add your own artistic touches to make the drawing unique. Once you are satisfied with the result, erase any remaining guidelines and unnecessary lines.
Congratulations! You have successfully drawn a flying plane. Through practice and experimentation, you can further develop your skills and create even more stunning plane drawings.
Conclusion
Drawing a flying plane can be an exciting and rewarding experience. By following this step-by-step guide and using reference images as a guide, you can create impressive plane drawings that capture the dynamic nature of flight. Remember to practice regularly and have fun with your drawings. So grab your pencils and start sketching your own airborne masterpiece!