Welcome aspiring artists! In this step-by-step tutorial, I will guide you through the process of how to draw a flying car. Imagine the possibilities of a vehicle that defies gravity and takes to the skies. So grab your pencils, paper, and let’s embark on this artistic journey together!
Materials Required
Before we begin, make sure you have the following materials handy:
- Pencil
- Eraser
- Paper
- Ruler
- Colored pencils or markers (optional)
Now that you have everything ready, let’s dive into the art of drawing a flying car!
Step 1: Planning the Composition
Start by visualizing the overall composition of your flying car. Decide on the angle and perspective you want to capture. It could be a front view, side view, or even a dynamic action shot. This will help you establish the proportions and placement of different elements within your drawing.
Step 2: Outlining the Basic Shape
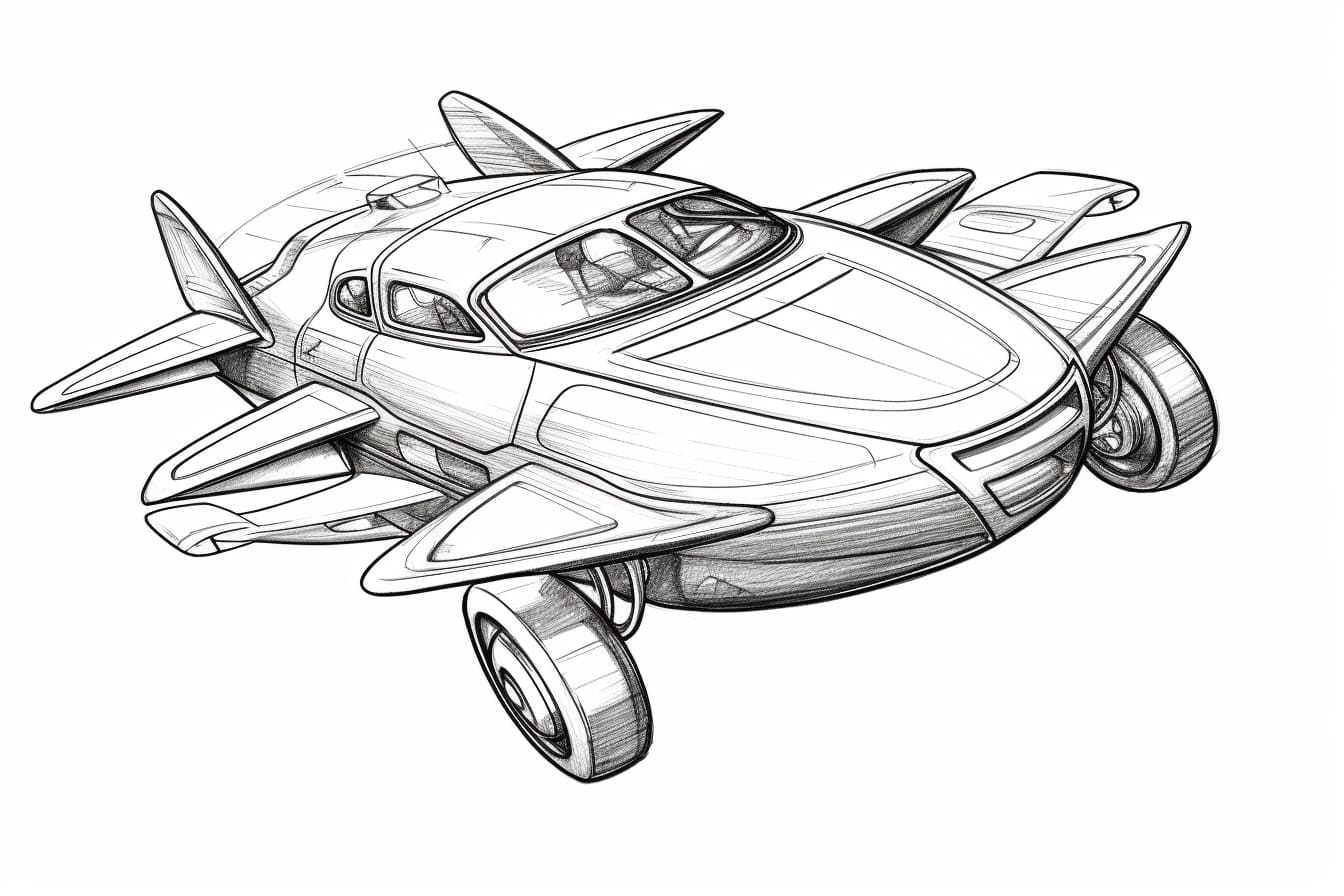
Using a light pencil, lightly sketch the basic shape of the car. Focus on capturing the main body of the vehicle, including the cabin and the streamlined design that emphasizes its aerodynamics. Remember to maintain the proportions and perspective you planned earlier.
Step 3: Adding Wheels and Wings
Next, add wheels to the bottom of your car. Since it’s a flying car, the wheels will be tucked underneath the body. Draw them with a slightly different perspective to indicate their position.
Now, let’s incorporate the wings. Extend two wing-like shapes on the sides of the car. Make sure they are aligned with the body and suit the overall design. Play with curved or sharp edges to give your flying car a unique personality.
Step 4: Designing the Cabin
The cabin plays a crucial role in the overall appearance of your flying car. Add a windshield and windows to the front portion of the vehicle. You can experiment with different shapes and sizes to make it visually interesting. Remember to maintain the perspective and make it look three-dimensional.
Step 5: Adding Details
Now it’s time to add some interesting details to your flying car. Sketch the headlights, grilles, and any other design elements that you envision. These details can greatly impact the overall look and feel of your drawing. Take your time and pay attention to symmetry and balance.
Step 6: Shading and Texturing
To make your flying car look more realistic, add shading and texture. Identify the light source in your composition and add darker tones to the areas that are away from the light. Use light, feathery strokes to create a smooth transition between light and shadow. Experiment with different shading techniques to achieve the desired effect.
Step 7: Coloring (Optional)
Once you’re satisfied with the shading, you can take your drawing to the next level by adding color. Use colored pencils or markers to bring your flying car to life. Play with different color schemes and combinations to create a visually captivating artwork. Remember, this step is optional, and you can choose to leave your drawing in black and white if you prefer.
Conclusion
Congratulations, you have successfully drawn a flying car! By following these step-by-step instructions, you were able to create a captivating artwork that showcases your artistic abilities. Remember, practice makes perfect, so keep honing your skills and exploring new possibilities.
So, set your imagination free, and let your pencil soar through the skies as you create more magnificent drawings of flying cars. Happy drawing!