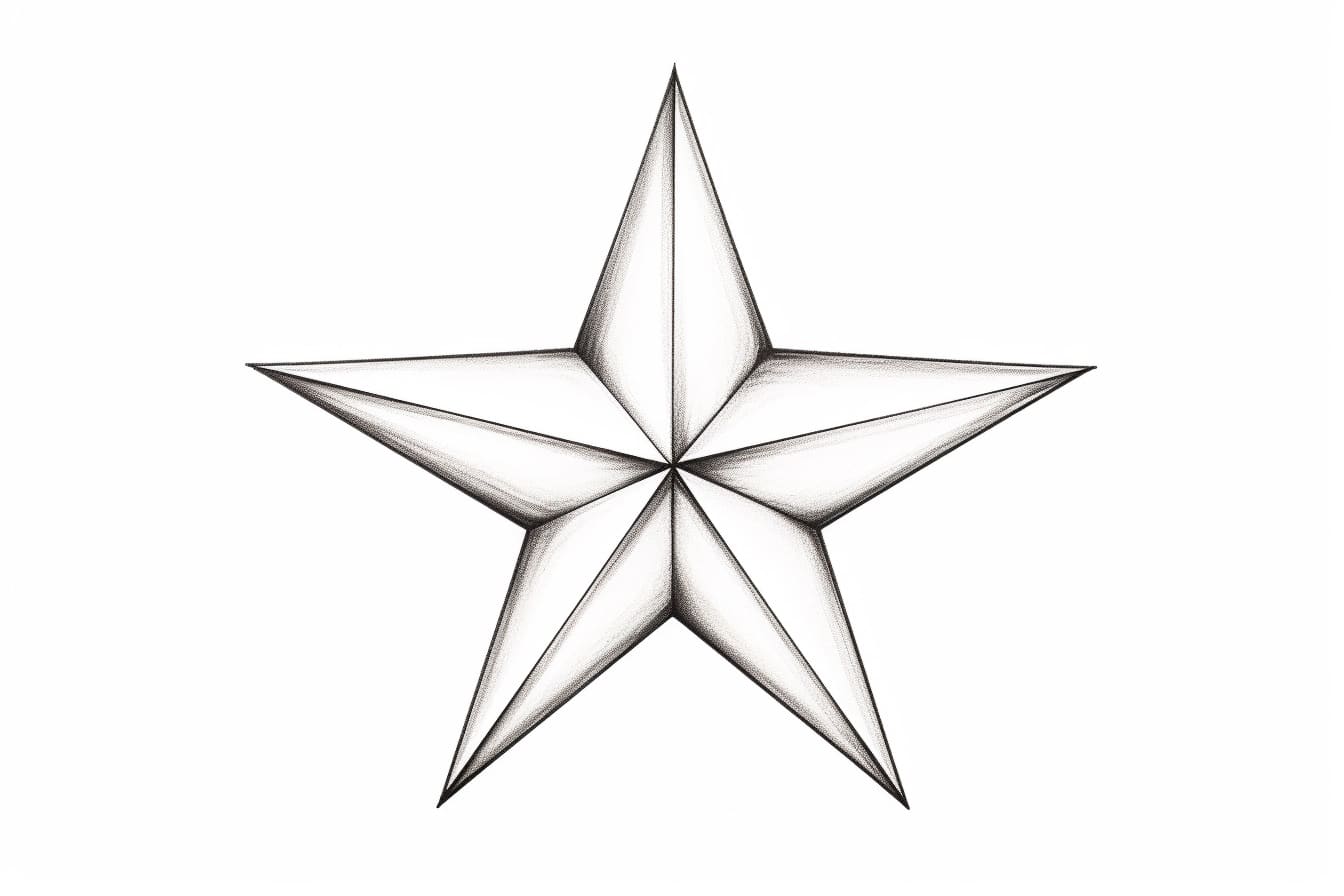
Are you interested in learning how to draw a five-pointed star? Drawing a star might seem challenging at first, but with a step-by-step approach, you’ll be able to create a perfect star in no time. Stars are a versatile and popular shape, often used in various artistic and decorative endeavors. So, whether you’re working on a craft project, creating a logo, or simply want to improve your drawing skills, mastering the art of drawing a five-pointed star is a valuable skill to have. In this article, we will guide you through the process of drawing a five-pointed star, providing clear and concise instructions. So, let’s get started!
Materials Required
Before we begin, gather the following materials:
- A pencil
- A sheet of paper
- An eraser
- A ruler
Now that you have everything you need, let’s move on to the step-by-step instructions.
Step 1: Draw a Circle
Start by drawing a circle in the center of your paper. Use your pencil and lightly draw a perfectly round circle. You can use a compass if you have one, or simply freehand it by drawing a series of small, connected arcs to form a complete circle.
Step 2: Divide the Circle
Next, carefully divide the circle into five equal parts. To do this, draw a line vertically through the center of the circle. Then, draw another line horizontally, intersecting the first line at a right angle. These two lines will create an imaginary cross at the center of the circle. Finally, draw two more lines diagonally from the top left to the bottom right, and from the top right to the bottom left, intersecting the center cross.
Step 3: Connect the Points
Starting from the top point of the circle, draw a straight line to connect it with the point located one-third of the way down on the right side of the circle. This will be one of the outer points of your star. Repeat this process, connecting the remaining points around the circle until you have drawn five lines in total.
Step 4: Complete the Star
To complete the star, draw another set of lines from the remaining two outer points to the opposite side of the circle. These lines should intersect the lines you initially drew, creating a star shape within the circle. Once you have connected all the points, carefully erase any unnecessary guide lines and smoothen out the edges of your star.
Conclusion
Congratulations! You have successfully learned how to draw a five-pointed star. By following the step-by-step instructions provided in this article, drawing a star has become an achievable task. Remember to practice regularly to refine your skills and create even more elaborate star designs. Stars are not only visually appealing but also have symbolic meanings in various cultures, making them a fascinating subject for art. So, grab your pencil and paper and start exploring the endless creative possibilities of drawing five-pointed stars!