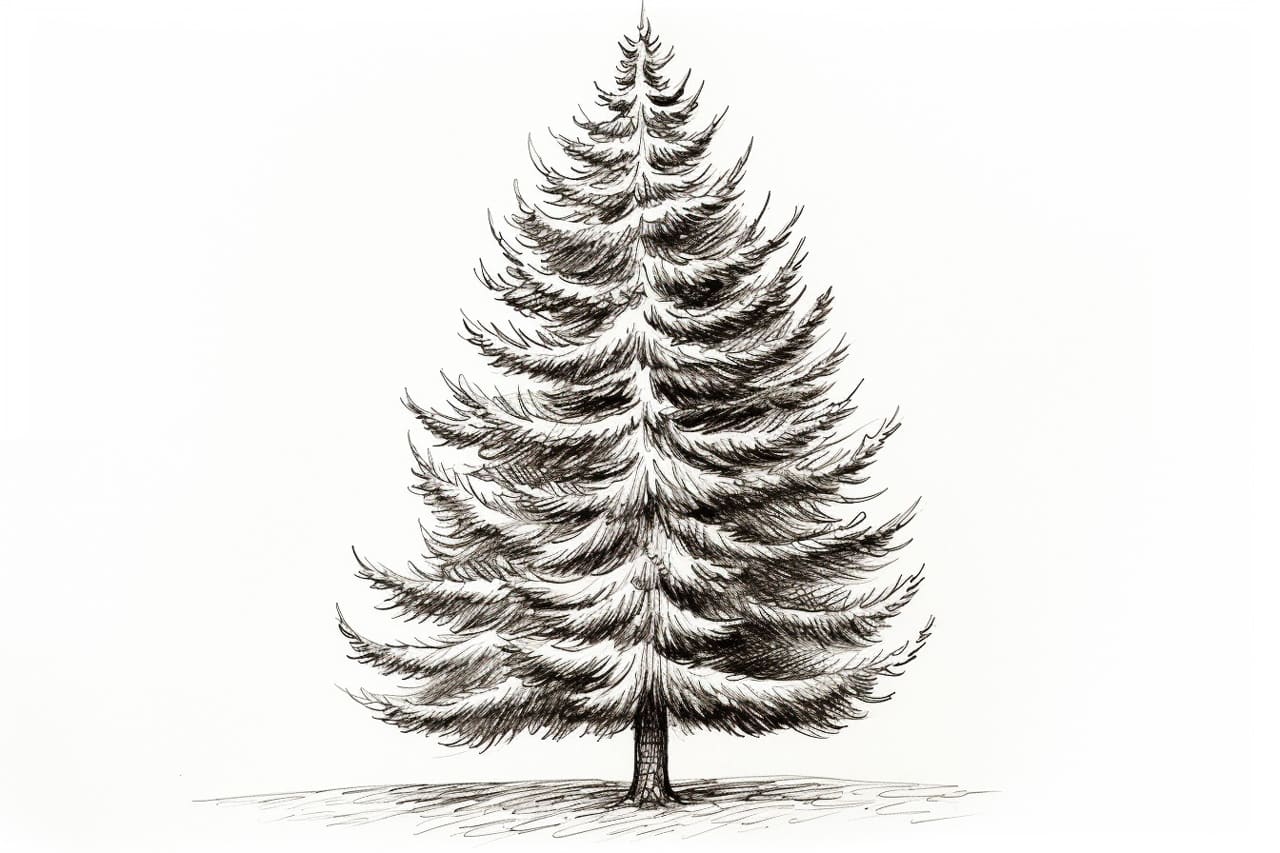
Drawing a fir tree may seem challenging, but with a little guidance and practice, you can create a beautiful and realistic representation. In this step-by-step tutorial, we will explore the process of how to draw a fir tree from scratch, utilizing basic shapes and simple techniques. So grab your pencil and paper, and let’s get started!
Materials Required:
Step 1: Sketch the Overall Shape
To begin, start by sketching the overall shape of the fir tree. Hold your pencil lightly and use basic geometric shapes to create a rough outline. Start with a slightly curved vertical line for the trunk. Then, at the top of the trunk, draw a large triangle shape that extends upwards. This triangle will serve as the main body of the tree.
Step 2: Add Branches
Next, we will add branches to our fir tree. Using curved lines, extend several smaller triangles from the main body of the tree. These triangles should be narrower and shorter than the main triangle and should gradually decrease in size as they move towards the top of the tree. Don’t worry about making them perfect at this stage, as we will refine them later.
Step 3: Refine the Shape
Now, it’s time to refine the shape of our fir tree. Using your pencil, go over the initial sketch and make any necessary adjustments. Pay attention to the proportions and angles of the branches, ensuring they radiate symmetrically from the main body of the tree. Use light, confident strokes to define the shape without pressing too hard.
Step 4: Add Texture and Details
Fir trees have distinct textures and details that give them their unique look. To capture this, we will add some defining features. Begin by drawing short, horizontal lines along the length of each branch, mimicking the appearance of needles. Vary the length and placement of these lines to create a natural and organic feel. Next, add some irregularities to the branches by drawing small bumps or knots. These imperfections will add depth and character to your tree.
Step 5: Outline the Trunk
Now, let’s outline the trunk of the fir tree. Use short, vertical lines to create the appearance of bark. Start at the base of the tree and work your way up, adjusting the length and thickness of the lines as you go. Remember, trees have rough and uneven bark, so don’t worry about making the lines too smooth or straight. The unevenness will add realism to your drawing.
Step 6: Refine and Finish
At this stage, take a step back and analyze your drawing. Look for any areas that require refinement and make the necessary adjustments. Smooth out any uneven lines, erase any unnecessary marks, and ensure that the overall shape and proportions are pleasing to the eye. If desired, you can also add color to your drawing using colored pencils or markers. Fir trees are typically dark green, but feel free to experiment with different shades and textures.
Conclusion
Drawing a fir tree may seem daunting at first, but with the right approach and practice, it becomes an achievable task. By breaking down the process into simple steps and focusing on the basic shapes and textures, you can create a realistic and visually appealing fir tree drawing. Remember to be patient with yourself and embrace the creative journey. So, grab your drawing tools and start sketching your very own beautiful fir tree!