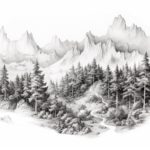
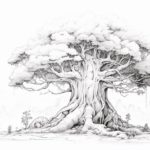
Drawing a forest tree can be a rewarding and enjoyable artistic endeavor. Whether you are a beginner or an experienced artist, capturing the beauty and essence of a tree can add depth and realism to your artwork. In this step-by-step guide, we will walk you through the process of how to draw a forest tree, starting with the basic shapes and gradually adding details to create a realistic and lifelike portrayal. So grab your art supplies and let’s get started!
Materials Required
Before we begin, make sure you have the following materials on hand:
- Drawing paper
- Pencil (preferably a set of graphite pencils ranging from 2H to 6B)
- Eraser (preferably a kneaded eraser)
- Blending stump or tissue paper (for shading)
- Reference image of a forest tree (optional)
Having these materials ready will ensure that you have everything you need to complete your forest tree drawing.
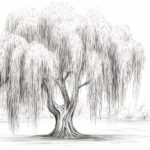
Step 1: Basic Outline
Start by lightly sketching the basic outline of the tree trunk and branches. Keep in mind that trees come in various shapes and sizes, so you can use your creativity to define the proportions and form of your tree. Begin with a vertical line for the trunk and add branches that extend outwards.
Step 2: Branch Structure
Next, focus on the branch structure of the tree. Add more branches that radiate from the main branches, creating a network of smaller branches. Remember to vary the length and thickness of the branches to add realism. Take your time to study reference images if needed and observe how branches are attached and positioned.
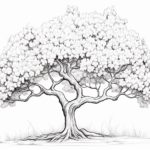
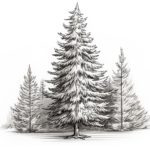
Step 3: Adding the Foliage
Now it’s time to bring your tree to life by adding the foliage. Start by sketching the general shape of the leaves or needles. Keep in mind that different tree species have different leaf shapes, so research the specific type of tree you are drawing if you want to be accurate. Use small, short strokes to represent the texture of the foliage.
Step 4: Shading and Texture
To add depth and dimension to your tree, apply shading and texture to the trunk, branches, and foliage. Start by shading the areas of the tree where light doesn’t reach, such as the underside of branches or leaves. Gradually build up the shading by using a range of pencil grades, from lighter to darker, to create the desired contrast.
Step 5: Detailing
Once you are satisfied with the overall shading, it’s time to add finer details to your tree. Pay attention to the smaller branches and twigs, as well as any interesting textures or patterns on the bark. Use a sharp pencil to add these details, and remember to take your time to achieve precision.
Step 6: Background and Environment
To complete your forest tree drawing, consider adding a background and elements from the tree’s environment. This could include other trees, plants, or even animals. By doing so, you can create a more realistic and immersive scene.
Conclusion
Drawing a forest tree can be a wonderful way to portray nature’s beauty and create a captivating artwork. By following these step-by-step instructions, you can develop your skills and create a lifelike representation of a tree. Remember to take your time, observe details, and have fun with your drawing. So grab your art supplies and start drawing your very own forest tree masterpiece!