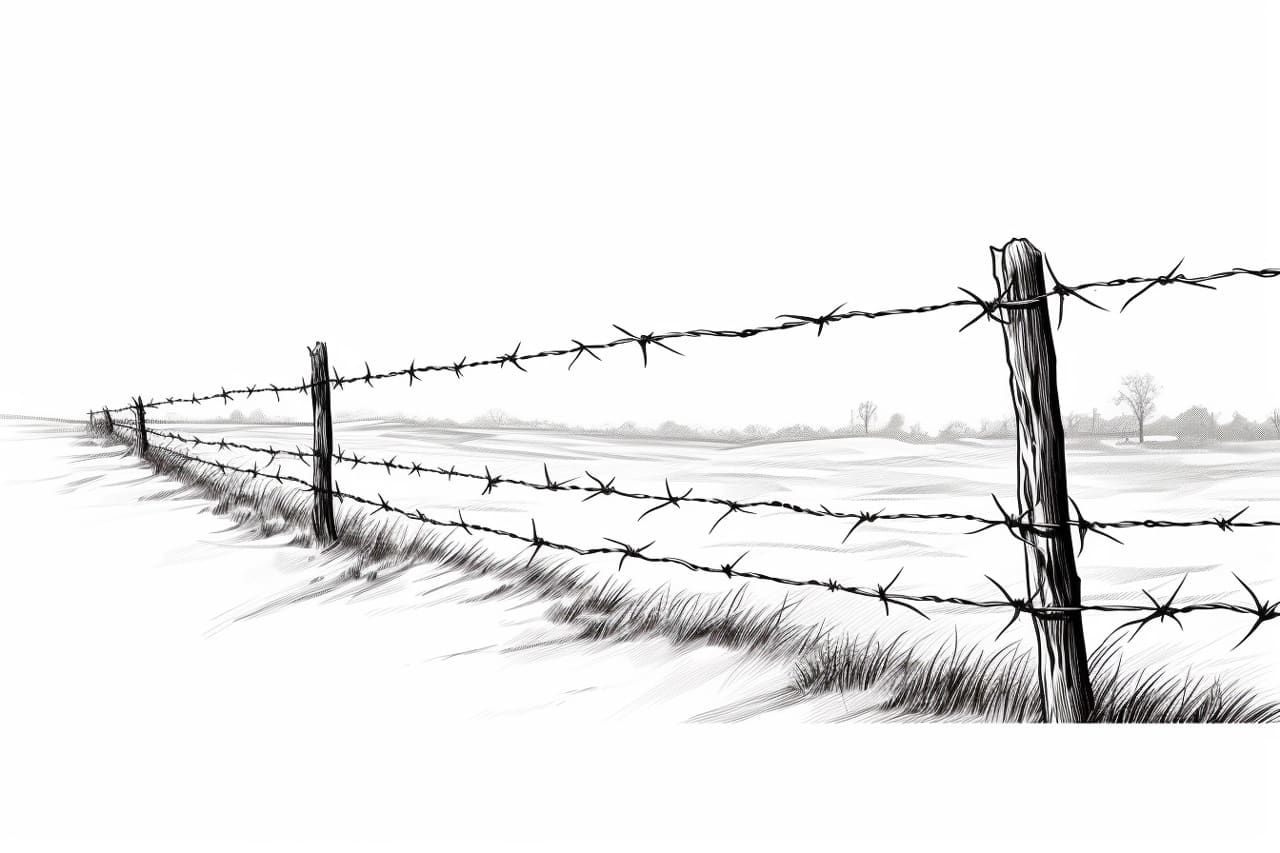
If you’re looking to add a touch of realism to your artwork, drawing a barbed wire fence can be a great way to accomplish that. Whether you’re working on a landscape, a portrait, or any other type of drawing, a barbed wire fence can add depth and interest to your composition. In this step-by-step guide, I will walk you through the process of drawing a realistic barbed wire fence, from start to finish.
Materials Required
To get started, gather the following materials:
- Drawing paper
- Pencils (HB and 2B recommended)
- Eraser
- Ruler
- Fine-tip pen or marker
- Compass or circle template (optional)
Now that you have your materials ready, let’s dive into the process of drawing a barbed wire fence.
Step 1: Sketch the Fence Posts
Begin by lightly sketching the fence posts on your drawing paper using a pencil. Start by drawing vertical lines to represent the posts. You can use a ruler to ensure they are straight and evenly spaced. The height and number of posts can vary depending on your desired composition. Remember to leave enough room between the posts to draw the wire.
Step 2: Add the Horizontal Rail
Next, draw a horizontal line near the top of the fence posts to represent the rail. This rail will provide support for the barbed wire. Again, use a ruler to ensure the line is straight and level.
Step 3: Draw the Barbed Wire
Now it’s time to draw the barbed wire itself. Start by lightly sketching a wavy line extending from one post to another. This line should follow the shape of the fence, creating a natural-looking curve. Don’t worry about making it perfect at this stage.
Step 4: Add the Barbs
To make the barbed wire more realistic, we will now add the barbs. Using your pencil, draw small V-shaped lines along the length of the wire. Space them out evenly, and make sure they are pointing inwards towards the fence.
Step 5: Refine the Shape
Take your time to refine the shape of the barbed wire. Use your pencil to smoothen out any rough edges or uneven curves. Pay attention to the spacing of the barbs, making sure they are consistent and evenly distributed.
Step 6: Ink the Fence
Once you are satisfied with the sketch, it’s time to ink the fence with a fine-tip pen or marker. Carefully trace over the pencil lines, making them more distinct and bold. Take your time and apply even pressure to achieve smooth and clean lines.
Step 7: Erase the Pencil
Once the ink has dried, erase any remaining pencil marks using an eraser. Be careful not to smudge the ink as you remove the pencil lines. If needed, you can use a kneaded eraser to gently lift away any stubborn marks.
Step 8: Add Shading and Texture
To give your barbed wire fence depth and texture, add some shading. Use a softer pencil, such as a 2B, to lightly shade the areas beneath the rail and wire. This will create a sense of shadow and dimension. You can also add subtle details, such as scratches or rust, to make your fence look weathered and worn.
Step 9: Optional Enhancements
If you want to take your drawing to the next level, you can enhance your barbed wire fence by adding additional elements. For example, you could draw a background landscape or incorporate other objects in the composition. Use your creativity to make your artwork unique and captivating.
Conclusion
Drawing a barbed wire fence can be a rewarding artistic endeavor that adds realism and interest to your artwork. By following these step-by-step instructions, you can create a detailed and lifelike fence that enhances your compositions. Remember to practice regularly to improve your skills and experiment with different styles and techniques. With time and dedication, you’ll be able to master the art of drawing barbed wire fences.