Welcome to this step-by-step guide on how to draw a detailed tree! Whether you’re a beginner or an experienced artist, trees are a wonderful subject to practice your drawing skills. In this tutorial, we will cover the process of drawing a realistic and intricate tree that captures the beauty and complexity of nature. So grab your drawing materials and let’s get started!
Materials Required
Before we begin, make sure you have the following materials ready:
- Pencil: A set of graphite pencils ranging from HB to 6B will be suitable for this drawing. It’s always good to have a range of hardness to create different shading and texture effects.
- Eraser: A good-quality eraser, such as a kneaded eraser or a soft gum eraser, will be helpful for correcting mistakes and creating highlights.
- Drawing Paper: Use a smooth and sturdy paper suitable for drawing, such as bristol board or sketch paper. The size of the paper is up to your preference, but a standard letter size or larger will give you more room to work.
That’s all you need to get started! Let’s move on to the step-by-step instructions.
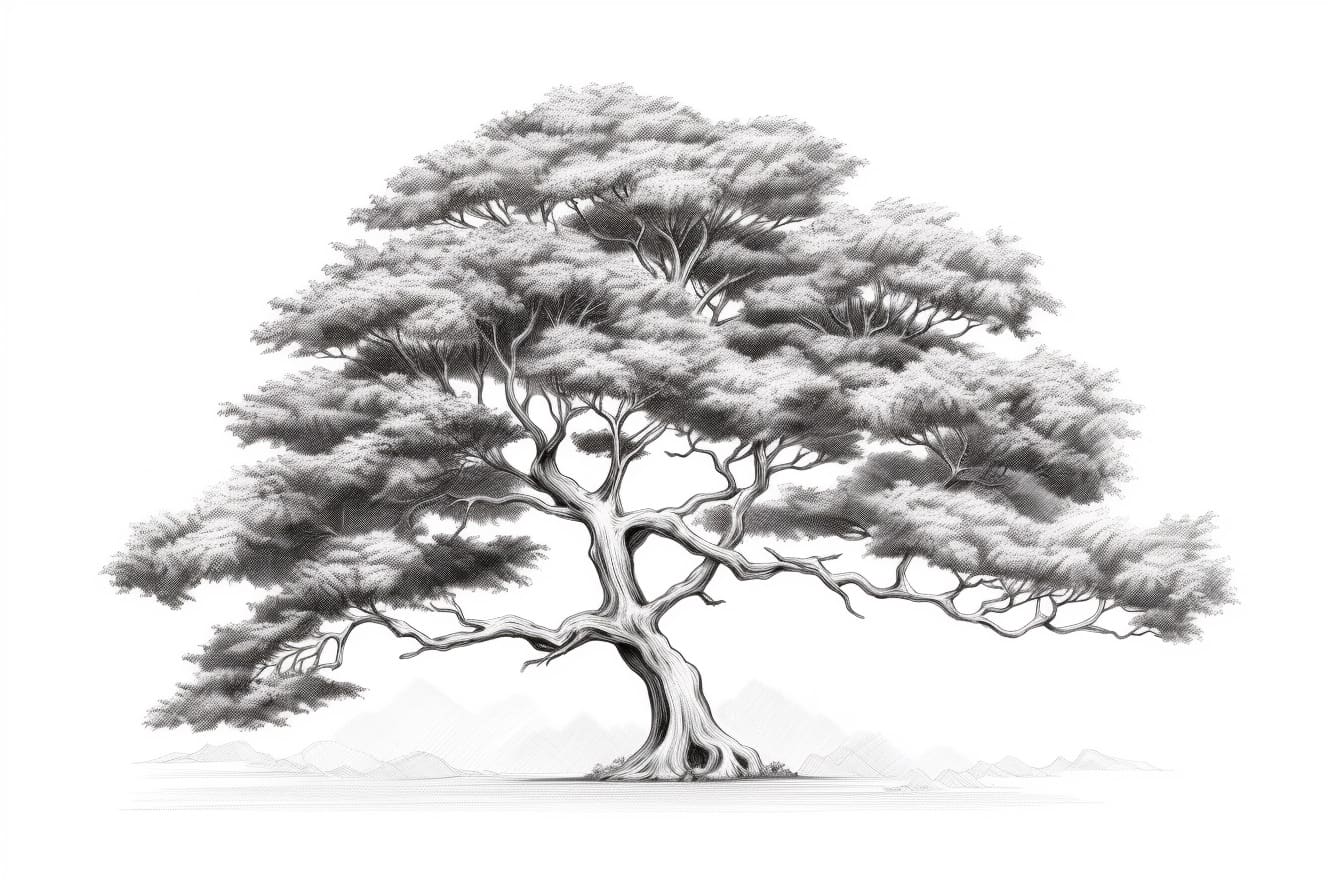
Step 1: Sketch the Basic Outline
Start by lightly sketching the basic outline of the tree trunk and branches using a light pencil. Observe the shape and structure of real trees and use simple curved lines to represent the main branches. Don’t worry about adding details at this stage, as we will refine and add them later.
Step 2: Add Branches and Foliage
Using the basic outline as a guide, start adding smaller branches and foliage to your tree. Remember that tree branches tend to get thinner as they extend outward, so vary the thickness of the lines accordingly. For the foliage, use a combination of short, curved lines to represent leaves and clusters of leaves.
Step 3: Refine the Shape and Texture
Refine the shape of the tree trunk and branches by adding more definition and details. Pay attention to the natural curves and irregularities of real trees to make your drawing more realistic. Use thicker, darker lines for the main branches and gradually lighten the lines as you move toward the smaller branches and twigs.
To create texture, add subtle lines and strokes to represent the bark of the tree. Trees have different types of bark, so feel free to experiment with different patterns and textures that suit your vision. Remember to observe reference images or go outside and study real trees for inspiration.
Step 4: Shade the Tree Trunk and Branches
Now it’s time to add shading to your tree drawing to give it depth and dimension. Start by identifying the main light source in your scene. This will determine where the highlights and shadows will fall on the tree.
Using a soft pencil (4B or 6B), start shading in the areas that are in shadow. Apply more pressure for darker areas and less pressure for lighter areas. Gradually build up the shading, blending the tones together using a blending stump or your finger. Take your time with this step, as shading is crucial in creating a realistic and detailed tree.
Step 5: Add Highlights and Details
To make your tree drawing pop, it’s important to add highlights and details. Use an eraser to carefully lift off some graphite to create highlights on the tree trunk and branches. This will give the illusion of light hitting those areas. Be mindful of your light source and keep the highlights consistent throughout your drawing.
Next, add more details to the foliage by using small, circular strokes to represent individual leaves or clusters of leaves. Vary the size and direction of the strokes to create a sense of depth and dimension. Don’t feel the need to draw every single leaf, as the suggestion of foliage will be enough to convey the overall texture.
Step 6: Finalize and Refine
Take a step back and assess your drawing so far. Are there any areas that need further refinement or adjustment? Use your eraser to make any necessary corrections or touch-ups. Pay attention to the overall balance, proportions, and composition of your drawing. Sometimes, stepping away from your work and returning with fresh eyes can help you see any areas that need improvement.
Conclusion
Congratulations! You have successfully learned how to draw a detailed tree. Trees are a versatile and captivating subject to draw, so don’t hesitate to continue practicing and exploring different variations. Remember to be patient and enjoy the process of creating art.
In this tutorial, we covered the step-by-step process of drawing a realistic and intricate tree, from sketching the basic outline to adding shading and details. By observing real trees and using proper techniques, you can create stunning tree drawings that capture the beauty of nature. So grab your drawing materials and let your creativity blossom!