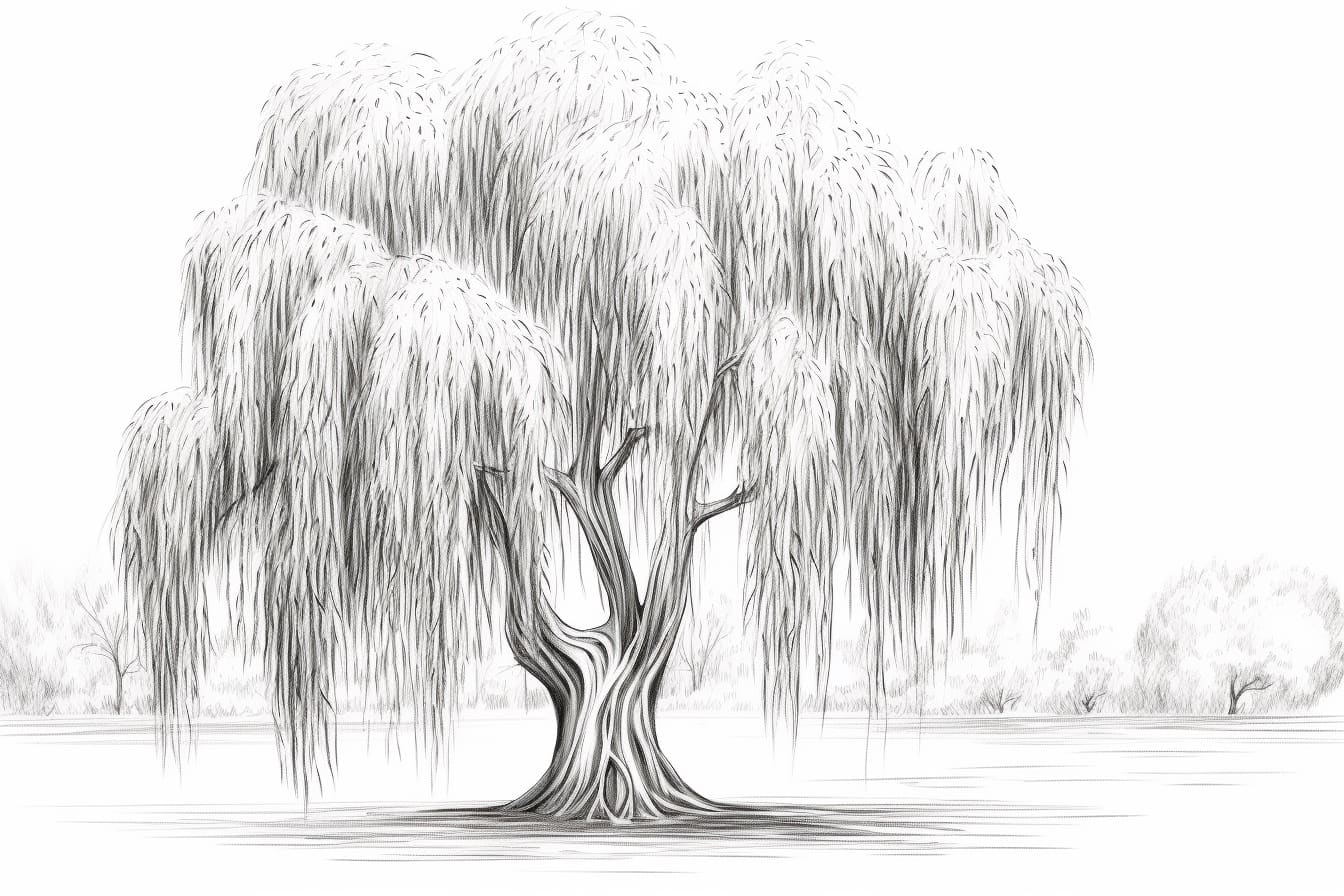
If you have ever marveled at the elegance and beauty of a weeping willow tree, you may have been inspired to try drawing one yourself. The graceful branches and cascading foliage of a weeping willow make it a captivating subject to capture on paper. In this step-by-step guide, I will walk you through the process of how to draw a weeping willow tree. So grab your pencils and let’s get started!
Materials Required
Before we begin, make sure you have the following materials:
- Drawing paper or sketchbook
- Pencils (HB, 2B, and 4B)
- Eraser
- Drawing compass
- Ruler
- Reference image of a weeping willow tree
Having these materials ready will ensure that you have everything you need to create a detailed and realistic drawing of a weeping willow tree.
Step 1: Sketch the Basic Shape of the Tree
Start by lightly sketching the basic shape of the tree trunk and branches. Use a light pencil, such as an HB or 2B, to create loose and flowing lines. Remember that weeping willows have a drooping and cascading form, so capture this in your initial sketch.
Step 2: Add the Major Branches
Using a darker pencil, such as a 4B, add the major branches of the tree. Pay attention to the way the branches curve and droop downwards. Weeping willows often have branches that hang low, almost touching the ground. Start from the trunk and work your way outwards, adding branches at different angles and lengths.
Step 3: Define the Foliage
Now it’s time to define the foliage of the weeping willow tree. Using your darker pencil, draw small, elongated ovals to represent the leaves. Focus on the areas where the branches are thickest and the foliage is most dense. Don’t worry about drawing every single leaf—suggesting clusters of leaves will give your drawing a more realistic and organic feel.
Step 4: Add Texture and Details to the Tree Trunk
Next, add texture and details to the tree trunk to make it more lifelike. Use short, curved lines to create the bark texture. Pay attention to the way the bark wraps around the tree trunk and the variations in color and tone. Weeping willow trees often have a rough and textured surface, so adding these details will enhance the realism of your drawing.
Step 5: Add Shadows and Highlights
To give your drawing depth and dimension, it’s important to add shadows and highlights. Study your reference image and observe where the light source is coming from. Use your pencils to shade the areas of the tree that are in shadow, and leave the lighter areas untouched or lightly shaded. This contrast will make your drawing appear more three-dimensional.
Step 6: Refine and Add Details to the Foliage
Go back to the foliage and add more details to make it look more realistic. Use your darker pencil to darken the areas where the foliage overlaps and create depth. Add smaller branches and twigs extending from the main branches to give your drawing a sense of intricacy and complexity.
Step 7: Draw the Reflection (Optional)
If you want to take your drawing to the next level, you can add a reflection of the weeping willow tree in water. To do this, lightly sketch the outline of the reflection beneath the tree. Use soft and flowing lines to suggest the ripples in the water. Then, use your pencils to add the same details and shading to the reflection as you did to the tree itself.
Step 8: Finalize and Refine
Take a step back and assess your drawing as a whole. Look for any areas that need refining or additional detail. Adjust any proportions or shapes that don’t look quite right. Use your eraser to remove any unwanted lines or smudges. Keep refining until you are satisfied with the overall look of your weeping willow tree drawing.
Conclusion
Drawing a weeping willow tree may seem challenging at first, but with patience and practice, you can create a stunning piece of artwork. By following these step-by-step instructions, you can capture the elegance and beauty of a weeping willow on paper. Remember to study your reference image and pay attention to details such as branches, foliage, shadows, and highlights. With time, your skills will improve, and you’ll be able to confidently draw a weeping willow tree.
I hope this guide has inspired you to try your hand at drawing a weeping willow tree. Remember, practice is key, so keep honing your skills and exploring your creativity. Happy drawing!