Snouts are an essential feature in many animal drawings, adding depth and character to your artwork. Whether you’re drawing a dog, a wolf, or any other animal with a muzzle, mastering the art of how to draw a snout will greatly enhance your skills as an artist. In this step-by-step guide, we will walk you through the process of drawing a snout, providing clear instructions and helpful tips along the way.
Materials Required
Before we begin, let’s gather the materials you’ll need for this drawing tutorial:
- Paper: A smooth and sturdy drawing paper will work best.
- Pencil: Use a range of pencils (HB, 2B, 4B) for sketching and shading.
- Eraser: A kneaded eraser is ideal for subtly removing pencil marks.
- Blending tools: Paper stump or blending tortillon to create smooth transitions.
- Reference image: Find a high-quality image of a snout to use as a visual guide.
Now that we have our materials ready, let’s dive into the step-by-step process of drawing a snout.
Step 1: Basic Framework
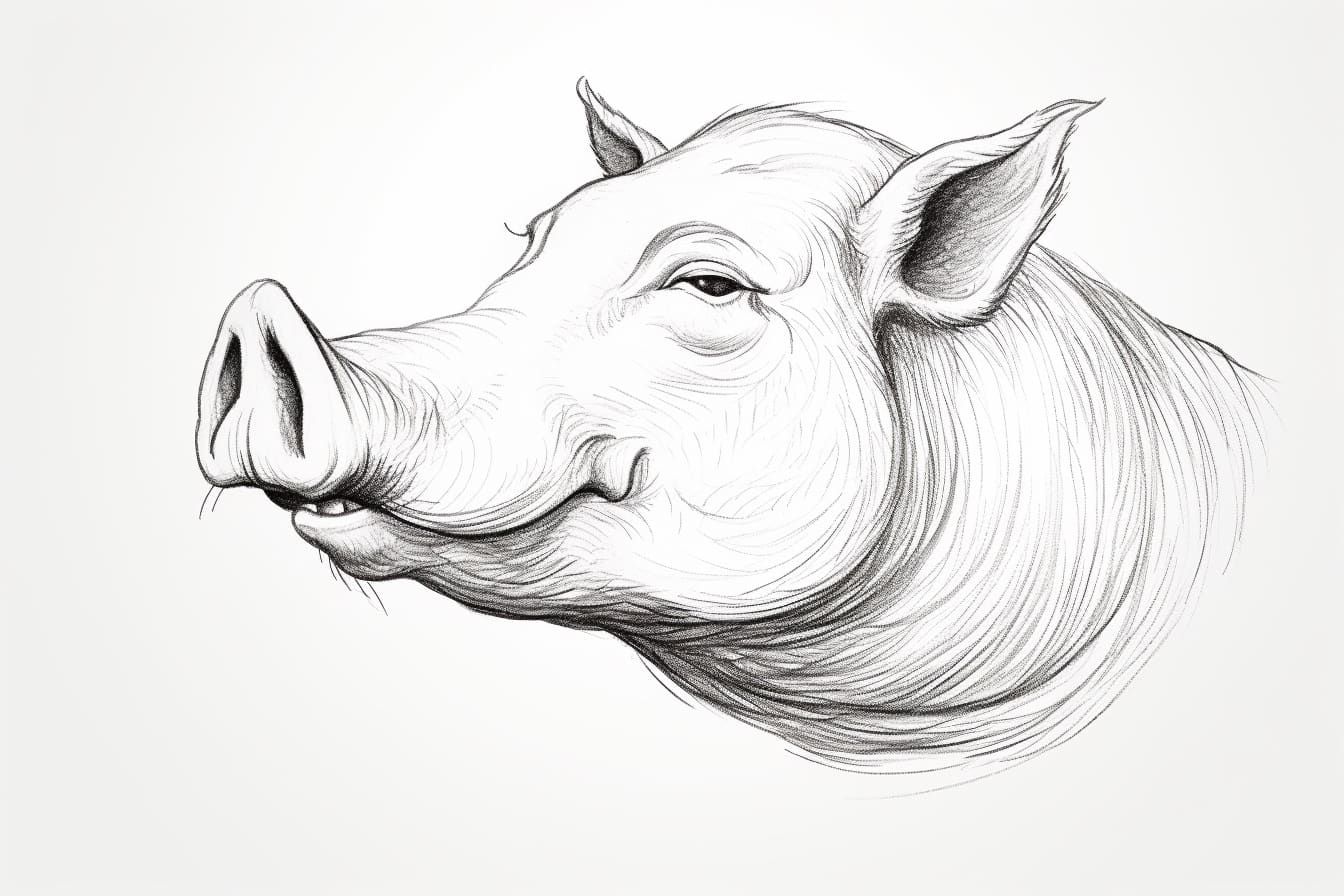
Start by lightly sketching a vertical oval shape in the middle of your paper. This oval will act as the foundation for the snout. Adjust its size and positioning depending on the animal you are drawing. For example, a dog snout will be longer and narrower compared to a pig’s snout.
Step 2: Outline the Snout
Using the basic framework as a guide, carefully outline the shape of the snout. Pay close attention to the curvature and angles of the animal’s muzzle. Keep your lines light and loose for easy adjustments later on.
Step 3: Define the Nostrils
Within the outlined snout shape, draw two small ovals or circles to represent the nostrils. These should be placed towards the bottom of the snout, slightly angled towards each other. Remember to leave ample space between the nostrils and the outline of the snout.
Step 4: Add the Nasal Bridge
Next, draw a slightly curved line connecting the top of each nostril. This line represents the nasal bridge and should extend slightly beyond the snout’s outline. Pay attention to the width of the bridge, as it varies between different animals.
Step 5: Sketch the Mouth
Positioned below the snout, draw a horizontal line to mark the mouth. The mouth’s size and shape will depend on the animal you are drawing. For example, a dog’s mouth will be wider compared to a cat’s. Experiment with different mouth shapes to match your reference image.
Step 6: Refine the Outline
At this stage, carefully refine the outline of the snout, emphasizing its curves and angles. Use shorter, more defined lines to give it a realistic appearance. Take your time and make any necessary adjustments until you are satisfied with the snout’s shape.
Step 7: Add Details
To add depth and texture to the snout, start by lightly shading the area around the nostrils, using small circular motions. Gradually build up the shading to create subtle shadows. Pay attention to any highlights or distinctive features on your reference image and incorporate them into your drawing.
Step 8: Define the Nostril Openings
Using a darker pencil, define the edges of the nostrils by shading around them. This will make the nostrils appear recessed and give the snout a more realistic look. Be cautious not to overdo it; the shading should be subtle and blend seamlessly with the rest of the drawing.
Step 9: Shade the Snout
Continuing with your shading, gradually darken the areas around the snout, creating depth and volume. Observe the shadows and highlights on your reference image to guide your shading. Remember to blend and smoothen the transitions between different tones using a blending tool.
Step 10: Refine the Mouth
Take some time to refine the details of the mouth, paying attention to the lips and any visible teeth or gums. Use your reference image as a guide and focus on capturing the specific characteristics of the animal you are drawing.
Step 11: Finishing Touches
Now that you’ve completed the main elements of the snout, take a step back and assess your drawing as a whole. Make any necessary adjustments or refinements to ensure all the features are proportionate and balanced.
Conclusion
Congratulations! You have successfully learned how to draw a snout. By following the step-by-step instructions in this tutorial, you now have the skills to create realistic and captivating snouts in your future animal drawings. Remember to practice regularly and use references to further enhance your technique. Happy drawing!