Welcome to this step-by-step tutorial on how to draw a cherry tree. Whether you’re a beginner or an experienced artist, this guide will help you create a stunning representation of nature’s beauty. Cherry trees are known for their delicate flowers and lush foliage, making them a perfect subject for any artwork. So let’s grab our drawing materials and dive right into capturing the essence of a cherry tree on paper.
Materials Required
Before we get started, make sure you have the following materials:
- Drawing paper: Choose a medium-weight paper that is suitable for your preferred drawing medium, such as pencil or pen.
- Pencil: A set of drawing pencils ranging from HB (medium) to 6B (soft) is recommended. This will allow you to create a range of values in your drawing.
- Eraser: A kneaded eraser or a vinyl eraser will come in handy for making corrections or lightening areas.
- Sharpener: Keep a pencil sharpener nearby to keep your pencil points sharp for fine details.
- Pen (optional): If you prefer to draw with ink, have a waterproof ink pen or a fine liner pen available.
Now that you have all the necessary materials, let’s start drawing our cherry tree!
Step 1: Sketch the Base Shape
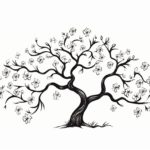
Begin by lightly sketching the base shape of the tree trunk and branches. Use your pencil to draw a vertical line for the trunk and several curved lines branching out for the main branches. Keep in mind that cherry tree branches often have a graceful and slightly curved shape. Don’t worry about adding too many details at this stage; we’ll refine the branches later.
Step 2: Add the Blossoms
Cherry trees are famous for their vibrant blossoms. Start adding the blossoms by drawing small circles or ovals along the branches. These circles will represent the clusters of flowers. Vary the sizes and angles of the circles to create a natural and organic look. Remember that cherry blossoms are typically five-petaled, so you can add small lines inside each circle to suggest the petals.
Step 3: Define the Branches
Now it’s time to define the branches of the cherry tree. Use your pencil to add more details and thickness to the branches, making them appear more three-dimensional. The branches closer to the trunk should be thicker and gradually taper as they extend outward. Pay attention to the curves and angles of the branches to maintain a natural and realistic look.
Step 4: Shade the Tree Trunk
To give the tree trunk depth and dimension, we’ll add some shading. Use a darker pencil, such as a 2B or 4B, to create shadows on one side of the trunk. Start by lightly shading along the edge of the trunk where it meets the background. Then, gradually darken the shadow as you move away from the trunk. Use smooth and even strokes to create a seamless transition from light to dark.
Step 5: Enhance the Blossoms
Now let’s enhance the cherry blossoms by adding more details and volume. Using a sharp pencil, lightly shade the inner part of the circles, leaving the outer edges lighter. This shading technique will give the blossoms a three-dimensional appearance. You can also add tiny lines or dots in the center of each blossom to represent the stamen. Be careful not to overdo it; subtlety is key in capturing the delicate nature of cherry blossoms.
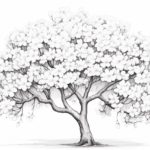
Step 6: Add Leaves
Cherry trees have lush foliage, so let’s add some leaves to our drawing. Using short, curved strokes, draw small leaf shapes along the branches. Cluster them together to create a dense foliage. Remember to vary the sizes and angles of the leaves for a more realistic look. You can also add some leaves falling off the tree by drawing them in a more scattered manner.
Step 7: Refine and Add Details
Now that the basic structure of the cherry tree is complete, take some time to refine the details and add any additional elements you’d like. You can darken the shading on the trunk to create more contrast or add more intricate textures to the bark. Consider adding a grassy ground or a simple background to complete the composition. Take a step back and assess your drawing, making any necessary adjustments to achieve the desired result.
Conclusion
Drawing a cherry tree allows us to appreciate the beauty of nature and practice our artistic skills. By following the steps in this tutorial, you’ve learned how to sketch the base shape, add delicate blossoms, define branches, shade the trunk, enhance blossoms, add leaves, and refine the details. With practice and patience, you’ll be able to create stunning cherry tree drawings that capture the essence of these magnificent trees.
So grab your drawing materials and start exploring the joy of drawing cherry trees. Happy creating!