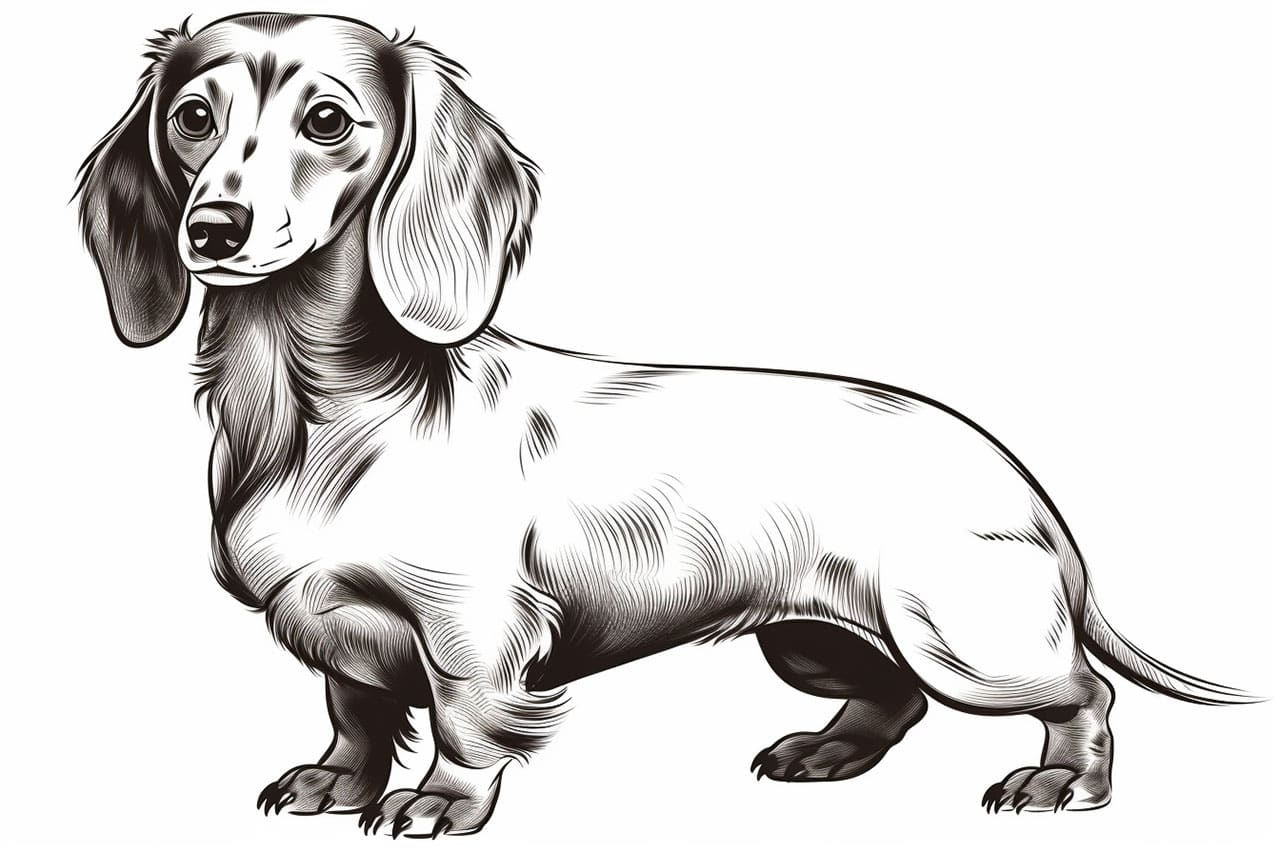
Welcome to this step-by-step tutorial on how to draw a dachshund! With their long bodies, short legs, and expressive faces, these adorable wiener dogs make for a fun and challenging drawing subject. Whether you are a beginner or an experienced artist, this guide will help you capture the unique characteristics of a dachshund in a clear and concise manner. So grab your art supplies and let’s get started!
Materials Required
Before we begin, make sure you have the following materials ready:
- Paper: Choose a high-quality drawing paper that can handle various drawing materials.
- Drawing Pencils: A set of graphite pencils ranging from 2H to 6B will give you different shades and textures.
- Eraser: A kneaded eraser or a vinyl eraser will help you correct any mistakes or lighten your pencil marks.
- Pencil Sharpener: Keep your pencils sharp for precise lines and details.
- Fine-tip Pens: Optional but useful for outlining and adding final details.
Now that we have our materials ready, let’s dive into the steps of drawing a dachshund!
Step 1: Basic Shapes
Start by drawing a large oval shape for the body of the dachshund. This oval should be slightly elongated horizontally to represent their unique body structure. Next, add a smaller oval shape for the head, connecting it to the body with a curved line. Finally, sketch a small oval at the rear end of the body for the tail.
Step 2: Legs and Paws
Draw four small vertical rectangles on the underside of the dachshund’s body to represent its legs. Remember that dachshunds have short legs, so keep the rectangles relatively short and stubby. At the bottom of each rectangle, add small oval shapes for the paws.
Step 3: Ears and Face
Now, let’s focus on the dachshund’s face. Draw two long, curved lines on either side of the head to represent the ears. Dachshunds have long, droopy ears, so make sure to capture that characteristic. Next, draw two circles for the eyes, placing them slightly above the middle of the head. Add a small triangle shape for the nose and a curved line for the mouth.
Step 4: Body and Tail Details
To give our dachshund more definition, let’s add some details to its body and tail. Add a slightly curved line from the front of the body to the hind legs to indicate the underside of the dachshund’s body. Next, draw a curved line along the top of the body to represent the back. Connect this line to the tail, adding some wavy lines to show the fur. Finally, sketch a small oval shape at the tip of the tail to complete this step.
Step 5: Eyes and Facial Features
Now, let’s focus on the dachshund’s eyes and facial features. Start by adding a small oval shape inside each eye for the pupil. Then, draw a curved line above each eye to represent the eyebrows. To make the eyes pop, add a few short, curved lines above the eyelids to represent the fur. Finally, add some short, curved lines on either side of the nose to show the dachshund’s whiskers.
Step 6: Fur Details and Texture
To make our dachshund drawing more realistic, we need to add some texture to its fur. Using short, curved lines, draw the fur along the dachshund’s body, concentrating on the areas where the fur would naturally be longer or fluffier. Pay attention to the direction of the lines and follow the contours of the body to create a sense of volume.
Step 7: Refine and Add Final Details
Now that we have the basic structure and fur texture in place, it’s time to refine our drawing and add some final details. Use an eraser to lighten any unnecessary pencil marks and make the lines cleaner. Add more definition to the eyes by darkening the area around the pupils and adding highlights. You can also use a fine-tip pen to outline the main shapes and add any necessary details, such as wrinkles on the face or tufts of fur.
Congratulations! You have successfully drawn a dachshund. With practice, you can experiment with different poses, expressions, and even color your drawing to make it truly stand out.
Conclusion
Drawing a dachshund may seem challenging at first, but by breaking it down into easy-to-follow steps, you can create a charming and accurate representation of this lovable breed. Remember to be patient with your progress and enjoy the journey of improving your artistic skills. So grab your drawing materials and give it a try! Happy drawing! If you love dogs, try our tutorials on some other breeds, like the german shepherd or goldendoodle.