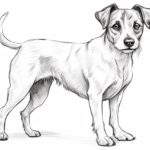
Welcome to this step-by-step guide on how to draw a Silky Terrier! Whether you’re a seasoned artist looking to expand your skills or a beginner who wants to learn how to draw dogs, this tutorial is perfect for you. With clear and concise instructions, you’ll be able to create a beautiful portrait of this adorable breed. So grab your art supplies and let’s get started!
Materials Required
Before we begin, let’s gather the materials you’ll need:
- Drawing paper
- Pencils (HB, 2B, and 4B)
- Eraser
- Blending stump or cotton swabs
- Reference photo of a Silky Terrier (optional)
- Colored pencils or markers (optional, for adding color)
Now that we have everything ready, let’s begin the drawing process!
Step 1: Basic Shapes and Proportions
To ensure accuracy in your drawing, start by sketching the basic shapes and proportions of the Silky Terrier. Begin with a lightly drawn circle for the head, followed by an oval shape for the body. Add two slightly curved lines for the neck and a straight line down the center for the spine. Finally, sketch in circles for the shoulders and hindquarters.
Step 2: Facial Features
Now, let’s focus on the facial features of the Silky Terrier. Start by drawing two almond-shaped eyes within the head circle, leaving a small space between them. Add a small triangle-shaped nose just below the eyes, and a curved line for the mouth slightly below the nose. Don’t forget to indicate the ears by drawing two triangular shapes on the sides of the head.
Step 3: Fur and Details
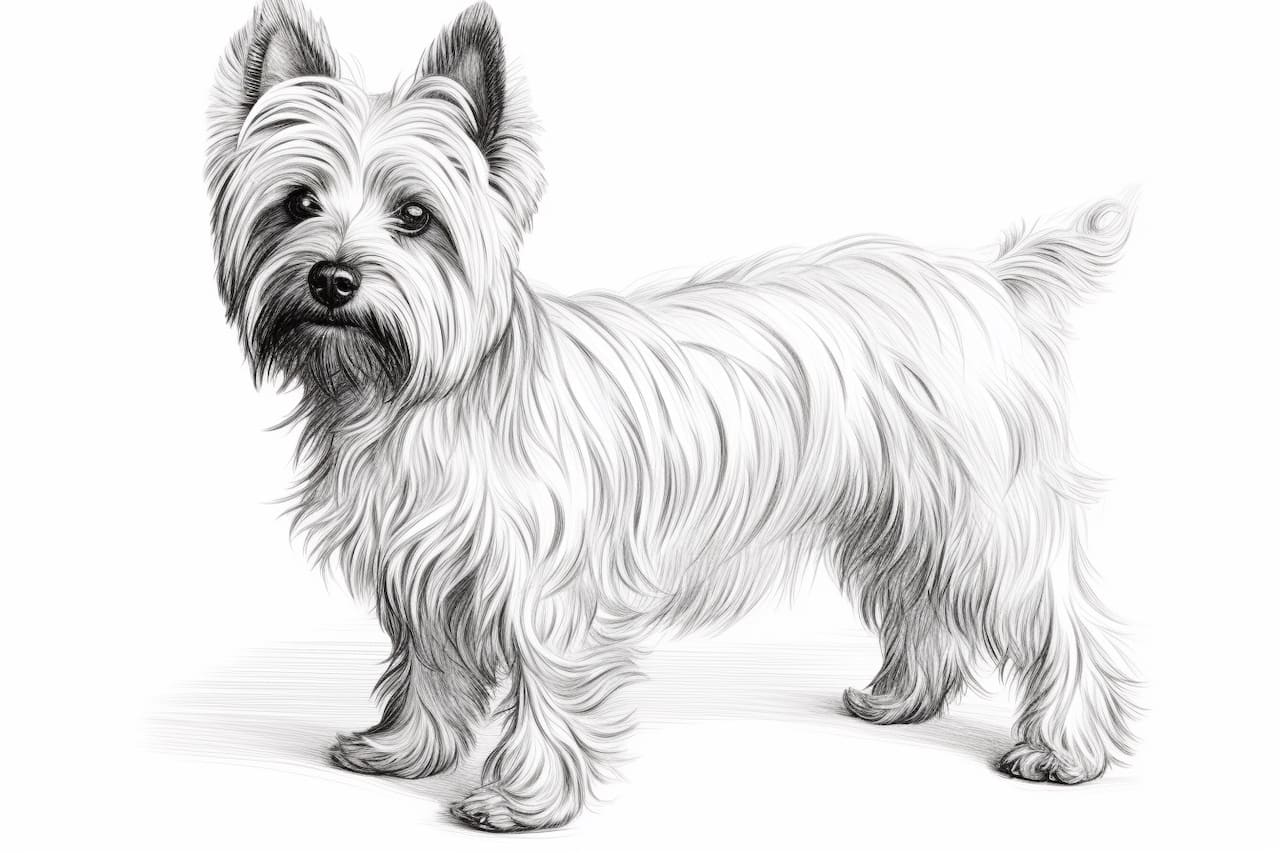
Silky Terriers have long and silky fur, which is an important characteristic to capture in your drawing. Use short, curved lines to outline the texture of the fur around the face and ears. Take your time to create soft and flowing lines, as these will give your drawing a realistic appearance. Pay attention to the direction of the fur and add some longer strands to enhance the texture.
Next, add some details to the face, such as the eyebrows and whiskers. Use light strokes to sketch these features, as they should blend in with the overall texture of the fur.
Step 4: Body and Legs
Now that we have captured the essence of the Silky Terrier’s face, let’s move on to the body and legs. Using the basic shapes as a guide, start sketching the outline of the body. Pay attention to the curves and proportions, making sure they match the reference photo or your vision of a Silky Terrier.
Once you have the body outlined, start adding the legs. Silky Terriers have straight and sturdy legs, so keep that in mind while drawing. Add the paws at the end of each leg, making sure they are small and delicate.
Step 5: Tail and Final Details
Silky Terriers have a long and plumed tail, which is an important feature to include in your drawing. Extend a curved line from the hindquarters, and add small curved lines along its length to represent the fur. Make sure the tail flows naturally and doesn’t appear stiff.
Now that the basic structure of the Silky Terrier is complete, add any final details such as small whiskers, shading around the eyes, and a collar if desired. Take your time to evaluate your drawing and make any necessary adjustments to ensure accuracy and likeness.
Conclusion
Congratulations, you’ve successfully learned how to draw a Silky Terrier! By following these step-by-step instructions, you were able to create a realistic and detailed representation of this adorable breed. Remember, practice is key, so don’t be discouraged if your first attempt doesn’t turn out exactly as you imagined. With time and dedication, your drawing skills will continue to improve.
So keep practicing and have fun exploring the world of art. Drawing dogs can be a rewarding experience, and with each new drawing, you’ll refine your techniques and develop your own unique style. Enjoy the process, and don’t forget to share your beautiful Silky Terrier drawings with others!