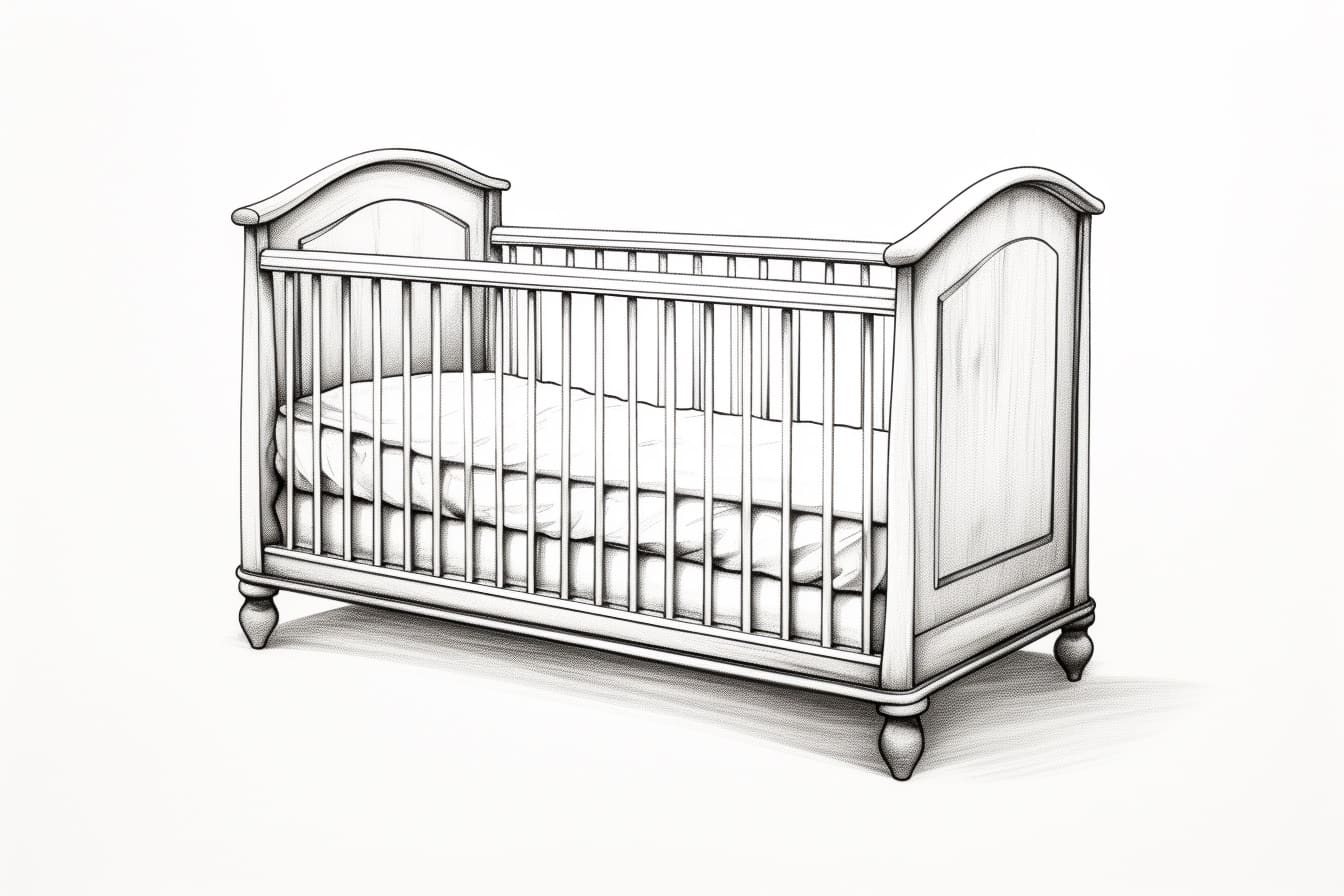
Welcome to this step-by-step guide on how to draw a crib! Whether you’re an aspiring artist or simply looking to create a cute illustration for a baby-themed project, this tutorial will provide you with all the necessary instructions to draw a realistic and adorable crib. So, grab your drawing materials and let’s get started!
Materials Required
Before diving into the drawing process, make sure you have the following materials handy:
- Pencil: A medium-soft graphite pencil, such as a 2B or 4B, will work well for sketching and shading.
- Eraser: A kneaded eraser is recommended as it allows for precise adjustments without damaging the paper.
- Paper: Choose a smooth, heavyweight paper that is suitable for drawing. A standard sketchbook or drawing pad will suffice.
- Ruler: Having a ruler will help you maintain straight and accurate lines, particularly when drawing the crib’s bars and frame.
- Optional: Colored pencils or markers if you wish to add some color to your drawing.
Now that you have your materials ready, let’s begin!
Step 1: Draw the Framework
Start by lightly sketching a rectangle in the middle of your paper. This will serve as the overall shape of the crib. Use your ruler to ensure that the lines are straight and evenly spaced. Don’t worry about getting it perfect on the first try, as we will be adjusting and refining the shape later.
Step 2: Add the Bars
Next, draw vertical lines within the rectangle to represent the crib’s bars. These bars should be evenly spaced and extend from the top to the bottom of the framework. Again, use your ruler to maintain consistency.
Step 3: Refine the Shape
Using gentle curves, refine the top and bottom edges of the crib’s framework to give it a more rounded appearance. Pay attention to the corners as well, ensuring that they are not too sharp or angular. Take your time with this step, as the overall shape will greatly influence the realism of your drawing.
Step 4: Detail the Bars
Give the crib’s bars some depth by adding thickness to each one. To do this, draw another set of parallel lines inside the original ones, gradually tapering them towards the top. This will create the illusion of perspective and make the bars look more three-dimensional.
Step 5: Draw the Mattress
Inside the crib, draw a rectangular shape to represent the mattress. It should be slightly smaller than the framework and positioned towards the bottom. Add some lines across the mattress to indicate texture or folds, giving it a more realistic look.
Step 6: Include the Legs
To complete the basic structure of the crib, draw four legs at each corner. These can be simple rectangular shapes or slightly tapered to add a touch of elegance. Make sure the legs are evenly spaced and proportionate to the rest of the drawing.
Step 7: Add Details and Enhancements
Now that you have the main structure of the crib, it’s time to add some finer details and enhancements. Consider adding decorative finials at the top of each post, intricate patterns on the framework, or even a mobile hanging above the crib. This is where you can let your creativity shine and personalize your drawing.
Step 8: Refine and Erase
Take a moment to study your drawing and make any necessary adjustments. Look for areas that may need refining, such as uneven lines or misshapen elements. Use your eraser to gently remove any unwanted pencil marks, focusing on creating clean and concise lines.
Step 9: Optional: Add Color
If you wish to add color to your drawing, now is the time to do so. Use colored pencils or markers to bring your crib to life. Consider using soft pastel shades or vibrant colors, depending on the mood or theme you want to convey.
Conclusion
Congratulations! You have successfully drawn a crib from start to finish. By following these step-by-step instructions, you have learned how to create a realistic and charming illustration. Remember to practice and experiment with your technique, as drawing is a skill that improves with time and dedication.
Drawing a crib can be a fun and rewarding experience, especially when you see the final result. So, grab your drawing materials and give it a try! Happy drawing!