Valentine’s Day is the perfect occasion to show your loved ones how much you care. And what better way to express your affection than by drawing a delightful Valentine cupcake? Whether you’re an experienced artist or new to drawing, this step-by-step guide will help you create a cute and mouthwatering cupcake that is sure to make hearts flutter. So, grab your pencils, and let’s get started!
Materials Required
To begin your artistic journey and draw a beautiful Valentine cupcake, gather the following materials:
- Drawing paper or sketchbook
- Pencils (HB, 2B, and 4B)
- Eraser
- Fine-tip black pen or marker (optional)
- Colored pencils or markers in shades of pink, red, and brown
- Ruler (optional, for precise measurements)
- Reference image of a cupcake (for inspiration)
With these materials ready, you’re all set to create a delicious artwork full of love and sweetness!
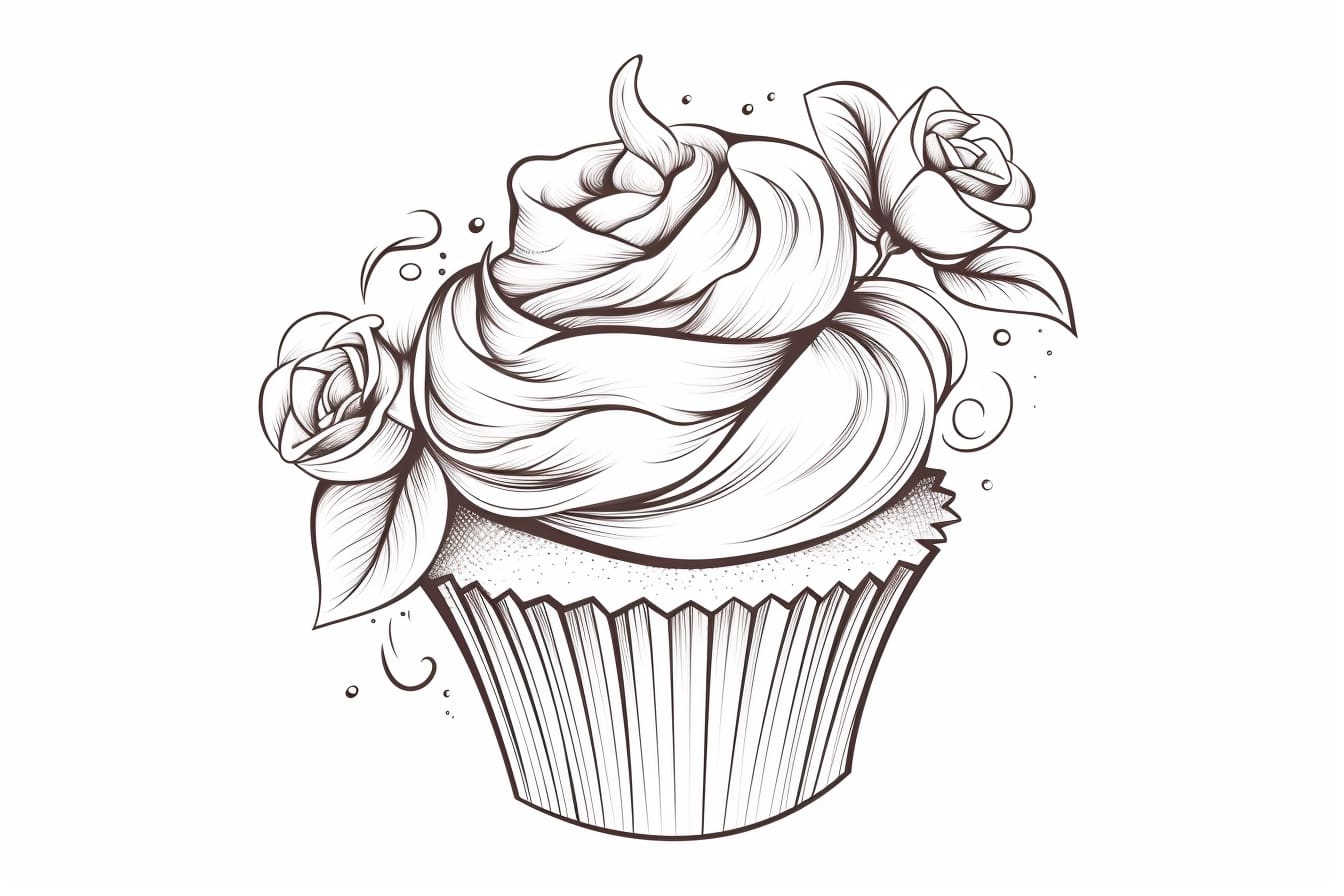
Step 1: Sketch the Cupcake Base
Using an HB pencil, lightly sketch the outline of the cupcake base. Start by drawing a curved shape like an upside-down U. This will be the top part of the cupcake. Then, draw a larger curved shape below it, resembling a smile. This will be the bottom part of the cupcake. Keep the lines soft and gentle, as this is just the initial sketch.
Step 2: Add the Cupcake Wrapper
Draw the wrapper of the cupcake by adding a wavy line at the bottom of the cupcake base. The line should follow the shape of the smile you drew in the previous step. Make the waves gentle and irregular to give it a realistic feel. You can use a ruler if you want to achieve more precise lines.
Step 3: Sketch the Frosting
Now, it’s time to add the delicious frosting on top of the cupcake. Draw a slightly curved line at the top of the cupcake base, following the shape of the upside-down U. Make it wavy and irregular to give it a fluffy appearance. This will be the top of the frosting. Then, draw another curved line below it, following the smile shape of the cupcake base. This will be the bottom of the frosting.
Step 4: Decorate the Frosting
Get creative and add some decoration to your cupcake frosting. Draw small, curved lines within the frosting, resembling swirls or ridges. Make them irregular and varied in size to add texture and visual interest. You can also draw small heart shapes or sprinkles on top of the frosting. Let your imagination guide you in this step.
Step 5: Outline the Cupcake
Once you’re satisfied with the cupcake’s shape and decoration, use a darker pencil (2B or 4B) to outline the entire cupcake. Start by tracing the cupcake base, followed by the cupcake wrapper and the frosting. Be careful not to press too hard with the pencil, as you can adjust the lines later.
Step 6: Refine the Cupcake Shape
Now, it’s time to refine the cupcake’s shape and make it more defined. Erase any unnecessary pencil lines, such as the initial sketch lines you made in the first steps. Pay attention to the curves and edges of the cupcake, making them smooth and appealing. Adjust any areas that need more definition or correction.
Step 7: Add Shadows and Highlights
To make your cupcake appear more three-dimensional, add shadows and highlights. Imagine a light source coming from one direction, and shade the opposite side of the cupcake accordingly. Use a darker pencil (4B or 6B) to lightly shade the areas where shadows fall, such as the bottom part of the cupcake base and the area between the frosting and the cupcake wrapper. Then, use an eraser to create highlights, especially on the top of the frosting and any other areas that catch the light.
Step 8: Color Your Cupcake
It’s time to bring your cupcake to life with colors! Use colored pencils or markers in shades of pink, red, and brown to add color to your artwork. Start by coloring the cupcake base and wrapper, using light and soft strokes to create a realistic texture. Then, color the frosting, allowing your creativity to shine through. Blend different shades to add depth and dimension to your cupcake. Don’t forget to color any decorations you added, such as the heart shapes or sprinkles.
Step 9: Fine-Tune and Add Details
Take a step back and observe your artwork. Make any necessary refinements and add additional details. You can use a fine-tip black pen or marker to outline certain areas or add emphasis to specific elements of the cupcake. This step is optional but can give your artwork a polished and finished look.
Step 10: Sign and Share Your Artwork
Congratulations! You’ve successfully drawn a Valentine cupcake. Before you sign your artwork, take a moment to appreciate your creativity and the effort you put into it. Add your signature or initials to the artwork, giving it a personal touch. Now, share your masterpiece with your loved ones, either by displaying it proudly or gifting it to someone special.
Conclusion
Drawing a Valentine cupcake is a delightful way to celebrate the season of love. By following this step-by-step guide, you’ve learned how to create a beautiful and mouthwatering artwork that is sure to make hearts skip a beat. So grab your art supplies and let your imagination run wild as you create sweet and heartfelt cupcake designs. Happy drawing!