Drawing a typewriter can be a fun and rewarding artistic endeavor. It allows you to capture the beauty and nostalgia of a bygone era. In this step-by-step guide, we will walk you through the process of drawing a typewriter, from the basic shapes to the intricate details. So grab your pencil and paper, and let’s get started!
Materials Required
Before we begin, make sure you have the following materials:
- Pencil
- Eraser
- Paper
- Ruler
- Black ink pen (optional)
- Colored pencils or markers (optional)
Now that you have your materials ready, let’s dive into the process of creating a stunning typewriter drawing.
Step 1: Draw the Main Shapes
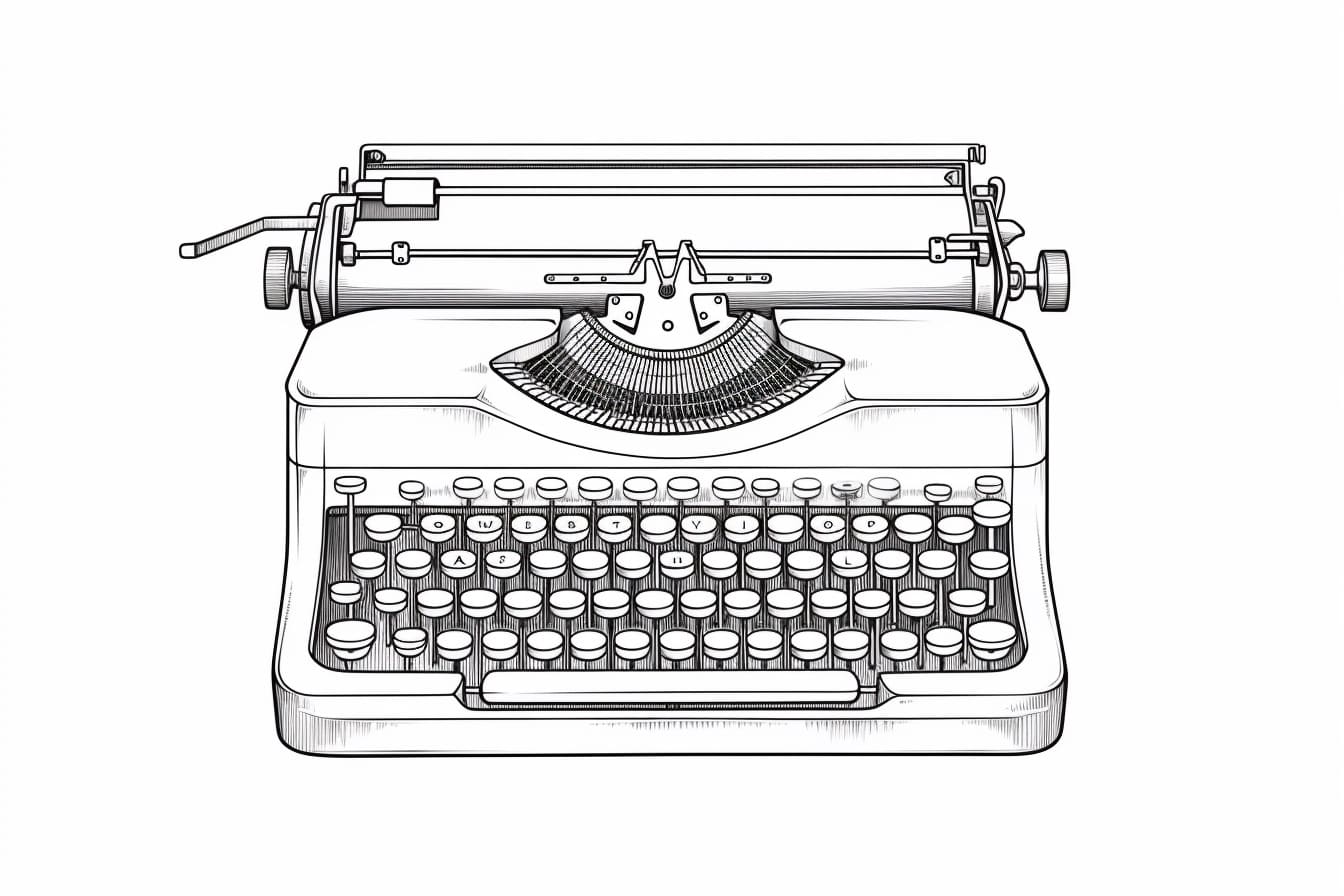
Start by drawing the basic shapes that make up the typewriter. Begin with a rectangular shape for the body of the typewriter. This will serve as the foundation for the rest of the drawing. Next, add a smaller rectangle for the keyboard area, slightly protruding from the body of the typewriter. Finally, draw a long, thin rectangle on top of the keyboard area for the paper holder.
Step 2: Add Details to the Body
Now that you have the main shapes in place, it’s time to start adding some details. Begin by drawing the carriage return lever, which is located on the left side of the typewriter. It typically has a curved shape with a small handle at the end. Next, draw the platen knob, which is located on the right side of the typewriter. This knob is used to advance the paper.
Step 3: Draw the Keyboard
Moving on to the keyboard area, start by dividing it into individual keys. Typically, typewriters have three rows of keys, with the letters arranged alphabetically. Use straight lines to create the rows and draw small rectangles for each key. Make sure to leave some space between the keys to add depth.
Step 4: Add the Paper Holder
Next, let’s add some details to the paper holder. Begin by drawing a small rectangle at the end of the holder. This represents the paper being held in place. Then, draw a few lines on the holder to create a textured effect, mimicking the ridges found on actual typewriters. These lines should run horizontally across the holder.
Step 5: Refine the Body and Details
With the main components in place, it’s time to refine the body and details of the typewriter. Start by adding curved lines to the body to give it a three-dimensional appearance. This will create the illusion of depth. Next, go over the details you have already drawn, making them more defined and polished. Use your pencil or an ink pen for this step, depending on the level of detail you want to achieve.
Step 6: Add Shadows and Highlights
To bring your typewriter drawing to life, it’s important to add shadows and highlights. Begin by identifying the light source in your drawing. This will determine where the shadows and highlights should be placed. Use hatching or cross-hatching techniques to create shading on the body of the typewriter, giving it a more realistic look. Add highlights by leaving some areas blank or lightly shading them to create contrast.
Step 7: Color Your Drawing (Optional)
If you want to take your typewriter drawing to the next level, consider adding color. Use colored pencils or markers to add a pop of vibrancy to your artwork. You can choose to color the entire drawing or focus on specific areas, such as the keys or the body of the typewriter. Be creative and experiment with different color combinations to make your drawing truly unique.
Conclusion
Drawing a typewriter can be a delightful and nostalgic experience. By following these step-by-step instructions, you can create a beautiful and detailed typewriter drawing that captures the essence of this iconic machine. Remember to be patient, practice, and have fun with your artwork. So grab your pencil and start drawing your own vintage typewriter masterpiece today!