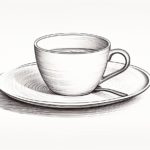
Are you looking to improve your drawing skills and create realistic still-life compositions? One significant subject to start with is a coffee cup. In this step-by-step guide, I will walk you through the process of how to draw a coffee cup, from basic shapes to adding details and shading. By the end of this tutorial, you can confidently draw a coffee cup that looks three-dimensional and lifelike. So, let’s grab our drawing materials and get started!
Materials Required
To draw a coffee cup, you will need the following materials:
- Drawing paper
- Pencil (preferably an HB or 2B)
- Eraser
- Ruler
- Compass (optional)
- Drawing pencils (optional)
- Blending stump or cotton swabs (optional)
Step 1: Draw the Outline of the Cup
Start by drawing a horizontal line across your paper to establish the table or surface on which the coffee cup will be placed. This line will act as a reference point for the base of the cup. Next, draw an oval shape just above the line to represent the top opening of the cup. Make sure the oval is narrower towards the bottom, mimicking the shape of a real cup.
Step 2: Add the Body of the Cup
Connect the oval shape to the horizontal line by drawing two straight lines that curve slightly outward. These lines will form the sides of the cup. Then, draw a curved line at the bottom of the oval shape to create the base of the cup. Ensure that the base is wider than the top opening.
Step 3: Sketch the Handle
Position the handle of the coffee cup on one side of the body. To do this, draw a curved line that connects the top and bottom of the cup’s body. Then, add a smaller curved line inside the cup, mirroring the shape of the outer line. Finally, connect the top and bottom of the handle with small curved lines.
Step 4: Refine the Shape and Proportions
Take a step back and assess the overall shape and proportions of your coffee cup drawing. Make any necessary adjustments to ensure that it closely resembles the reference or real-life object. Pay attention to the curves, angles, and sizes of different parts of the cup.
Step 5: Add Details
Once you are satisfied with the basic structure of the cup, it’s time to add some details. Begin by drawing a small ellipse at the top of the cup to represent the coffee inside. Then, add a curved line near the bottom of the cup to indicate the table or surface it is resting on. You can also add some decorative elements like patterns or logos if you wish.
Step 6: Start Shading
To make your coffee cup drawing appear three-dimensional, it’s important to add shading. Begin by identifying the direction of the light source. Once you determine this, shade the areas of the cup that would be in shadow. Use a combination of light and dark pencil strokes to create depth and texture. Pay attention to the reflections and highlights on the cup’s surface as well.
Step 7: Refine the Shading
Continue refining the shading by adding more layers and textures. Use varying pressure with your pencil to create a smooth gradient from light to dark areas. Pay close attention to the transitions between light and shadow, making them appear seamless. Use an eraser when needed to lift off some graphite and create highlights.
Step 8: Add Final Details
In this step, focus on the smaller details that will bring your coffee cup drawing to life. Add any additional lines, textures, or patterns that you see on the reference or real-life object. Pay attention to the rim of the cup, the handle, and any other elements that help create a realistic representation.
Conclusion
Congratulations! You have successfully learned how to draw a coffee cup from start to finish. Through careful observation and attention to detail, you can create a beautifully rendered drawing that captures the essence of this everyday object. Remember to practice regularly and experiment with different shading techniques to further enhance your skills. So, grab your drawing materials and start creating your very own coffee cup masterpiece!

